Every time I see a photographer using an old film camera it makes me smile. It doesn’t happen often – seeing a film camera that is, not smiling – but it does make me wonder about their reasons. The love of the art of photography perhaps, or maybe they’re after some ‘feel’ to the image without reverting to Photoshop? Perhaps one day I should stop and ask. Film cameras are, of course, extremely limited when compared to the capabilities of today’s DSLRs in virtually every respect. Except one: they don’t need to be constantly fed power.
Of course, depending upon the style of photography you pursue power may not be an issue. A healthy DSLR battery in normal conditions can usually cope with 700-1000 shutter operations and as long as you don’t make heavy use of live view, picture review or image stabilisation then a single battery may easily cope with a day’s shooting. Carry a spare or two and charge them back in the hotel room overnight and power will not be on your shoot’s “risk register”. But what if you don’t have a room to go back to – have no mains power at all? What if you do need to shoot video, use live view and stabilisation? What if you are not shooting in ‘normal’ conditions? How do you keep a ready supply of power then?
Power on location has become a bit of a crusade for me and I have written about it before when first looking at the Voltaic Systems’ Solar Charger and in my detailed Voltaic Systems’ 17W Solar Charger Field Review. But as I prepare for two upcoming trips – the uninhabited island of Batu Tara, Indonesia and central Siberia – I’ve been spending more time researching my holy grail – a reliable, capable, easily transportable power source. And I have learnt some interesting facts which may be worth sharing as they help demystify the confusing world choosing a battery pack.
Whilst this article does have a slight photographic angle it is equally applicable to choosing a battery pack for any purpose.
Identify Your Needs
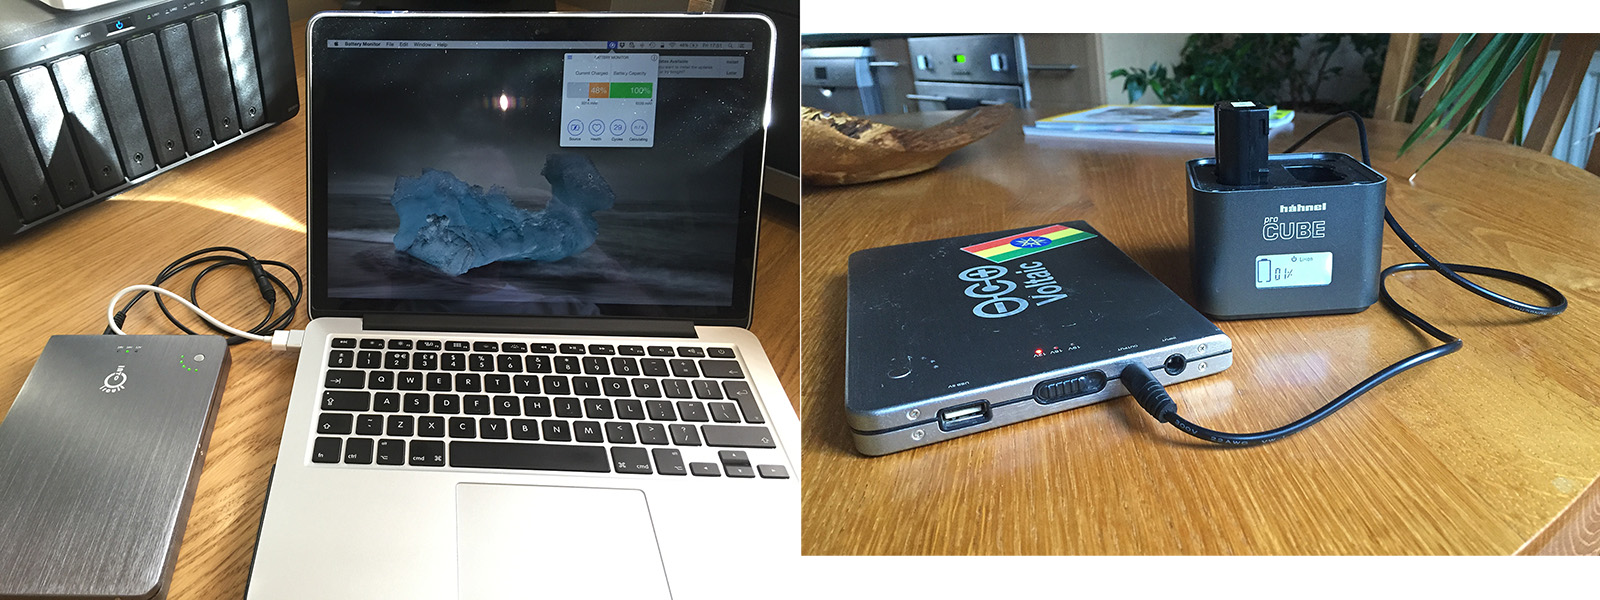
My two primary use cases for power on location; charging the laptop and charging my camera batteries.
Perhaps obvious but worth mentioning is that what you want to keep powered on location will dictate the kind of solution you will need. Before travelling to Ethiopia I knew that I wanted to be able to charge not only my DSLR batteries but also my travel laptop and so the solution that I needed had to have the ability to provide 12V for the DSLR and 16V for the laptop. But once on location other requirements were discovered; my smart phone (for quick videos) and someone’s drone batteries, meaning that the more standard 5V USB port was needed. Given that most battery packs are USB only I could eliminate a lot of options very quickly.
If you have ever looked at battery packs on Amazon or similar web sites you’ll notice that they are almost always rated by their “mAh” or milliampre-hour value and it is human nature to assume that the bigger the mAh, the more you can charge with the battery pack. And if you are only looking at charging USB devices then you would be right. Well, that 26000mAh battery pack still won’t really be 26000mAH, but at least it will still be more than the 20000mAh one – which will also not really be 20000mAh. But, if you are looking at charging more than USB devices, for example camera batteries and laptops, mAh suddenly becomes far less useful and even downright misleading.
The Science Bit: The Watering Can
In simple terms any battery has three aspects that are relevant to us: the output voltage it can supply (measured in volts), the electrical current (measured in amps) and total power capacity (measured in watts). Like the relationship between ISO, stutter and aperture, volts, amps and watts are linked such that a change in one has to be reflected by a change in (at least) one of the other two. The equation that links watts, volts and current is very simple:
Watts (W) = Current (I) * Volts (V)
Equations tend to put people off, as does talking about current, volts and watts so a typical analogy may help: a garden watering can.
Every watering can has a capacity – it may be large or small but it can only hold a finite amount of water. In the same fashion a battery pack has a finite capacity for storing electricity. The capacity of a watering can is usually measured in litres (or pints); the capacity of a battery pack is measured in watts (W), or more specifically watt-hours (Wh).
The flow rate at which the water leaves the watering can’s spout represents electrical current. If you were to fill a cup from the watering can, it would take a long time if the water only dripped out but be very quick if the water gushed out. In the same way, electrical circuits require an amount of power to be supplied to them; just how much is their flow rate and delicate electronics usually require very low flow rates. The battery pack’s flow rate is termed its “current” and is measured in ampres per hour (Ah), or thousandths of an ampre per hour – mAh.
Voltage is a like the force or pressure of the flowing water. Imagine water pouring out of the watering can’s spout onto the earth. If the spout is simply the open end of a tube then the water is concentrated in one spot and it hits the earth with some force likely pushing the earth aside making a small hole. If you attach a sprinkler head to the water spout the water is spread over a larger area and it hits the earth with less force. In the same way a lot of water in one spot can make a dent in the ground, too much voltage can damage electrical circuits.
Ultimately what is important to us is the capacity of the battery pack as this directly determines just how much stored power we have for charging our camera batteries, phones, drones and laptops. And, as mentioned, stored power is measured in watt-hours. So when choosing a battery pack the value we are really interested in is not amps or millamps, but watts.
Now I promise this is the last of the watering can analogy. A full can could be emptied in one go or gently poured out – in other words how long the stored water lasts depends upon how quickly you use it. Power stored in battery packs is usually given in watt hours (Wh) meaning a 72Wh battery can provide 72 watts for one hour, 144 watts for 30 minutes or 1 watt for 72 hours. So how long it lasts depends upon how much power the connected device is using and that is a function of the voltage the device requires and the current it is drawing.
In the same way that watts can be expressed as watts per hour, amps can be expressed as amps per hours. So 10000mAh means that over a one-hour period 10 amps will flow; equivalent to five amps per hour for two hours and so on. But there is one crucial difference between watt-hours and ampre-hours: ampre-hours only measure the flow of power, not how much power has flowed. Knowing the mAh rating is all well and good but it does not tell us the actual capacity of the battery.
So, why then, when shopping for battery packs do manufacturers almost always rate their products in amps?
Lies, Damned Lies and Advertising
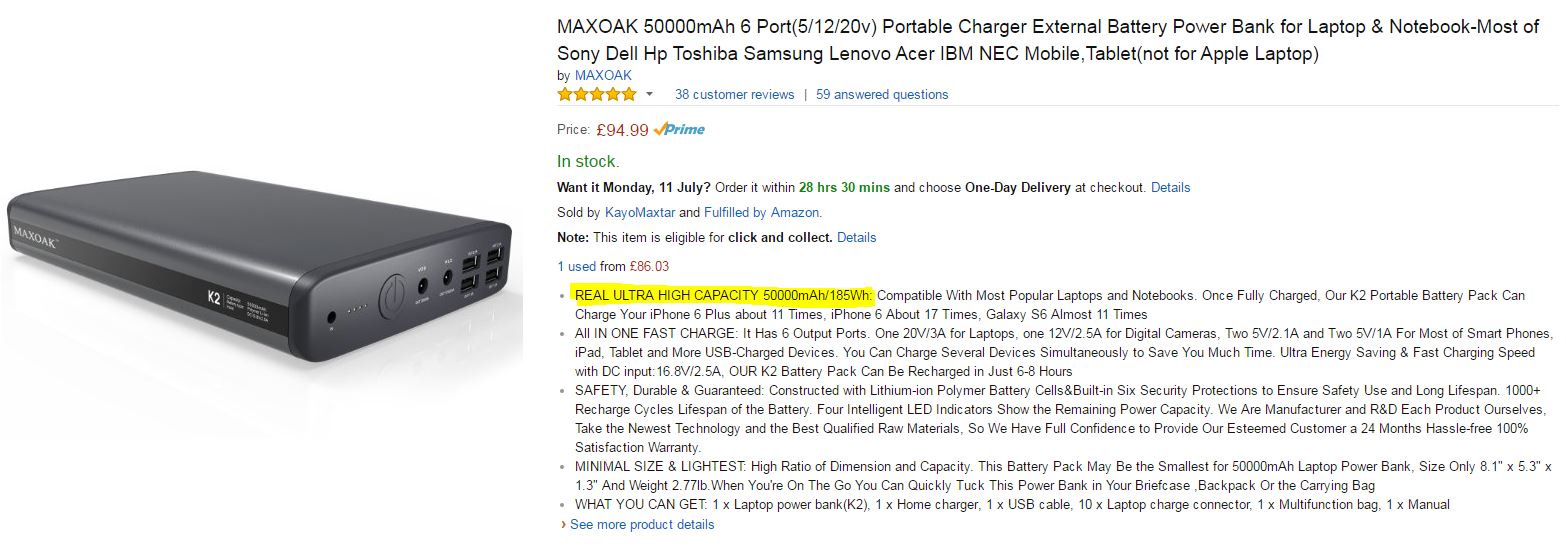
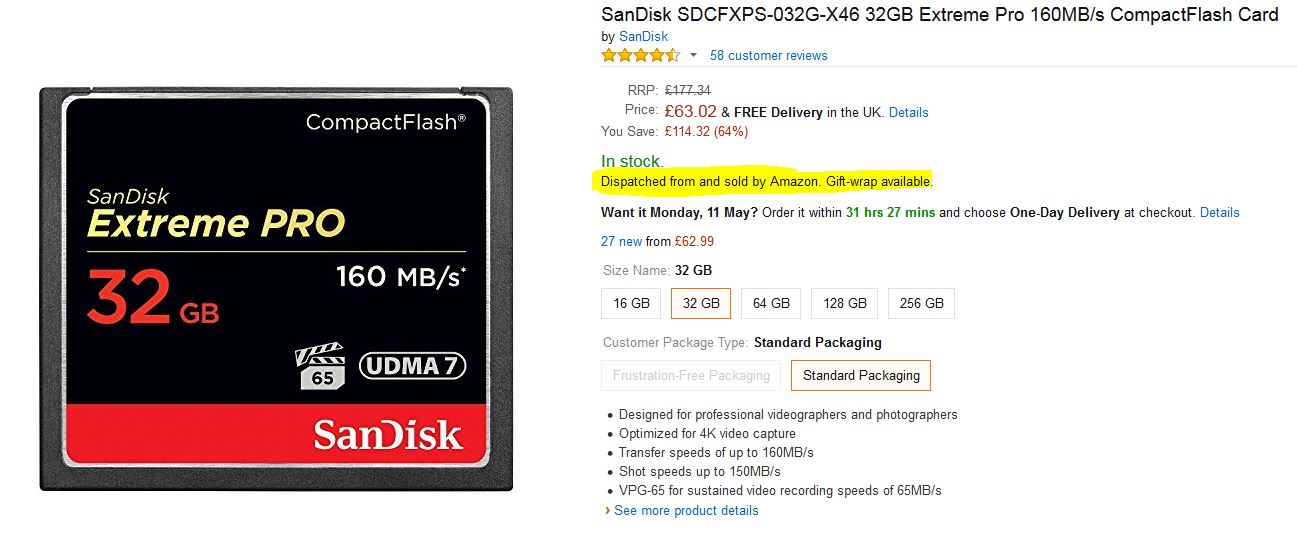
The best way to demonstrate why using the mAh can be misleading is by an example. I have picked the Maxoak battery pack below only because it is in my Amazon shopping basket and it actually – if perhaps inadvertently – attempts to be somewhat honest about the battery’s true capacity.
Some battery pack manufacturers provide the watt-hour capacity of their product which is much more useful than the mAh value.
The obvious selling point of this battery pack is its 50,000mAh rating. If you were looking for a high capacity pack, this would be very hard to ignore. My Macbook Retina Pro 13” laptop has a rating of 6559mAh so in theory I can charge it about eight times from this battery pack. The maths is simple but do you really believe the result?
From the equation above we know that the actual capacity of a battery is the current – here 50 amps – multiplied by the voltage. The problem is this battery pack lists three voltages, so which one do we use?
Unlike many advertisers Maxoak actually provide the watt-hours capacity, here highlighted in yellow, but now things get a bit more interesting. It states a watt-hour capacity of 185Wh; if you put these values into the equation we get:
185Wh = 50000mAh * 3.7V
So, where did 3.7V come from? The advertised voltages are 5V, 12V and 20V. Something does not add up.
Single Cell Equivalency: A Universal Standard
As I am no expert on battery technology I will defer to Wikipedia:
A “cell” is a basic electrochemical unit that contains the basic components, such as electrodes, separator, and electrolyte. In the case of lithium-ion cells, this is the single cylindrical, prismatic or pouch unit, that provides an average potential difference at its terminals of 3.7 V for LiCoO and 3.3 V for LiFePO. A “battery” or “battery pack” is a collection of cells or cell assemblies which are ready for use, as it contains an appropriate housing, electrical interconnections, and possibly electronics to control and protect the cells from failure. In this regard, the simplest “battery” is a single cell with perhaps a small electronic circuit for protection.
So it appears that the Maxoak battery pack is using the voltage rating of a single cell, not of the voltage output by the battery. If it were possible to task the Maxoak battery pack with providing 3.7V to a device then it could (theoretically) provide 50 amps for one hour, or a more realistic 0.5 amps for 100 hours. The problem is of course that you can’t attach a 3.7V device; it provides 5V, 12V or 20V. Given that the capacity of the battery at 185Wh is fixed then using the rated voltages (and ignoring internal losses due to voltage conversion) we get:
185Wh = 37000mAh * 5V
185Wh = 15417mAh * 12V
185Wh = 9250mAh * 20V
Which is a big difference. Suddenly the mAh figure used by so many battery pack manufacturers is a little less meaningful as it depends upon the voltage requirement of the device being powered. What the manufacturer is doing is stating the theoretical current output of their battery pack as if it were a single cell. This is called Single Cell Equivalency, or simply SCE, and is very common.
Unless a manufacturer of a battery pack states otherwise then it is probably wise to assume that the mAh value they proudly claim for their product is based upon supplying a 3.7V load – the SCE. And, given that the vast majority of battery packs aim to provide a 5V USB for phones, tablets and, well, anything else USB, then you can see that the advertised mAh value is already a little meaningless as that 20000mAh (at 3.7V) battery pack is now only 14800mAh (20Ah * 3.7V = 74Wh / 5V = 14.8Ah).
Knowing about the SCE is really quite useful as it allows you to get a better idea as to the true capacity – the watt-hours – of a given battery pack.
Real World Examples
Above I mentioned that, even for USB-only battery packs, the advertised mAh is probably not what you will end up getting. This is simply as the USB port provides a 5V supply and the mAh rating is likely based on the SCE voltage of 3.7V. If we assume that there are no losses from the process of voltage conversion then we get:
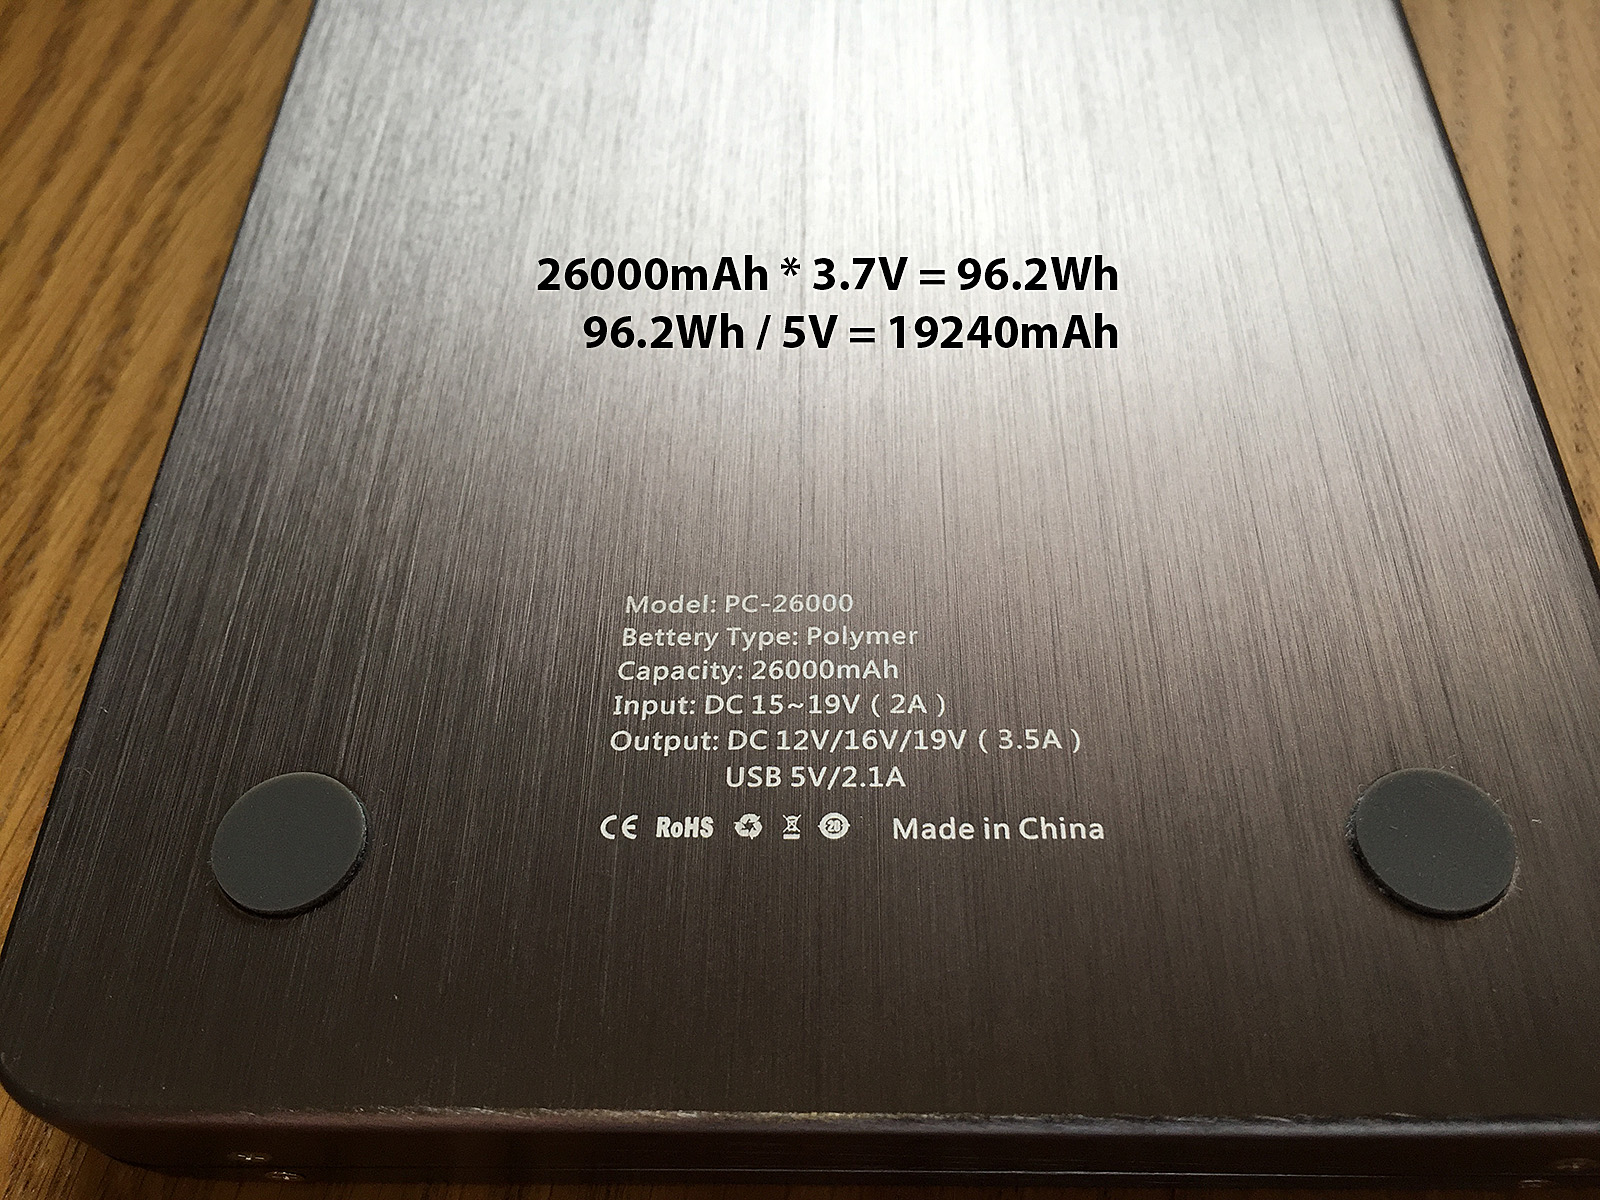
The Intocircuit battery pack specifies a ‘capacity’ of 26000mAh, but this isn’t really what you get. It is not a lie, but, like most other manufacturers, they are using an industry standard that you won’t be.
Our 26000mAH pack is now only 19240mAh. But there will be energy losses due to conversion. Depending upon the internal design of the battery pack its native voltage will be a multiple of 3.7V and the process of turning the native voltage into USB’s 5V requires some kind of circuitry such as a boost convertor. This type of conversion is inefficient and whilst I have no concrete evidence I have seen a figure used in a couple of articles: 30%. If we use this figure then we get a 5V USB mAh of 13468mAH, enough to charge an iPhone 6 (SCE 1810mAh) about seven times.
Going back to my Macbook and its 6559mAh capacity we now know that we really need is the watt-hours capacity of its battery which, according to Apple’s web site is 74.9Wh.

Apple are helpful in that they specify the watt-hour (Wh) of their devices.
The Maxoak could therefore theoretically charge the MacBook twice with a bit left over, although again this is just the raw arithmetic without accounting for internal losses due to voltage conversion and other considerations. Assuming a 30% for conversion reduces this to approximately 1.7x charges for the MacBook.
More relevant to photographers is the camera battery which, in my case, is the Nikon EN-EL15. Like Apple, Nikon helpfully provide the watt-hours value on the battery casing itself:
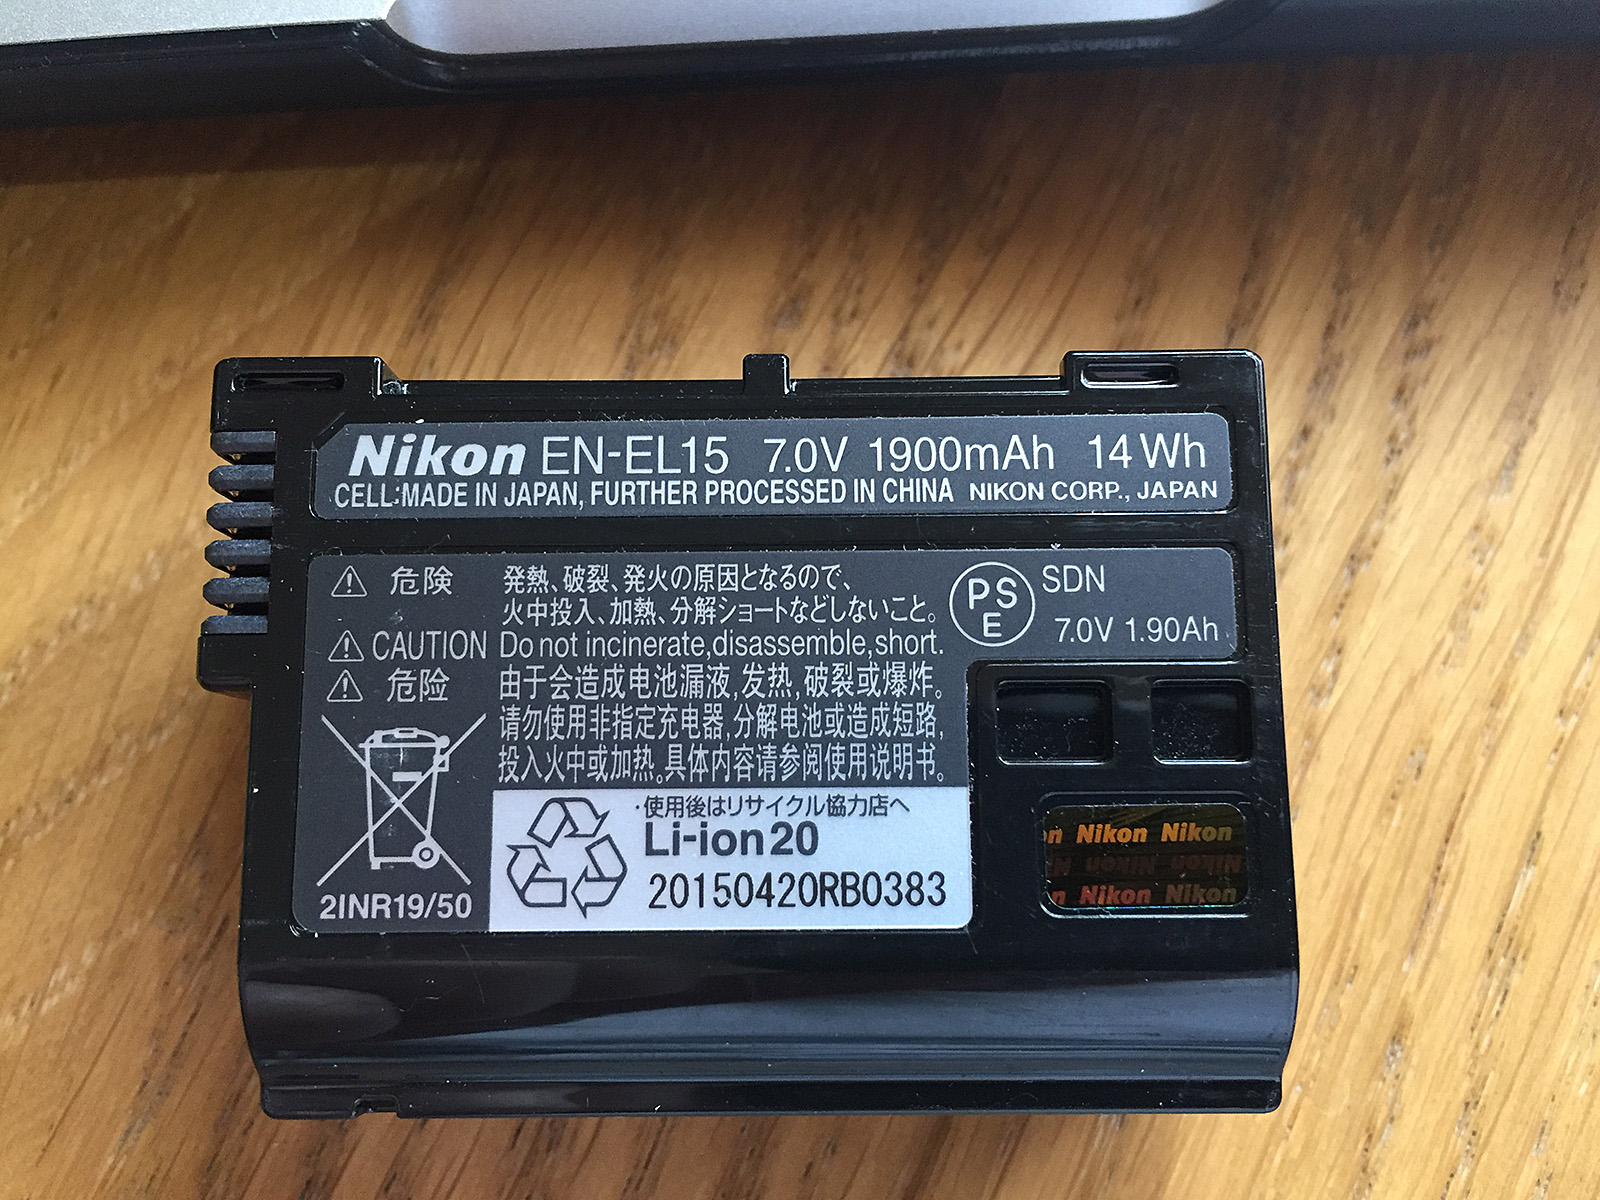
Here the Nikon EN-El15 specifies the watt-hour capacity from which we can calculate the single cell equivalency as 3780mAh.
This is a more tricky example as, whilst the Nikon battery is a 7V battery pack the Hahnel battery charger I use for it specifies a 12V input. But I was curious to find out anyway.
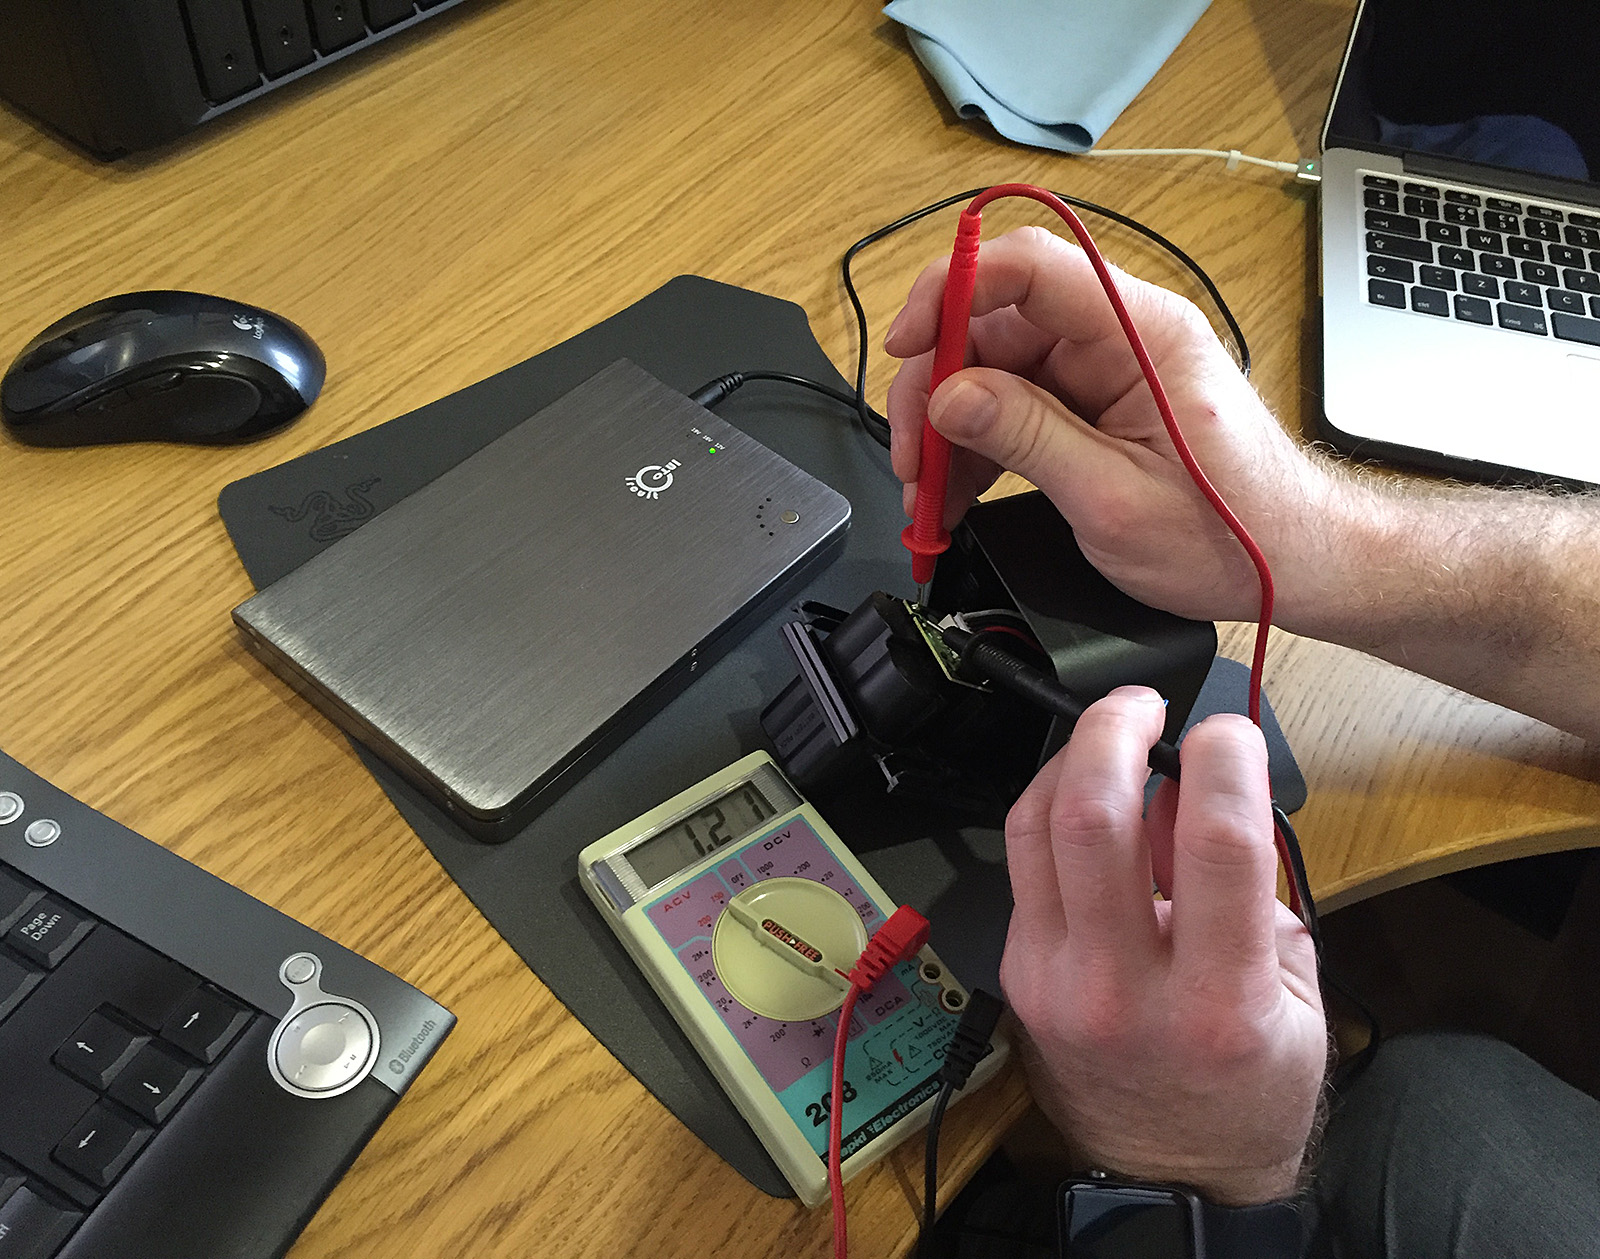
So what does the 7V Nikon EN-EL15 battery draw when charging from a 12V Hahnel charger? 8V at 1.2 amps. apparently.
When charging a single Nikon battery I measured a 8V draw at 1.2 – 1.3 amps. I would not put any emphasis on these values as “intelligent” battery chargers vary the supplied current throughout the charging process. So let’s try our basic equation:
Allow for Conversion Loss: 26000mAh * 0.7 = 18200mAH
Nikon EN-EL15 SCE: 14Wh/3.7V = 3780mAh
Theoretical Number of Charges: 18200/3780 = 4.8
If we believe the rudimentary maths my 26000mAh battery pack should charge 4.8 EN-EL15 batteries. I have so far managed just under three charges from the battery pack and there are still 2/5 LEDs lit so we might be in the right ballpark.
One final note is that all the above is assuming that the environment is not a factor. If the surrounding ambient temperature is significantly higher or lower then this will also have an effect of the number of charges as it affects the battery chemistry.
There’s Just One More Thing
Remember the 50000mAh (SCE) Maxoak battery pack above? It is attractive and despite the 50000mAh not really being what we have available it is has more capacity than a 26000mAh (SCE) battery. But there is a reason it is still in my Amazon shopping basket and not in the camera bag.
After a few incidents involving lithium batteries on aircraft the International Airline Travel Association – IATA have issued an advisory on the passenger transport of lithium batteries, both in cabin and hold luggage. The jist of the advisory is that the maximum capacity lithium battery that can be carried is 150Wh. The Maxoak is 185Wh.
Could I get away with it? Yes, probably. Do I want to risk losing the one power source I will be depending upon when on location and nowhere near mains electricity?. No.
Conclusion
A lot to consider when making what should be a simple decision:
- That battery pack rated at 26000mAh (or whatever) is, unless stated otherwise, most likely the SCE value, not what you actually will get.
- The battery pack will also have to do some internal voltage conversion which incurs power losses due to inefficiency. The loss may be about 30%.
- If you want to approximate how much you can charge with a given battery pack, you will need to know its watt-hours (Wh) rating and the single cell equivalency (SCE) of both it and the device being charged.
- Airlines tend to follow IATA’s guidelines permitting a maximum battery capacity of 150Wh, so bigger might not be better for you.


![Hundreds of images were very nearly harmed in the making of this shot... [Click to enlarge]](http://davehoggan.com/wp-content/uploads/2015/05/MG_0443.jpg)

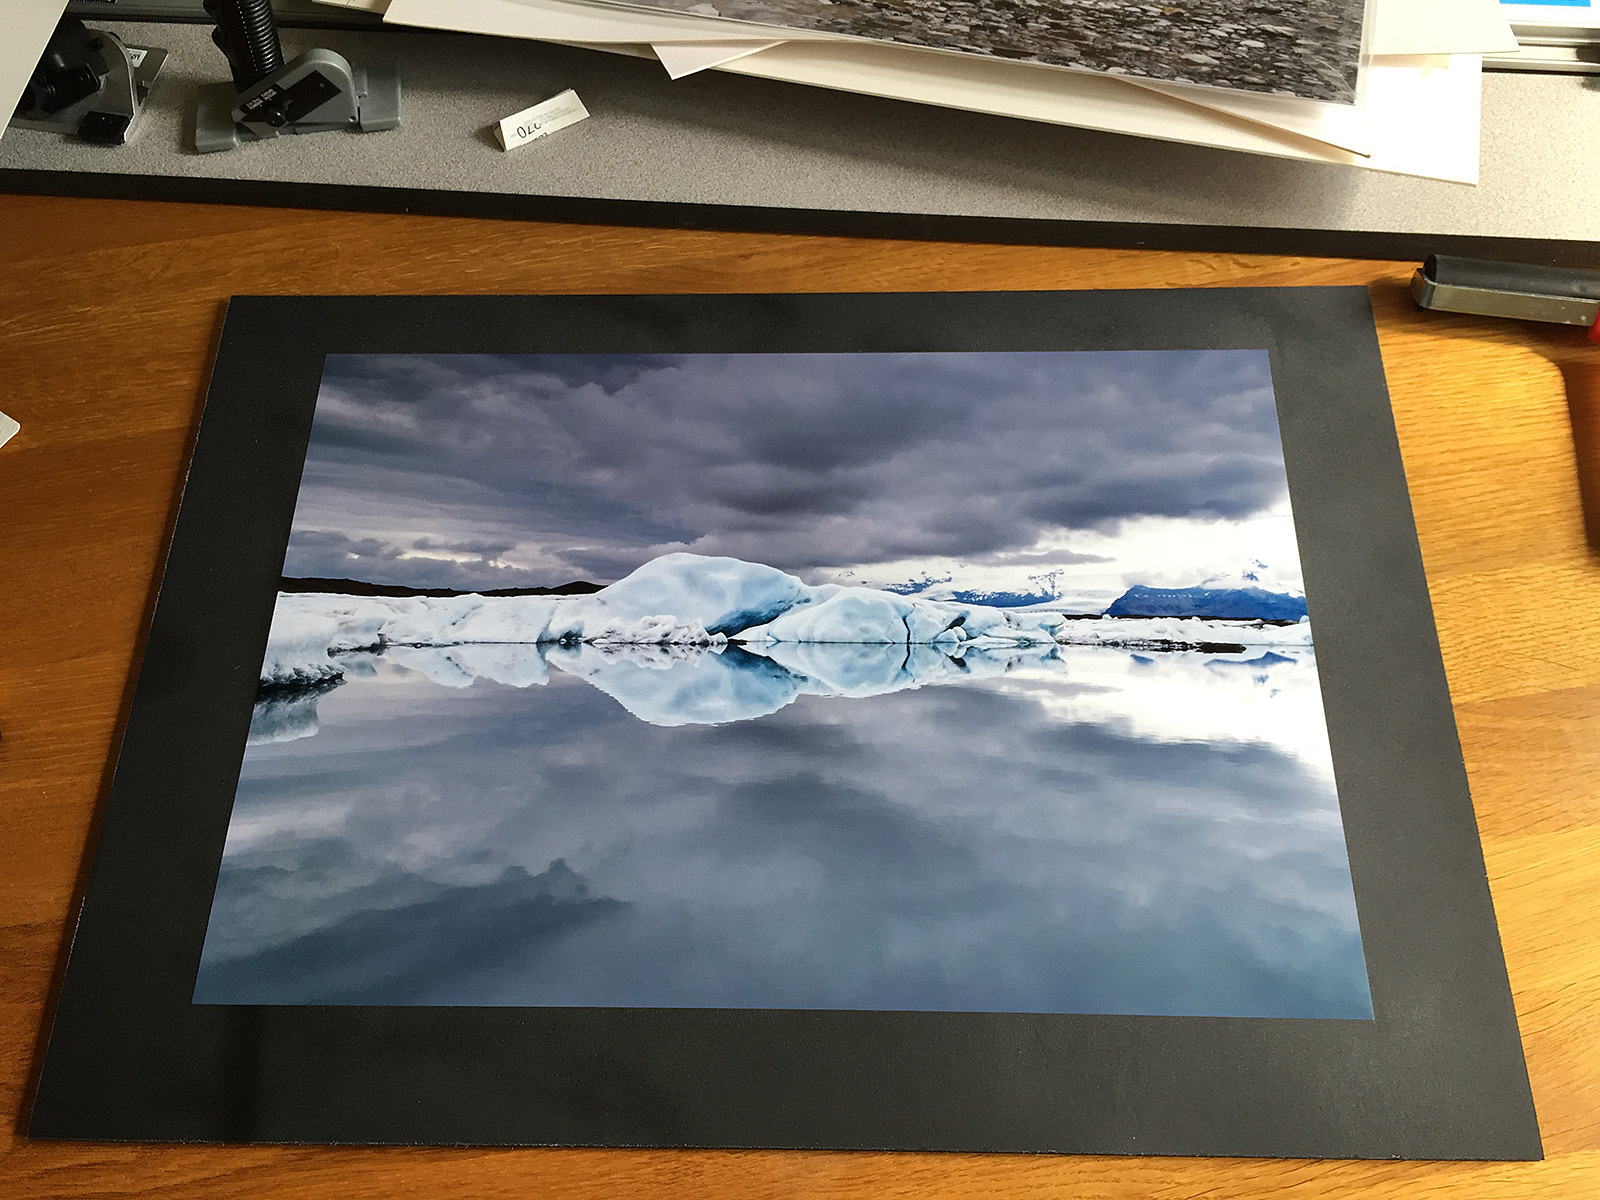
![There's no denying that a large image or graphic make a striking statement, but you have to choose carefully. The image should be timeless and detailed enough to reward people for repeated viewing with details they've missed in the past. [Click to enlarge]](http://davehoggan.com/wp-content/uploads/2015/04/MG_2667.jpg)
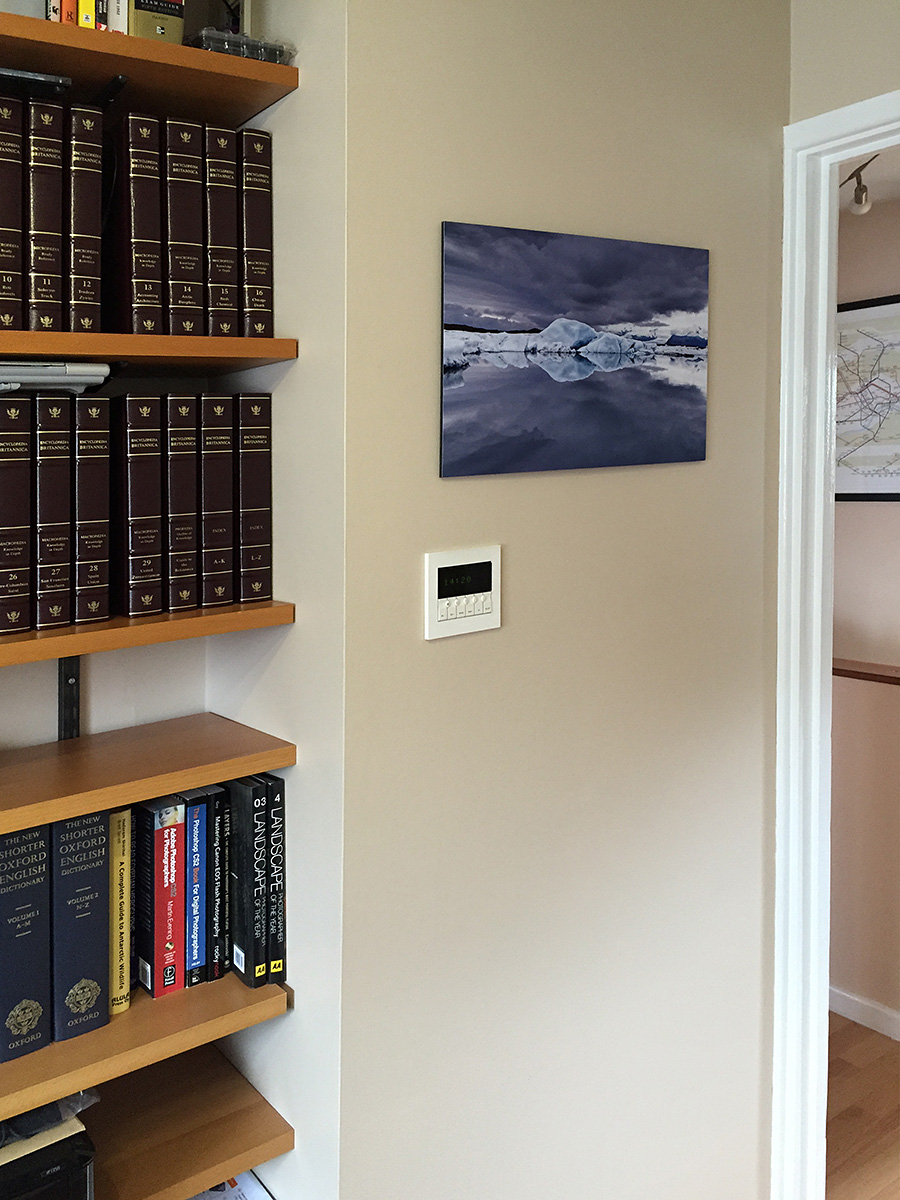
![Meeting rooms can be clinical places often decorated as an afterthought, if at all. Add a feature image (and maybe a potted plant or two) and even small rooms can feel more welcoming. [Click to enlarge]](http://davehoggan.com/wp-content/uploads/2015/04/MG_2655.jpg)
![It is a great way to encourage employees to take pride in the appearance of their place of work - by making it personal. [Click to enlarge]](http://davehoggan.com/wp-content/uploads/2015/04/MG_2661.jpg)
![Even a 10.1MP camera like the Canon 40D can produce respectable sized images like this 150cm by 100cm canvas. [Click to enlarge]](http://davehoggan.com/wp-content/uploads/2015/04/MG_2626.jpg)