This is the third (and final) part of a three-part review of the Nature’s Light “Composing the Dunes” photographic workshop. Today we look at days nine through thirteen covering Deadvlei, Sossusvlei and Spitzkoppe as well as my concluding thoughts. If you haven’t already done so it is probably best to read part one and part two first.
Day 9: Deadvlei and Sossusvlei
Leaving at 2AM the aim was to arrive at Deadvlei and be set up for around 3:30AM. Romeo had decided not to come – presumably as he was tired – but my advice is not to miss this opportunity.
There’s no way that I can convey the feeling of standing in Deadvlei with the night sky above you as it is an experience in the truest form of the word. The silence is absolute. The sky is ablaze with starlight. There is so little light pollution that the faint glow on the horizon comes from the sun that had set hours earlier. The Milky Way galaxy is a glowing ribbon in the sky and other galaxies appear as luminous clouds. Even if you weren’t interested in photography, it is still worth the lack of sleep for there are precious few places left on the planet where you can have a similar experience.
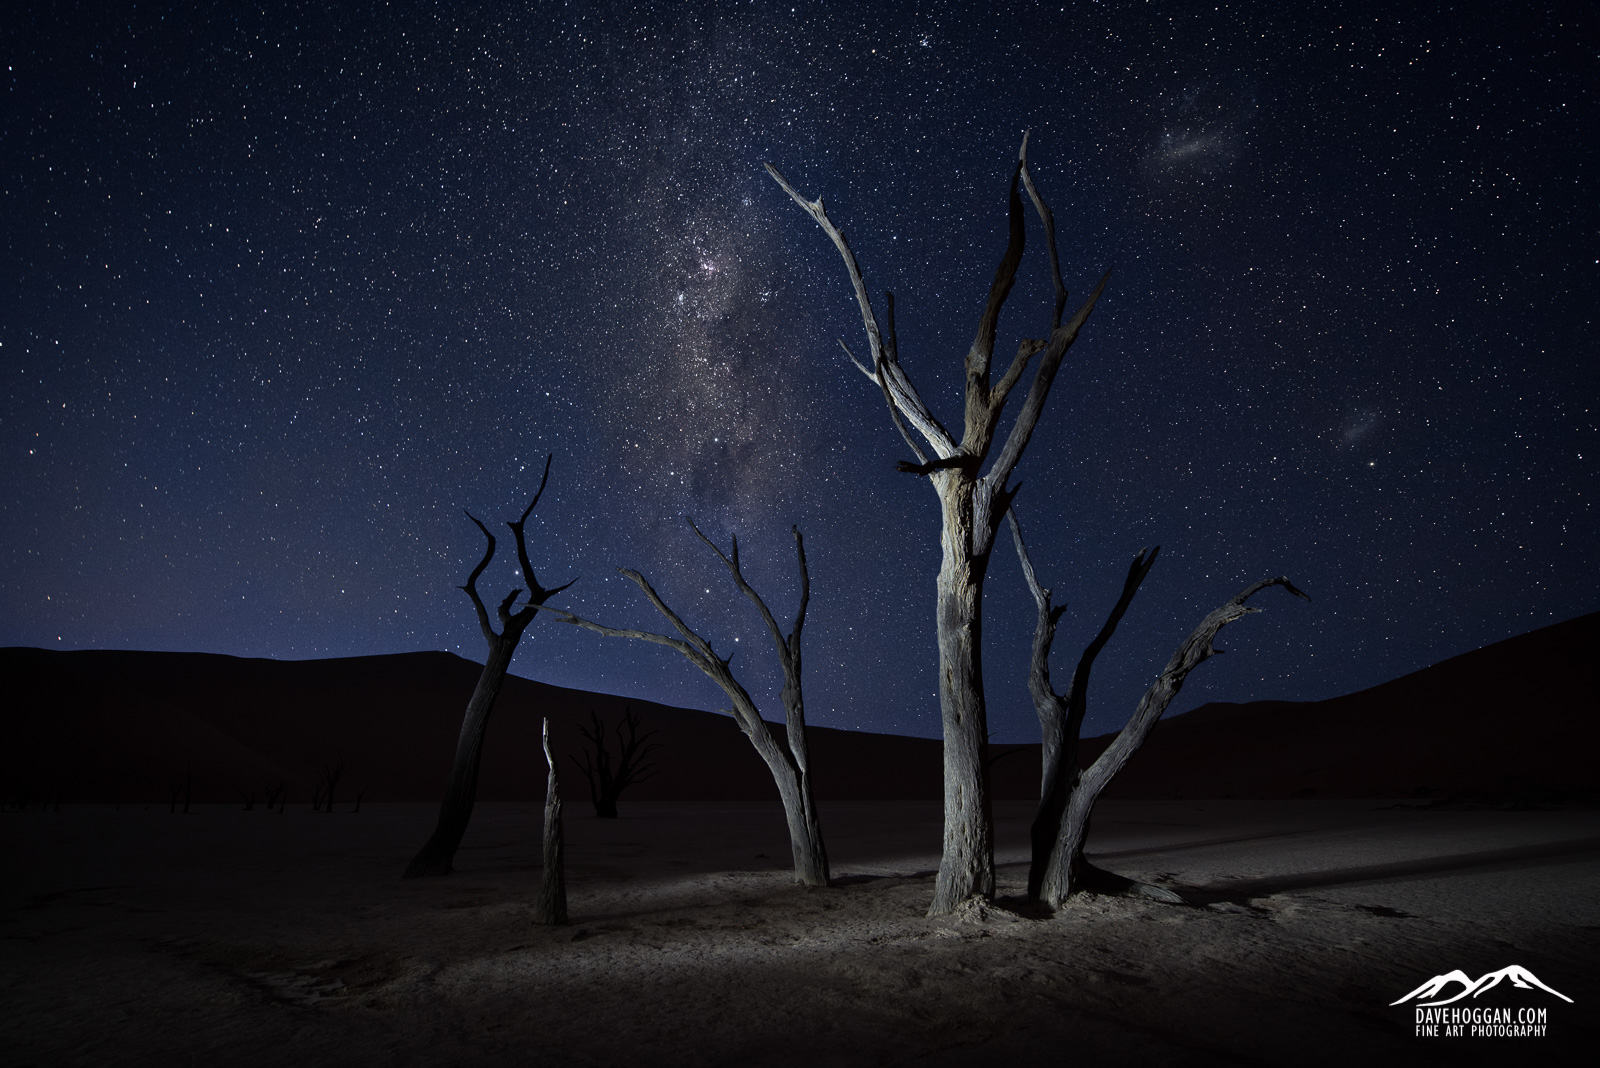
It is impossible to not be impressed with Namibian night sky…
Despite it being 3:30AM we only had a couple of hours of light in which to capture star trails and so the first job was to locate a suitable foreground, set up the camera on a tripod, and go about capturing the long exposure shot that we’d later use in post production to create the luminosity mask. Once done we set the intervalometers to 240 seconds and 15 shots and walked away.
This is the advantage for having not only two cameras but two tripods. Carrying one tripod is a necessary evil of landscape photography but carrying two seems excessive. However, given that you have very limited time in a unique location the ability to have one shot set up and taking care of itself whilst you concentrate on another is important as it doubles your shooting potential. So whilst the star trail was taking care of itself and with the obligatory coffee consumed we busied ourselves about the task of finding interesting compositions for astrophotography. The only disruption to the proceedings was a jackal that took a fancy to one of the LED lamps and tried to eat it.
It is amazing how quickly the time went and soon it was 5:30AM and the light was rendering the canopy of stars invisible. The star trail time-lapse was complete and so we swapped to standard compositions although until the sun broke above the dunes the light was rather flat. Just after 7AM the first visitors were arriving which carried the mixed blessing of lending a sense of scale to the location whilst also meaning people were getting in the frame a lot more. We decided to call it a day and headed back to the lodge for breakfast.
If yesterday was a tough day to pay attention during the lessons, you can perhaps imagine how today was. That said the excitement of having just experienced something I can only describe as “awesome” and seeing the initial results from the night’s shoot gave me a surprising amount of energy. There were more Photoshop lessons and another critique session followed by lunch and time to rest.
As nice as the lodge was it did have one major issue: mosquitos. Despite having the mosquito net down the previous night and despite only being in bed for three hours I had a surprising number of bites and by the end of the three night’s stay I counted 47 bites. Luckily this is not malaria country but the bites were nonetheless annoying to the point of distraction. If I ever return I’m taking mosquito repellant and would suggest you do too.
The late afternoon shoot was at Sossusvlei although I was tempted to return to Deadvlei as, like my first time at any location, I felt I didn’t really do a good job. In the end I stuck with Sossusvlei and glad I did. In any event it was going to be the only chance I got.
Despite being in close proximity to Deadvlei, Sossusvlei is a different experience. It is still a sun-scorched pan, but there are more signs of life. Oryx graze in the shade of trees and bushes ring the pan.
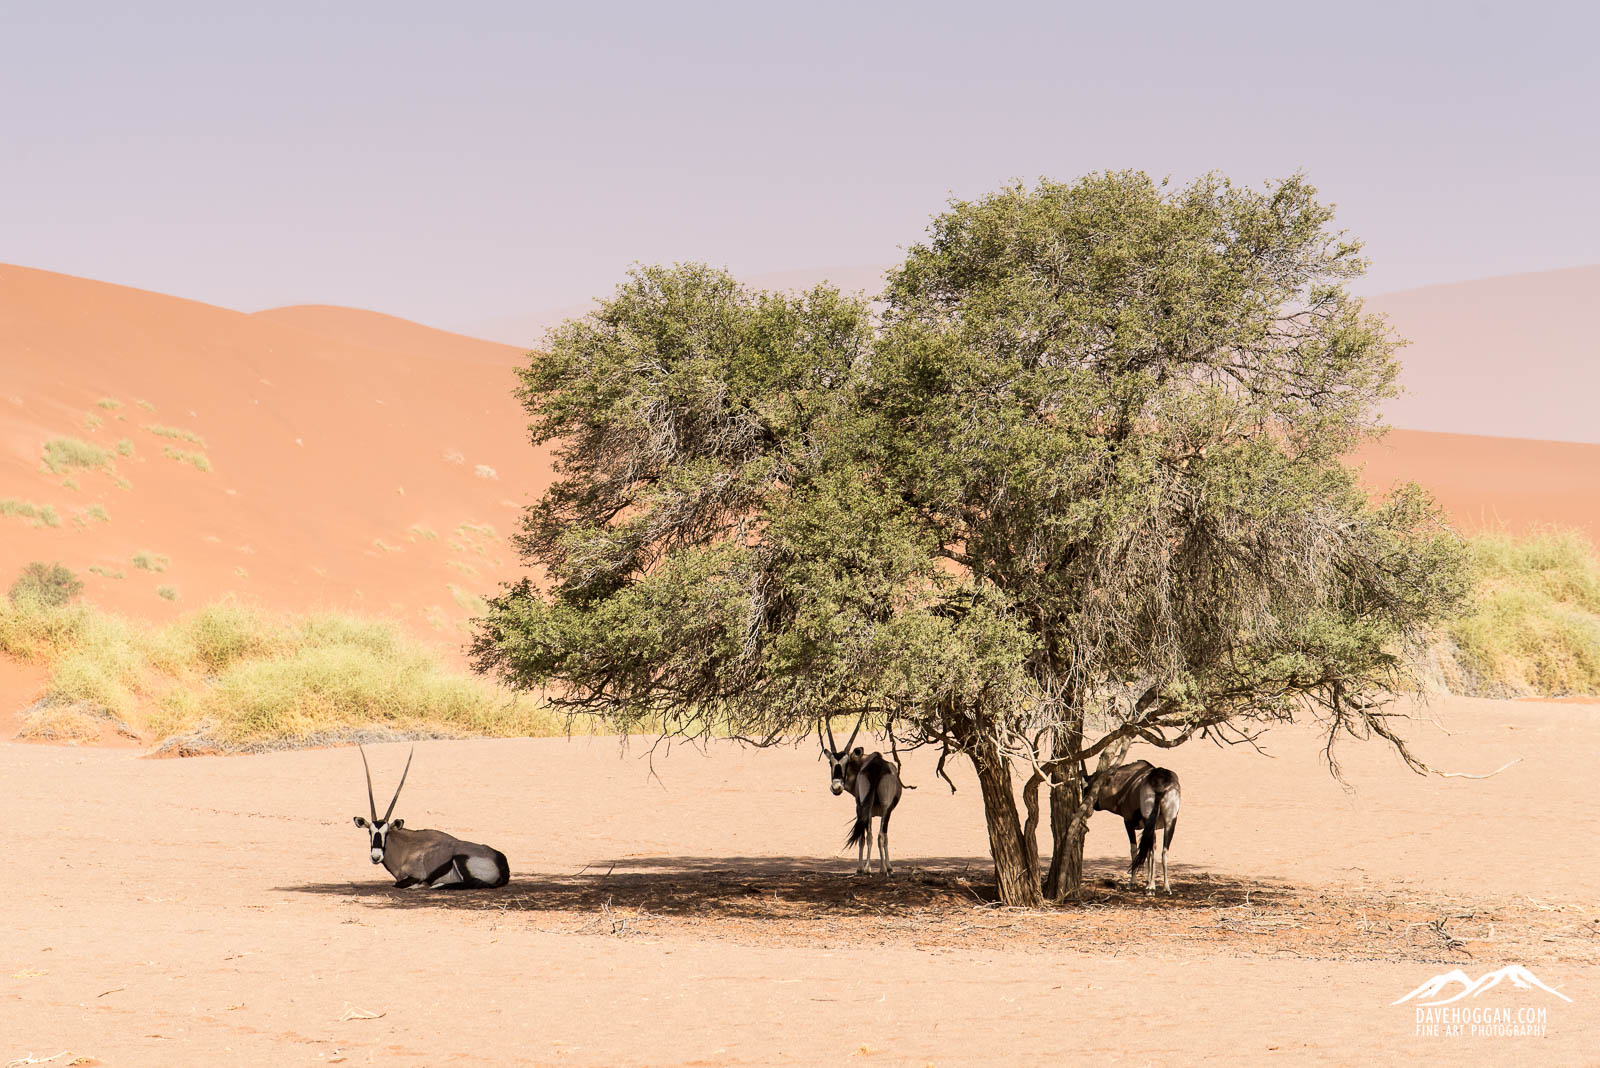
Oryx looking on in amusement perhaps wondering why these ‘human things’ were standing in the sunlight when there was a perfectly good tree to stand under…
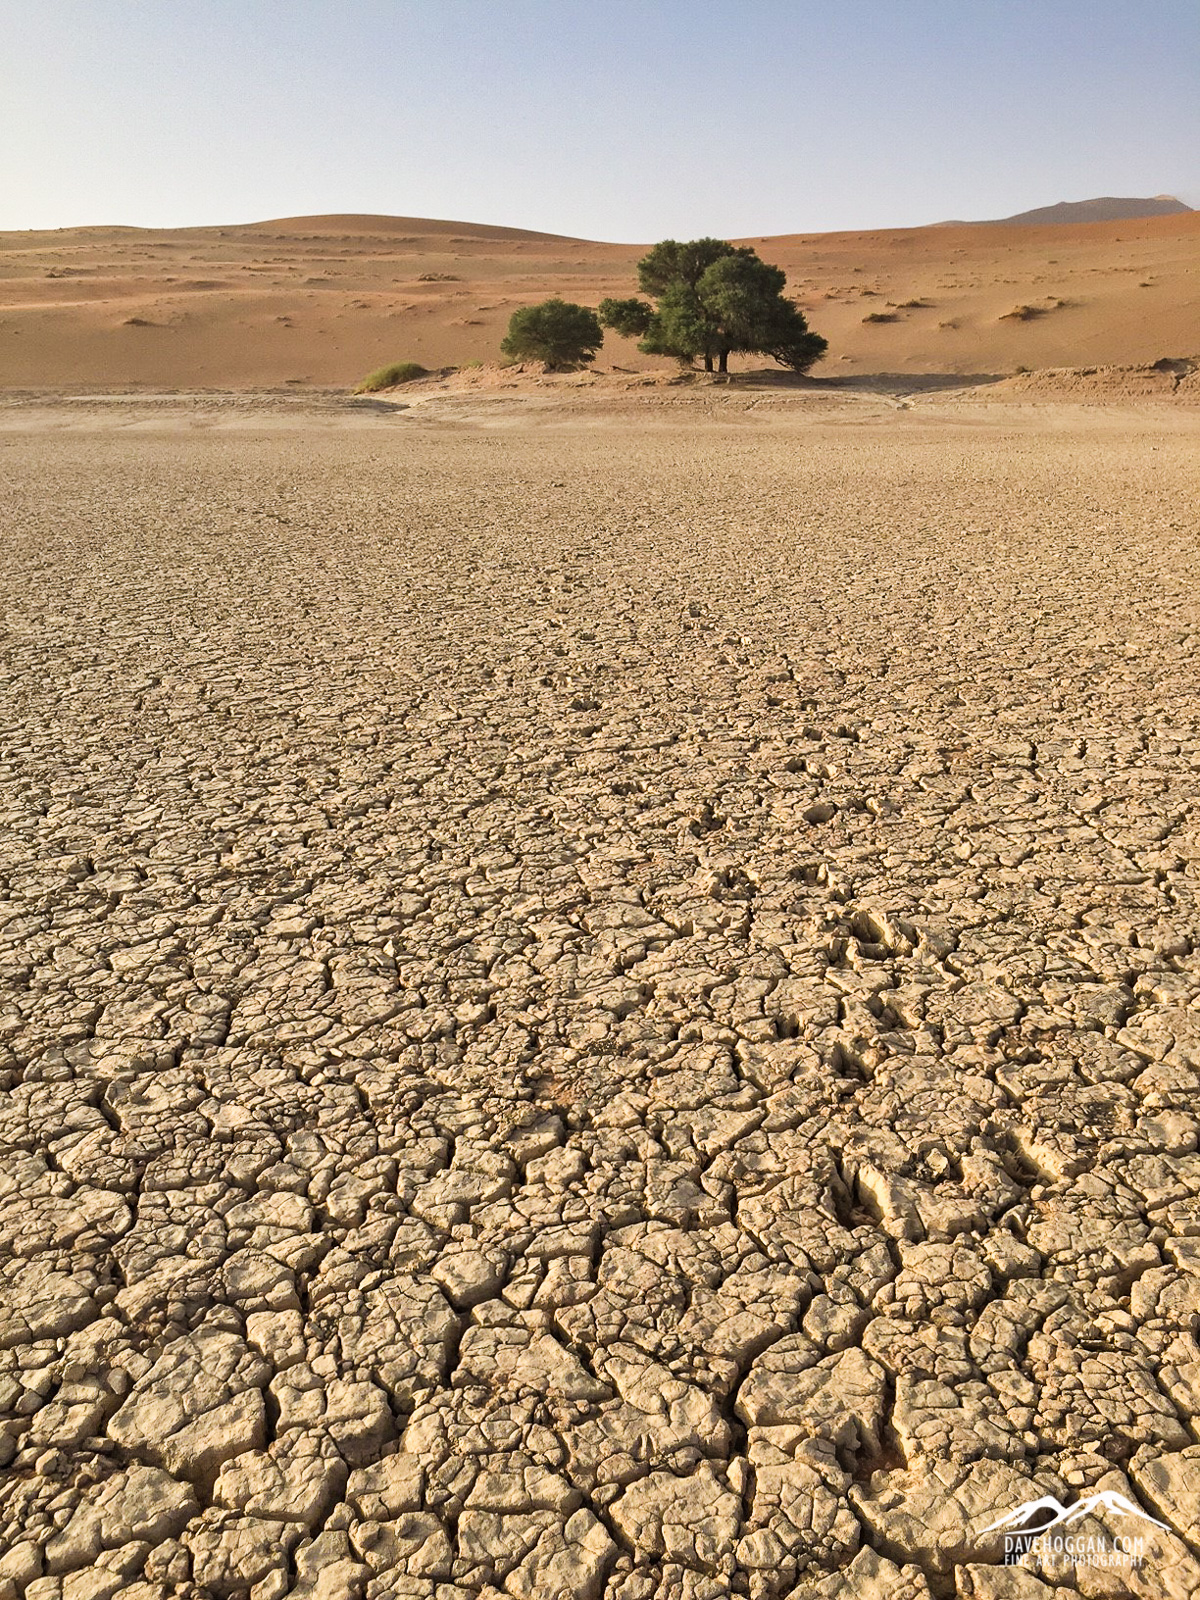
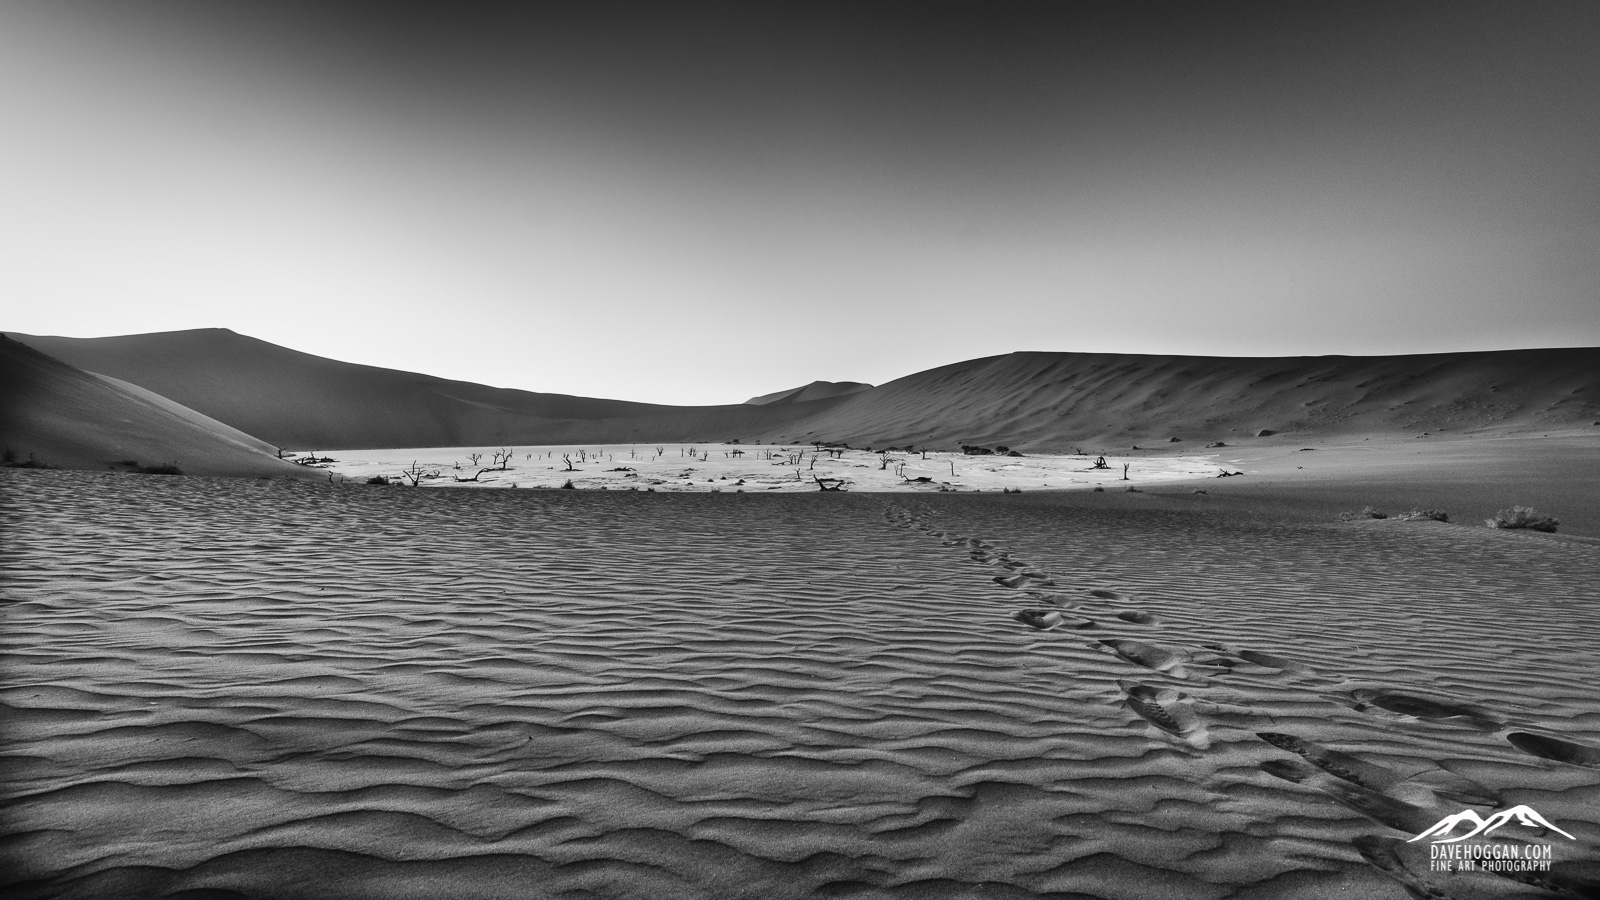
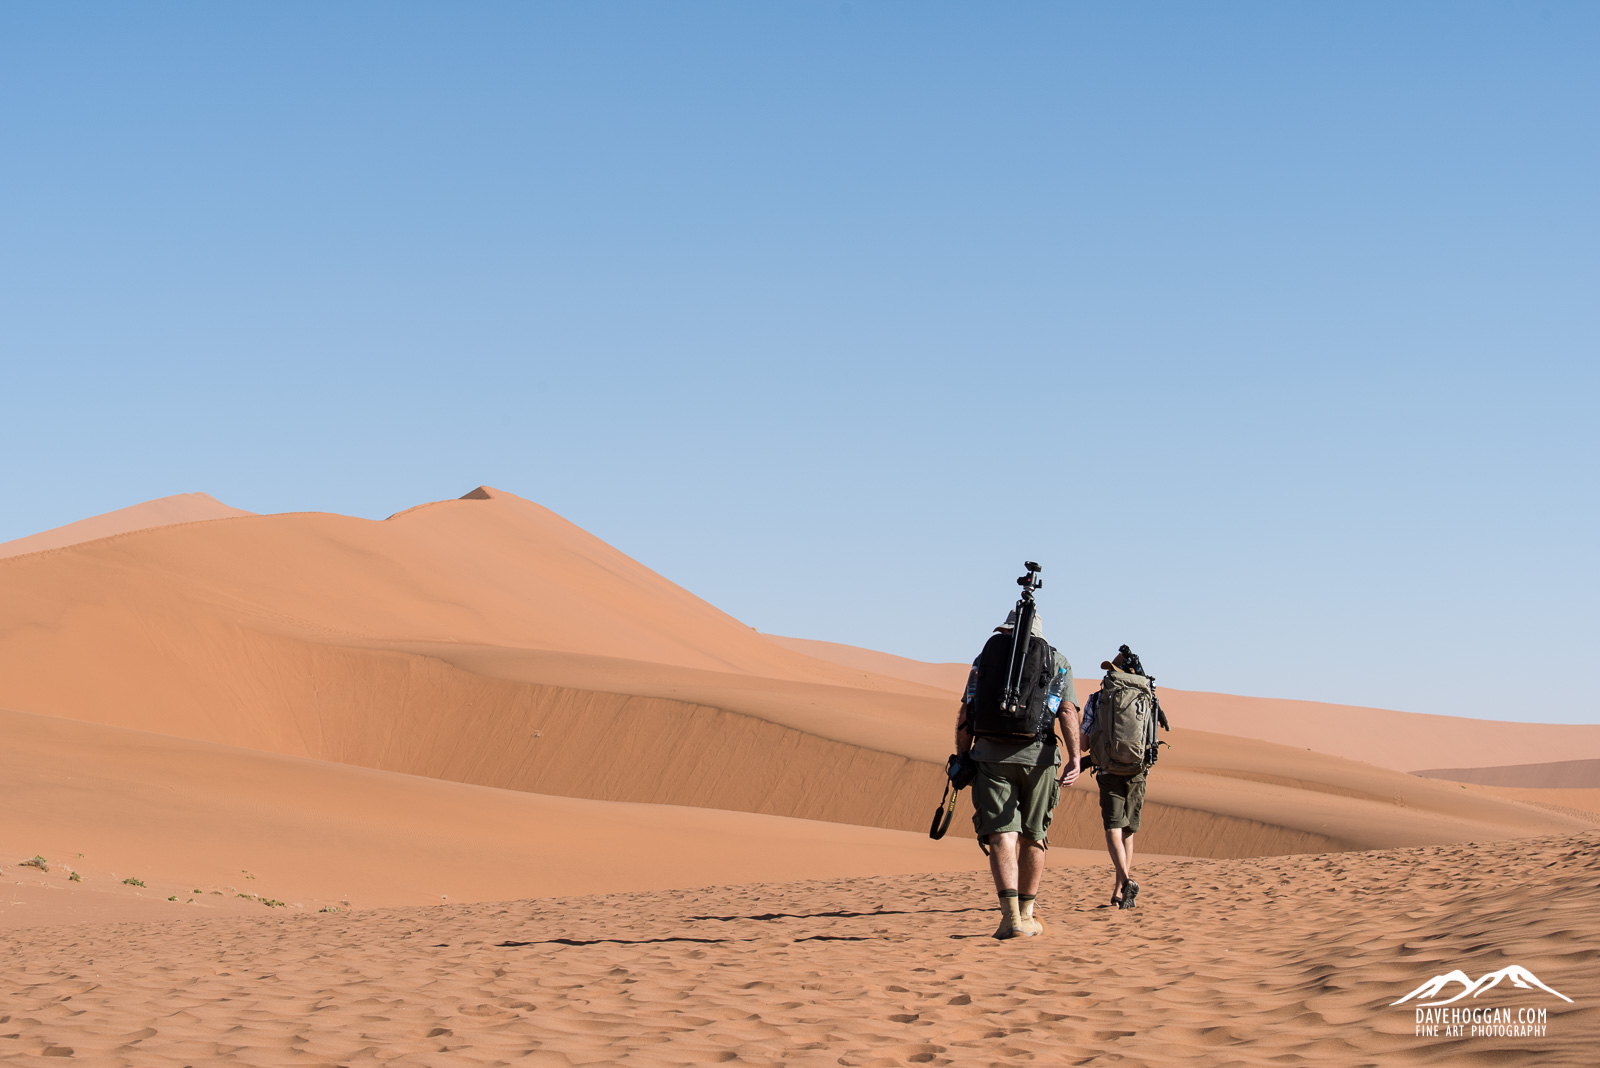
Usually the pan at Sossusvlei sees an annual flood but Namibia has been in drought for a few years and the pan is a cracked, salty expanse. There are a number of options here and whilst Romeo busied himself composing some of the bushes I spent some time with some animal tracks that had obviously been left when the ground had been wetter. There are options to get an elevated view of the area – as well as a serious workout – by climbing the surrounding dunes. I made it half way up one before the camera backpack and tripod made the climb more of a slog.
One of the (many) shots that I really wanted to work but just didn’t quite meet the image in my head…
As with yesterday we headed back to the lodge in time for “curfew” – after the wonderful experience of this morning there was no point in jeopardising the chance to do it again!
Day 10: Deadvlei and Travel
Another 2AM start in order to be at Deadvlei by 3:30AM, this time with Romeo who had seen the images we had shot the previous day. It was a similar process; set up a time-lapse and then use the remaining time to shoot astrophotography. Emil was delegated the task of light painting where required and we managed to get a couple of portfolio candidates over the course of the morning.
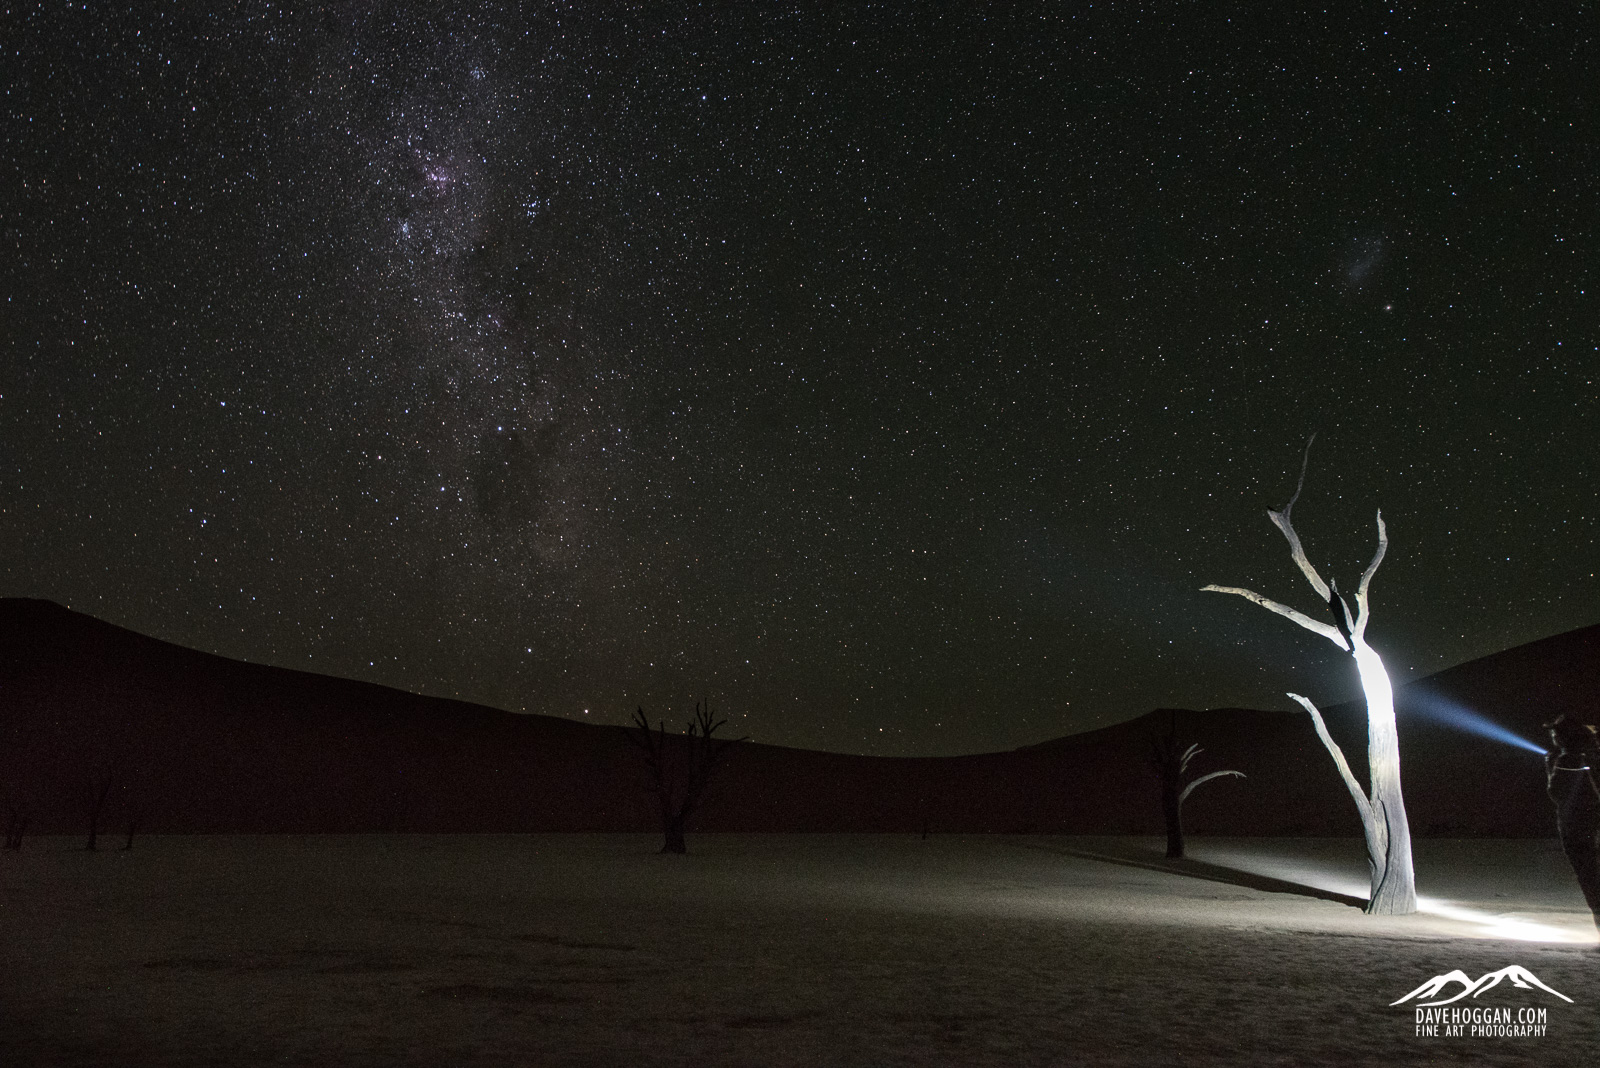
Emil performs his light painting duties…
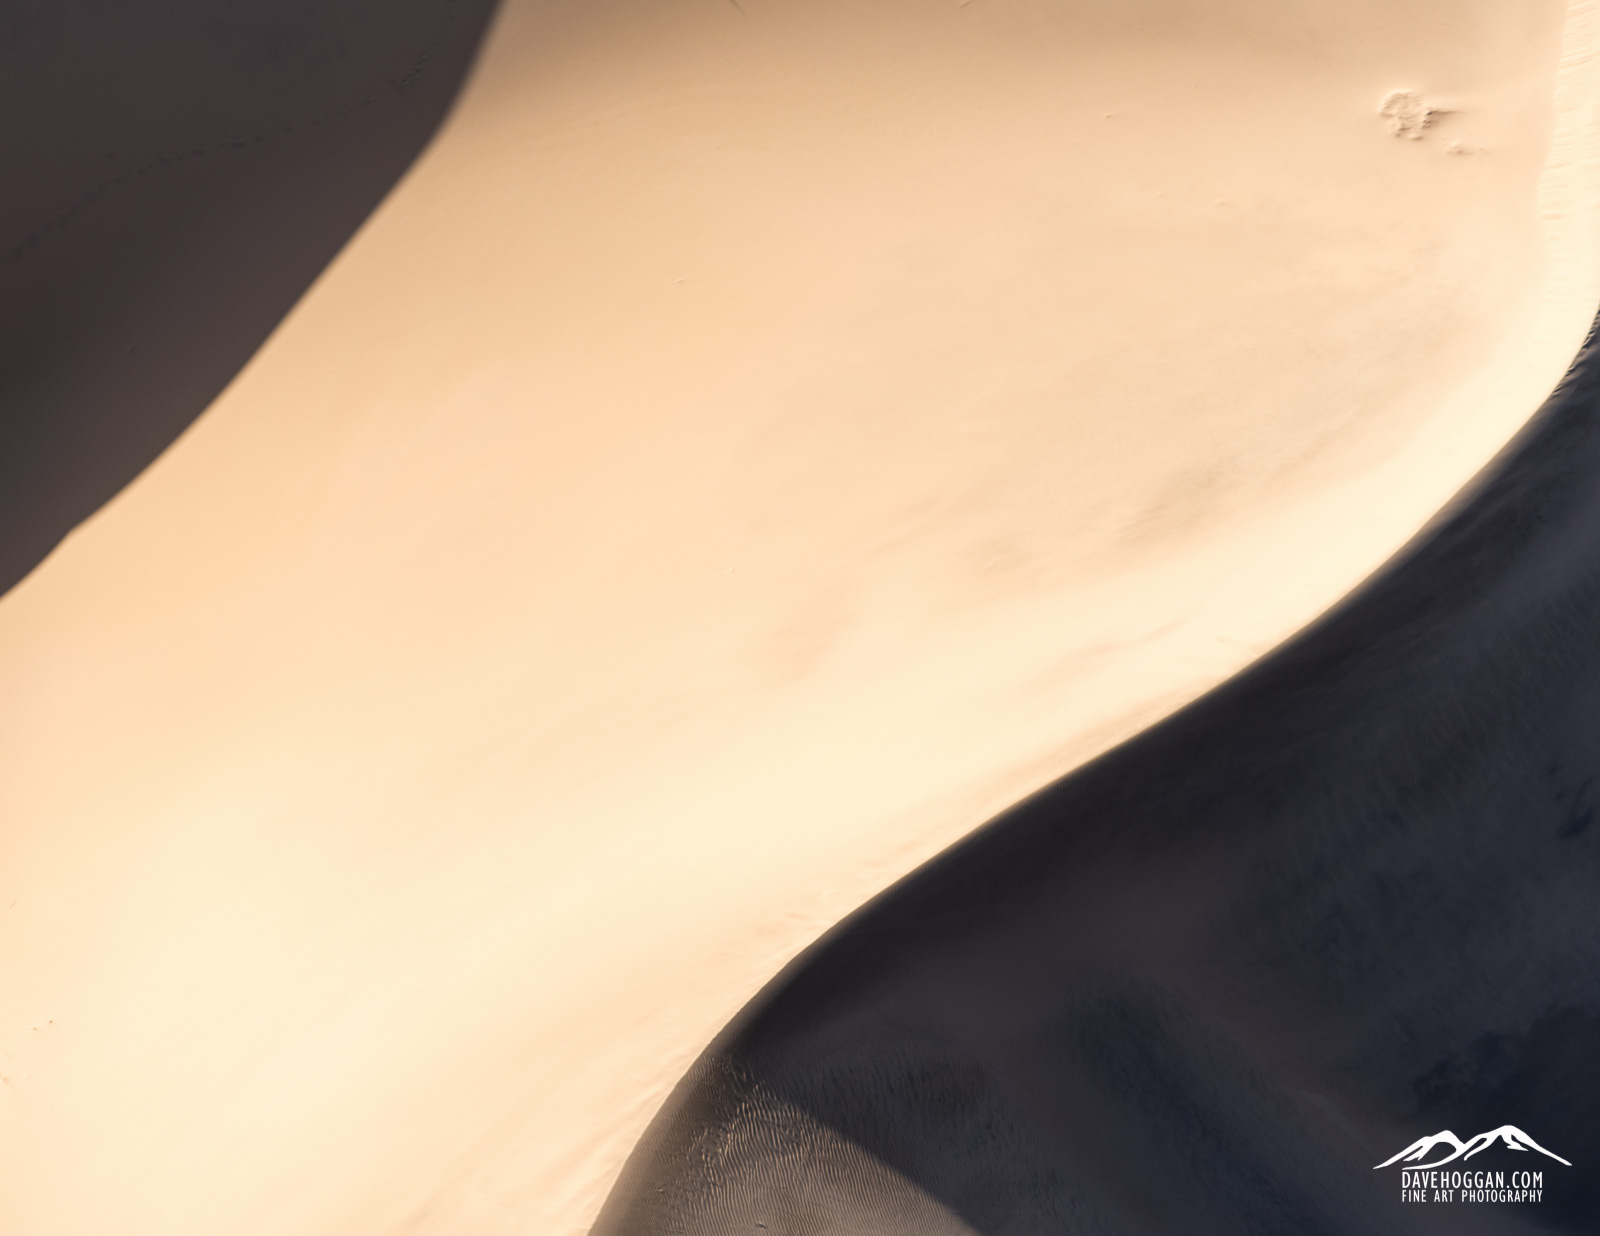
Once the light became too bright we switched to more standard compositions only stopping once the first visitors began arriving. Climbing out of the basin I managed to capture Deadvlei with near perfect sands – in about 30 minutes the windswept patterns will be replaced by a mass of foot prints.
A sight that most visitors to Deadvlei won’t get to see – pristine sands sculpted by the wind and untouched (well, almost) by man.
Having stopped to take the image of Deadvlei we realised that we were only a short way from Deadvlei’s less visited brother which from a distance is admittedly less impressive looking and I can understand why people may forego it and head straight for the main attraction. But it does have its own appeal and despite being smaller does have some potential. In the end we spent a very worthwhile 90 minutes here before heading back to the 4WD and the lodge.
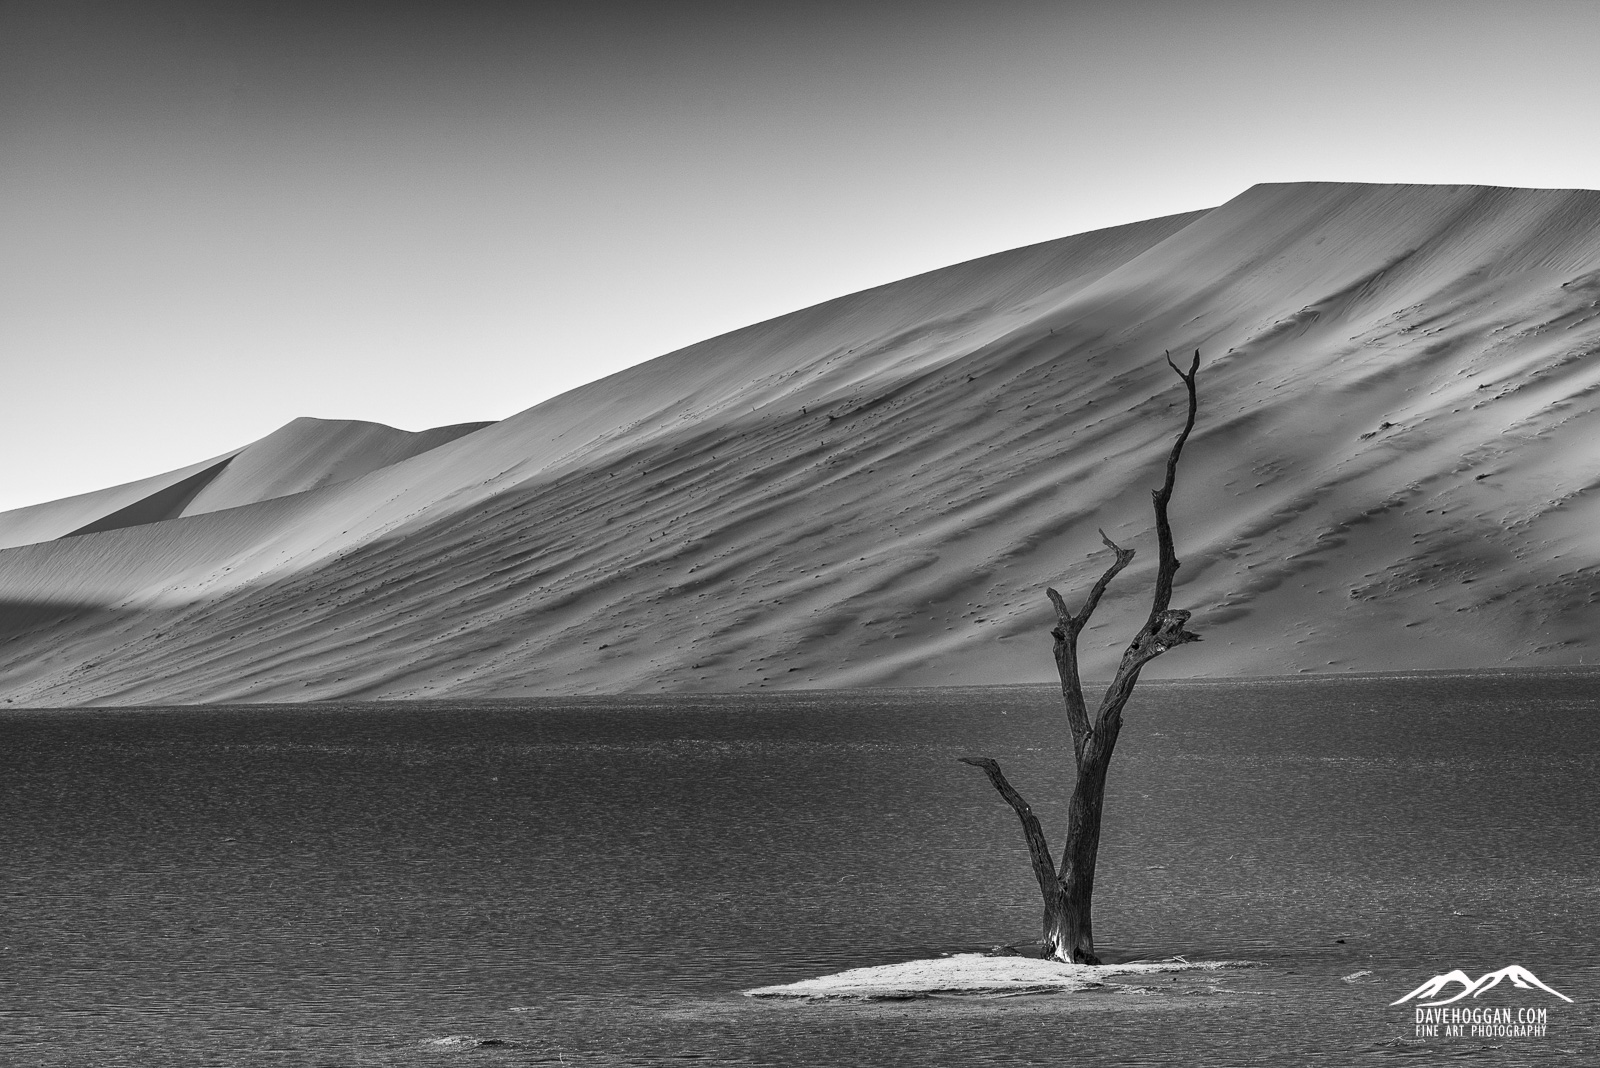
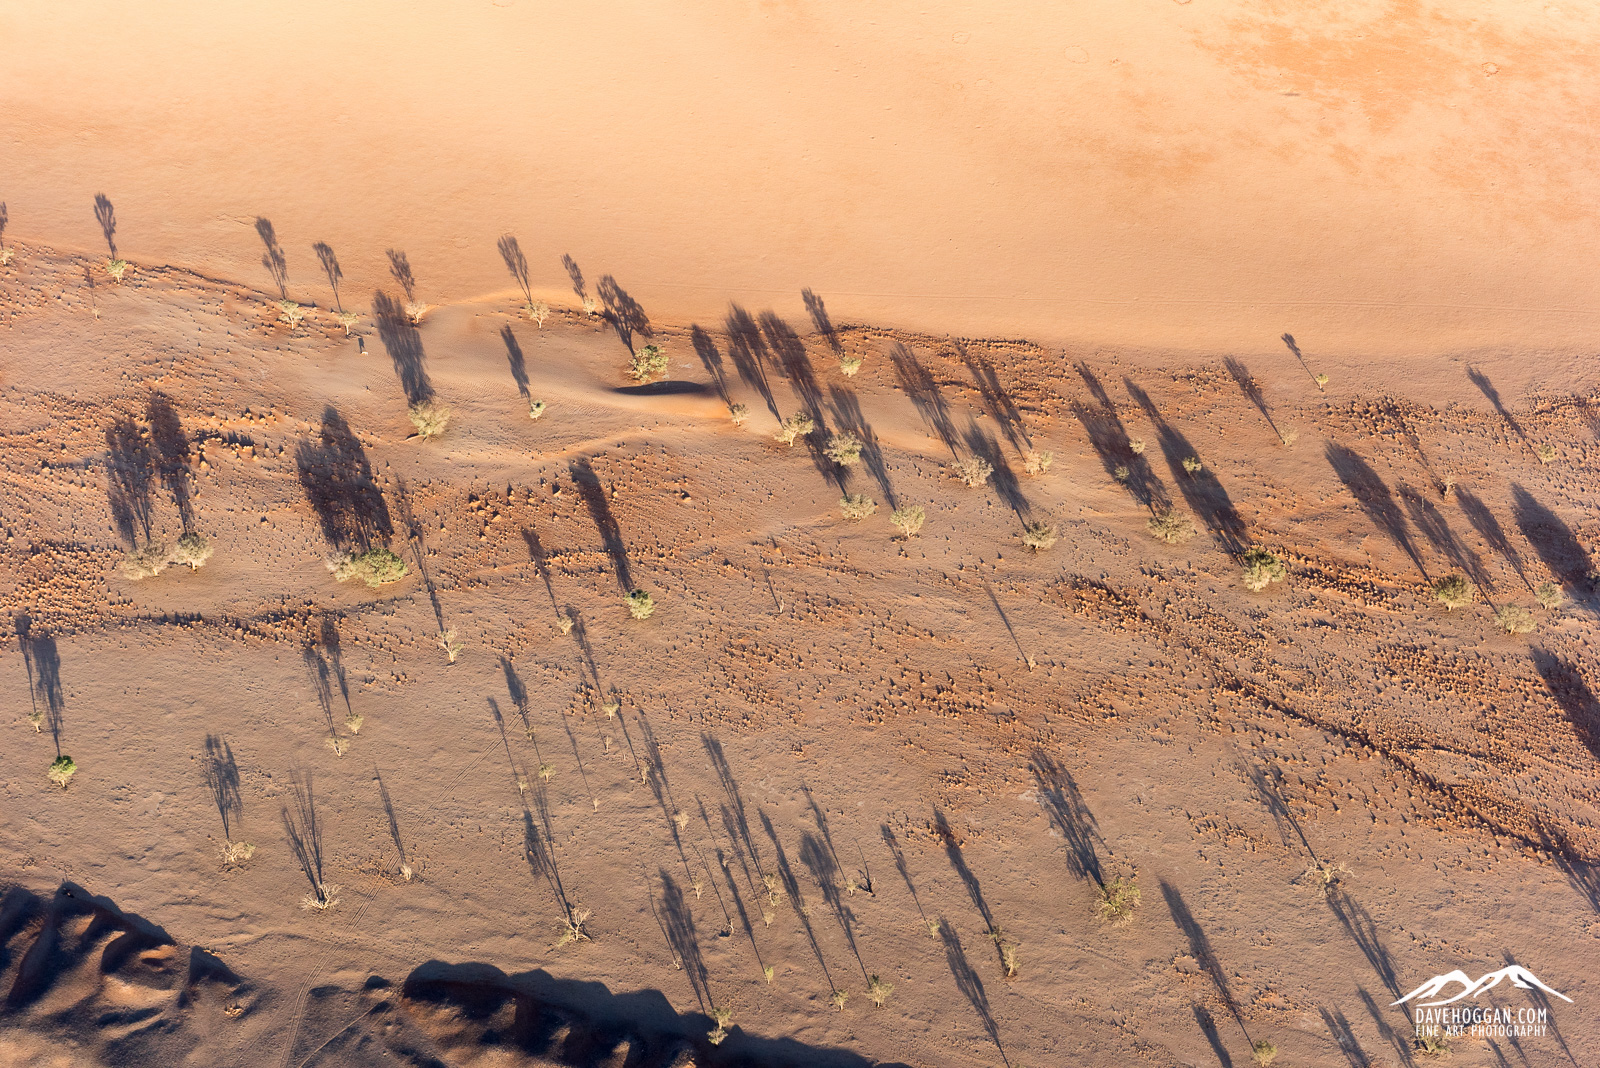
Taking this shot I could see the shadow line on the dunes get lower as the sun rose. In the space of four shots the tree went from being in shadow to being bathed in light…
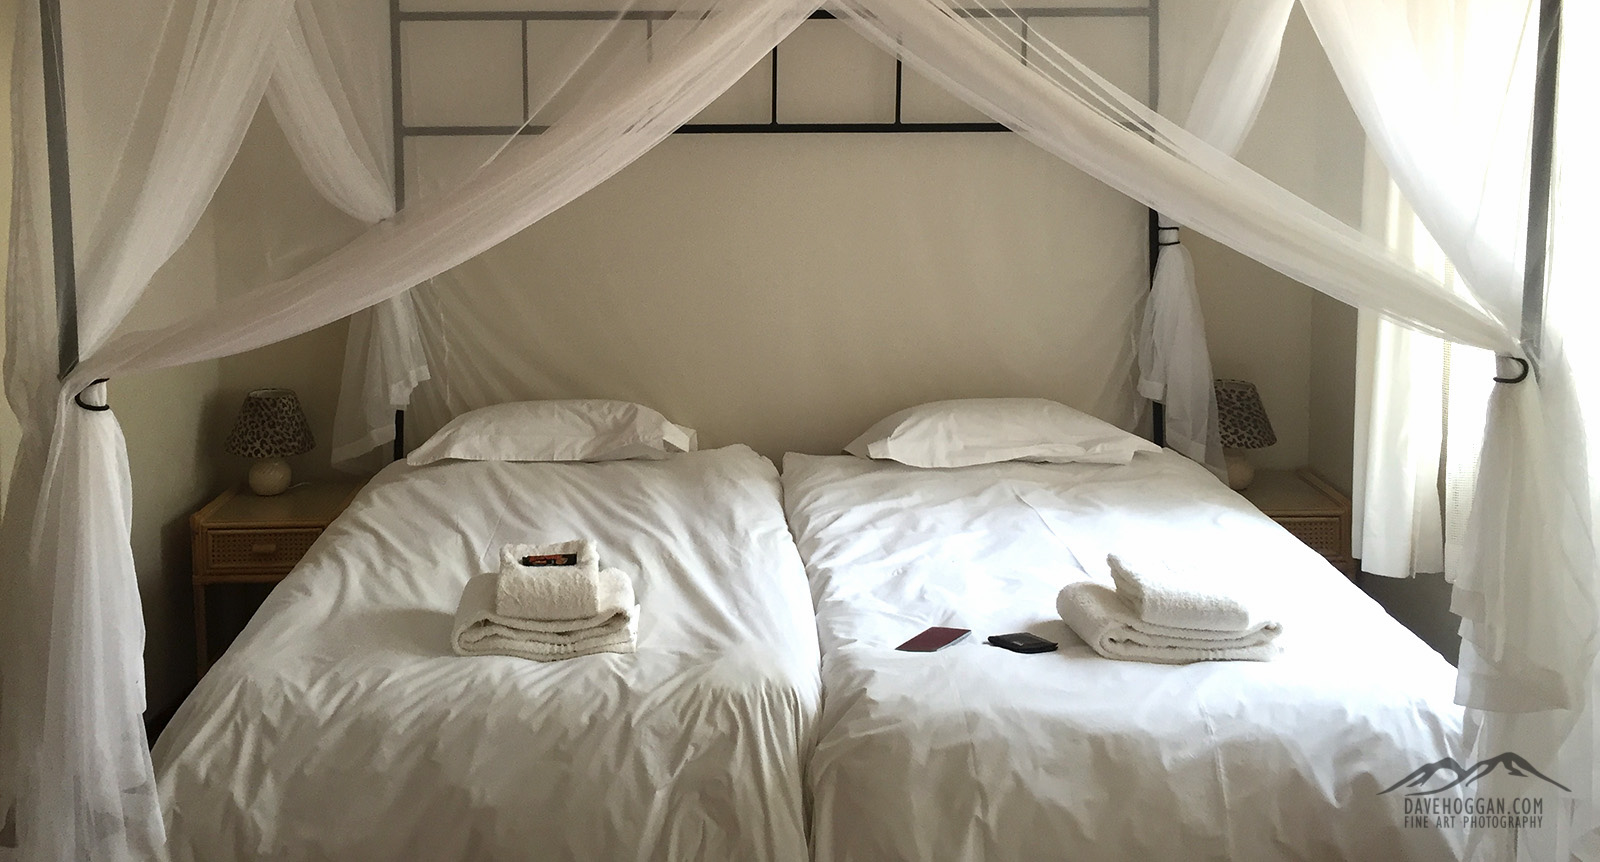
After breakfast we were travelling further north to the final location of the trip, Spitzkoppe. Given the previous two days early starts the journey was broken into two legs with today seeing us take a 150 kilometre journey to Rostock where we would stay and relax. The Rostock Ritz was excellent and although I could have likely slept standing up by now, the comfortable rooms and beds were appreciated. The Ritz like many of the places we had visited throughout Namibia was invested in solar energy and talking to the owner I discover that their (very impressive) solar array meant that they were totally independent of external power sources. And if you’re craving a bit of wildlife, the Ritz is also a sanctuary for meerkats.
We had another lesson and critique session and Emil recorded another video, followed by a wonderful dinner and even more wonderful sleep.
Day 11: Rostock to Spitzkoppe
After breakfast we embarked upon the second leg of the trip to Spitzkoppe, a journey of approximately 250 kilometres. Along the way we made the usual stops as the landscape presented interesting compositions but even with a stop in the town of Karibib for supplies we made good time and arrived at the Spitzkoppe Rest Camp early afternoon. This is the most rustic of the accommodation and the only one where the rooms did not have en suite, but the showers were hot, the facilities clean and the rooms spacious and comfortable. Still the staff were perhaps less impressive and generally seemed unwilling to help. After a rest in the outdoor bar area, we headed out for a late afternoon and evening shoot.
Spitzkoppe was the one location that I was unsure of prior to the start of the workshop. I even emailed Nick and Freya back in January 2015 to ask about whether we were really spending two days here. I was told that the feedback was invariably positive and so I left it at that, but it still seemed odd. With the benefit of hindsight I have to agree that the balance is right – the reality is that you’re not spending two full days here, but rather two afternoon/evenings and two dawns over three days. Also, despite “The Rock” (as I dubbed it) being exactly that, a big rock, there is more than enough to keep you busy.
Despite simply calling it Spitzkoppe, we were actually based at Large Spitzkoppe, visually interesting in that it has vast slabs of unbroken, smooth rock face. It is also a pronounced red colour due to a high iron content and when the sun sets the mountains take on a striking reddish glow.
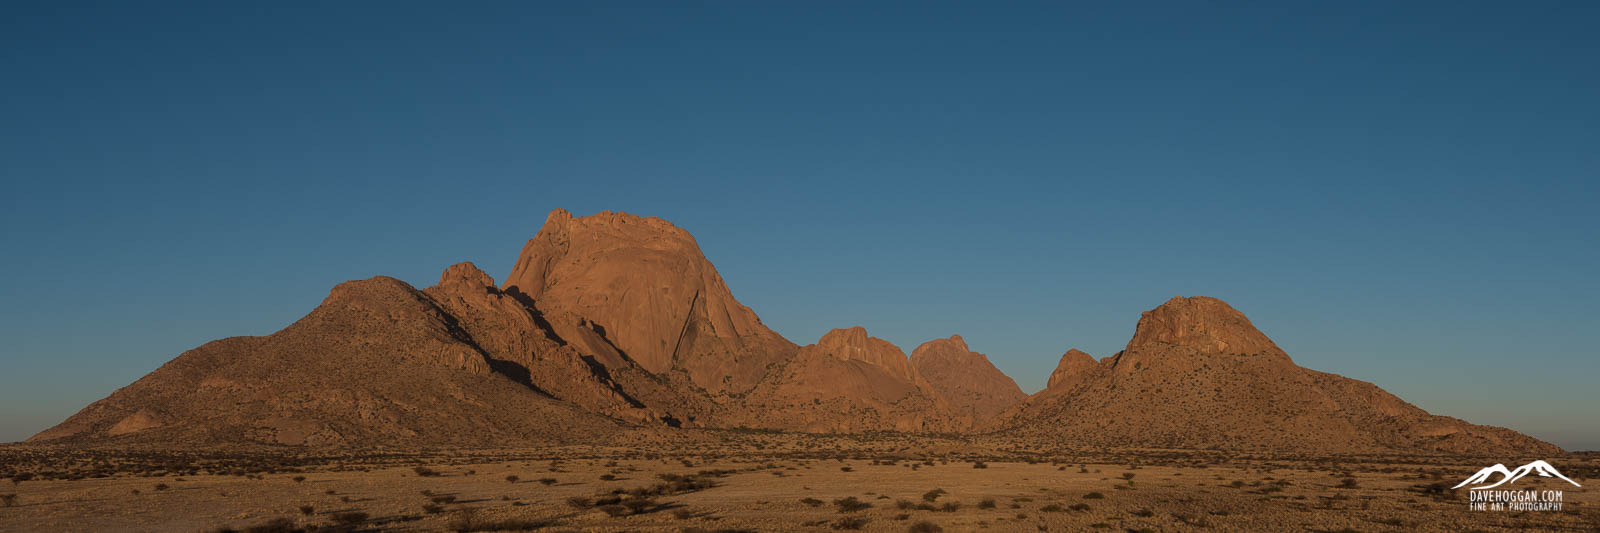
Large Spitzkoppe begins to glow as light from the setting sun falls across the rock face.
Once the sun had set it was a quick drive over to a rock arch where the plan was to set up for some astrophotography.
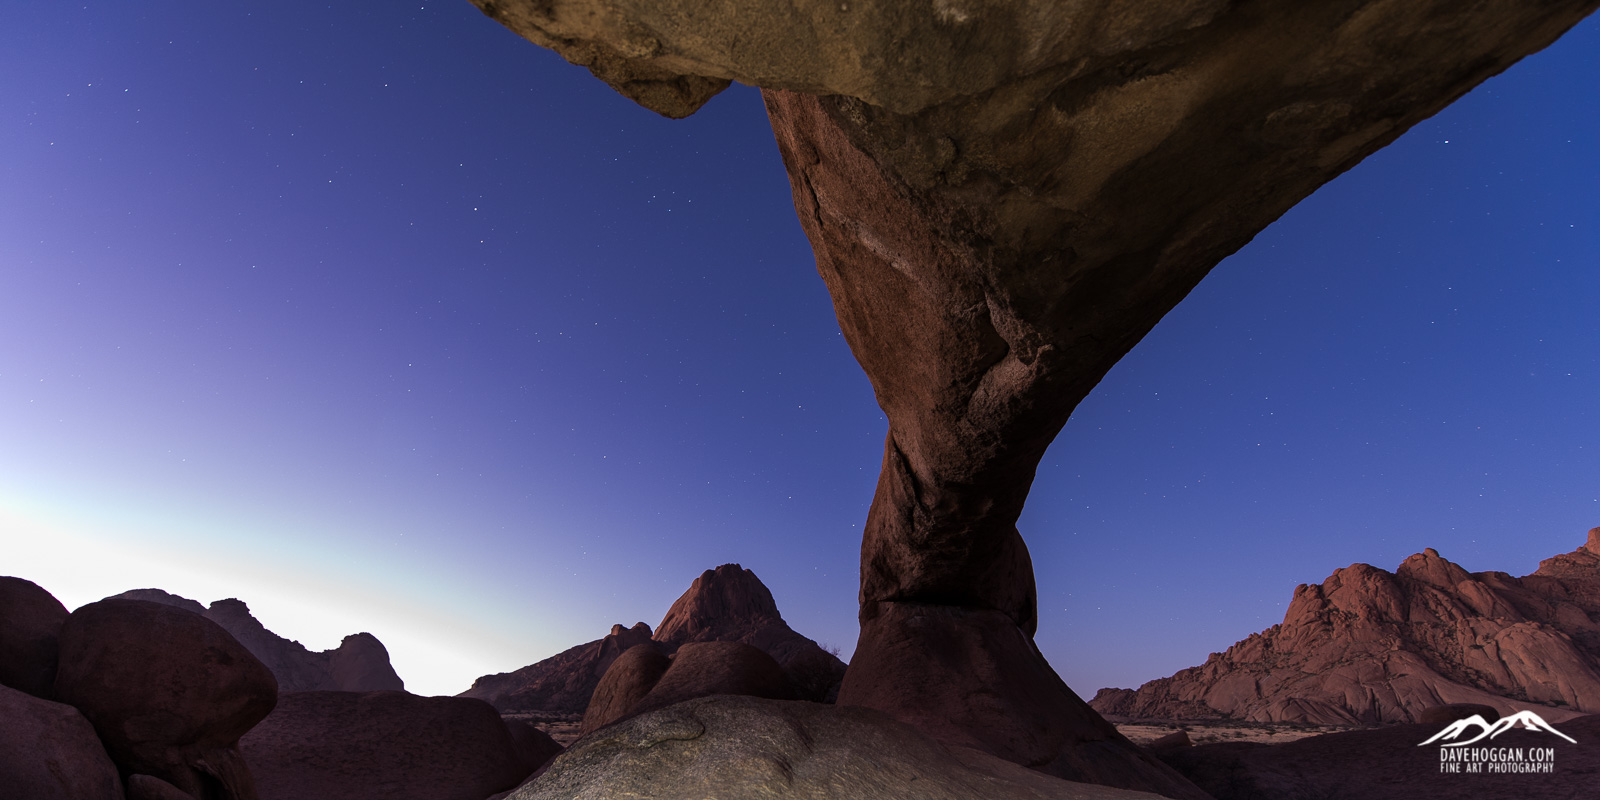
One of the test shots for Spitzkoppe arch; despite having dropped below the horizon the sun is still too strong…
With three of us camped up on the rock arch there was room to move about but with a full workshop of seven, and two or three instructors, I suspect that it would get a bit crowded.
The landscape suits panoramic shooting and so I embarked upon a series of attempts to shoot a panorama of the Milky Way and the arch, not quite succeeding with each attempt. In the end I managed a couple of single shot images before we packed up for the evening. It was a pleasant evening at the rock arch, especially as a nearby camp site had a coach party who for some reason had brought along a group of singers performing a variety of South African songs.
Day 12: Spitzkoppe
The final full day of shooting and time for a lie in. Whilst Spitzkoppe was better than I had expected, a dawn shoot there wasn’t compelling enough for me to get up at 5AM. Perhaps I should have made the effort but I wanted to concentrate on the lessons and so the idea of a couple of extra hours in bed and feeling a bit more alert seemed a better idea. The lesson was more astrophotography – which I was more than happy with – and I felt that I was even beginning to understand it! After the lessons, it was time for another sensor cleaning session and I actually feel quite proud of cleaning my own sensors. It may seem a small thing, but it has given me a level of independence and comfort knowing that, at any point in the future should I find myself on location with a dirty sensor, I can resolve the issue myself. It is not just a cost-saving thing, it could make the difference between a usable shot and a ruined one. The rest of the day was spent relaxing before returning in the late afternoon to “The Rock”.
There are lots of little details on and between the rocks and it wasn’t difficult to spend the afternoon composing various shots. But I had a goal in mind and that was to produce a good panorama of the arch and Milkyway, so as soon as the sun fell behind Small Spitzkoppe I was itching to get back to the arch and virtually sprinted across the rocks upon our arrival. Being happy with yesterday evening’s work Romeo and Emil busied themselves with setting up a time-lapse and as my D750 wasn’t going to be used I set one up too, set the intervalometer on 25 shots (far more than needed) and left it to its own devices.
Taking the panorama was very time sensitive. I wanted the sky to still be blue whilst having a rich canopy of stars. At seven shots, each of 30 seconds, the entire run took three and a half minutes to work through during which time the stars obviously move and giving the Milky Way a slight arc in the sky. Emil popped up to see how things were going and since he was there got delegated the task of light painting the foreground before leaving me to my own devices. After a few passes the sky had darkened and the image in my mind with it so I returned to the others who had broken out dinner and the beer whilst waiting for the time-lapses to run their course.
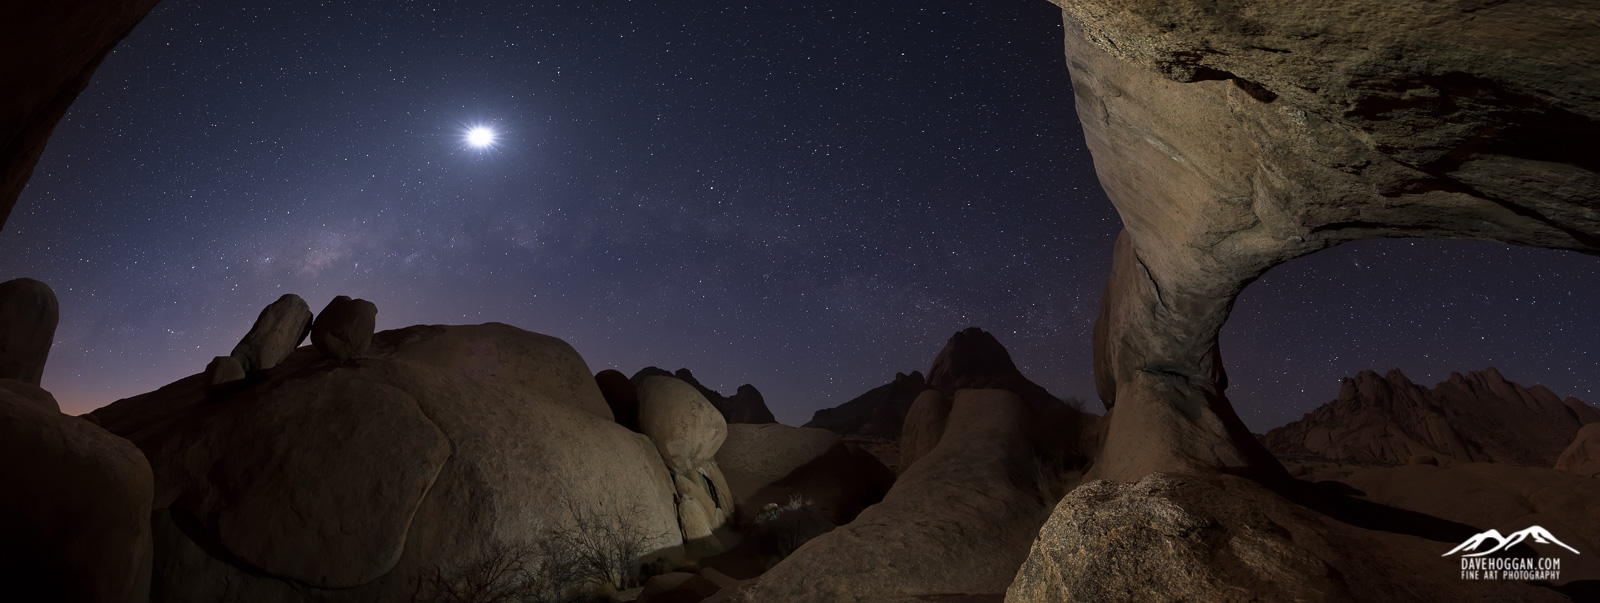
You’ll get used to horizons having a faint glow – there is so little light pollution that the sun, despite having set nearly three hours earlier, can still be seen…
There was one final scene for the night shoot, a rather interesting group of boulders in the foreground with the plain extending out behind them to Large Spitzkoppe and the Pontok Range. What was a ‘quick shot’ turned in to close to an hour as we composed the shot, took the necessary images and then did the whole thing again as a safety measure.
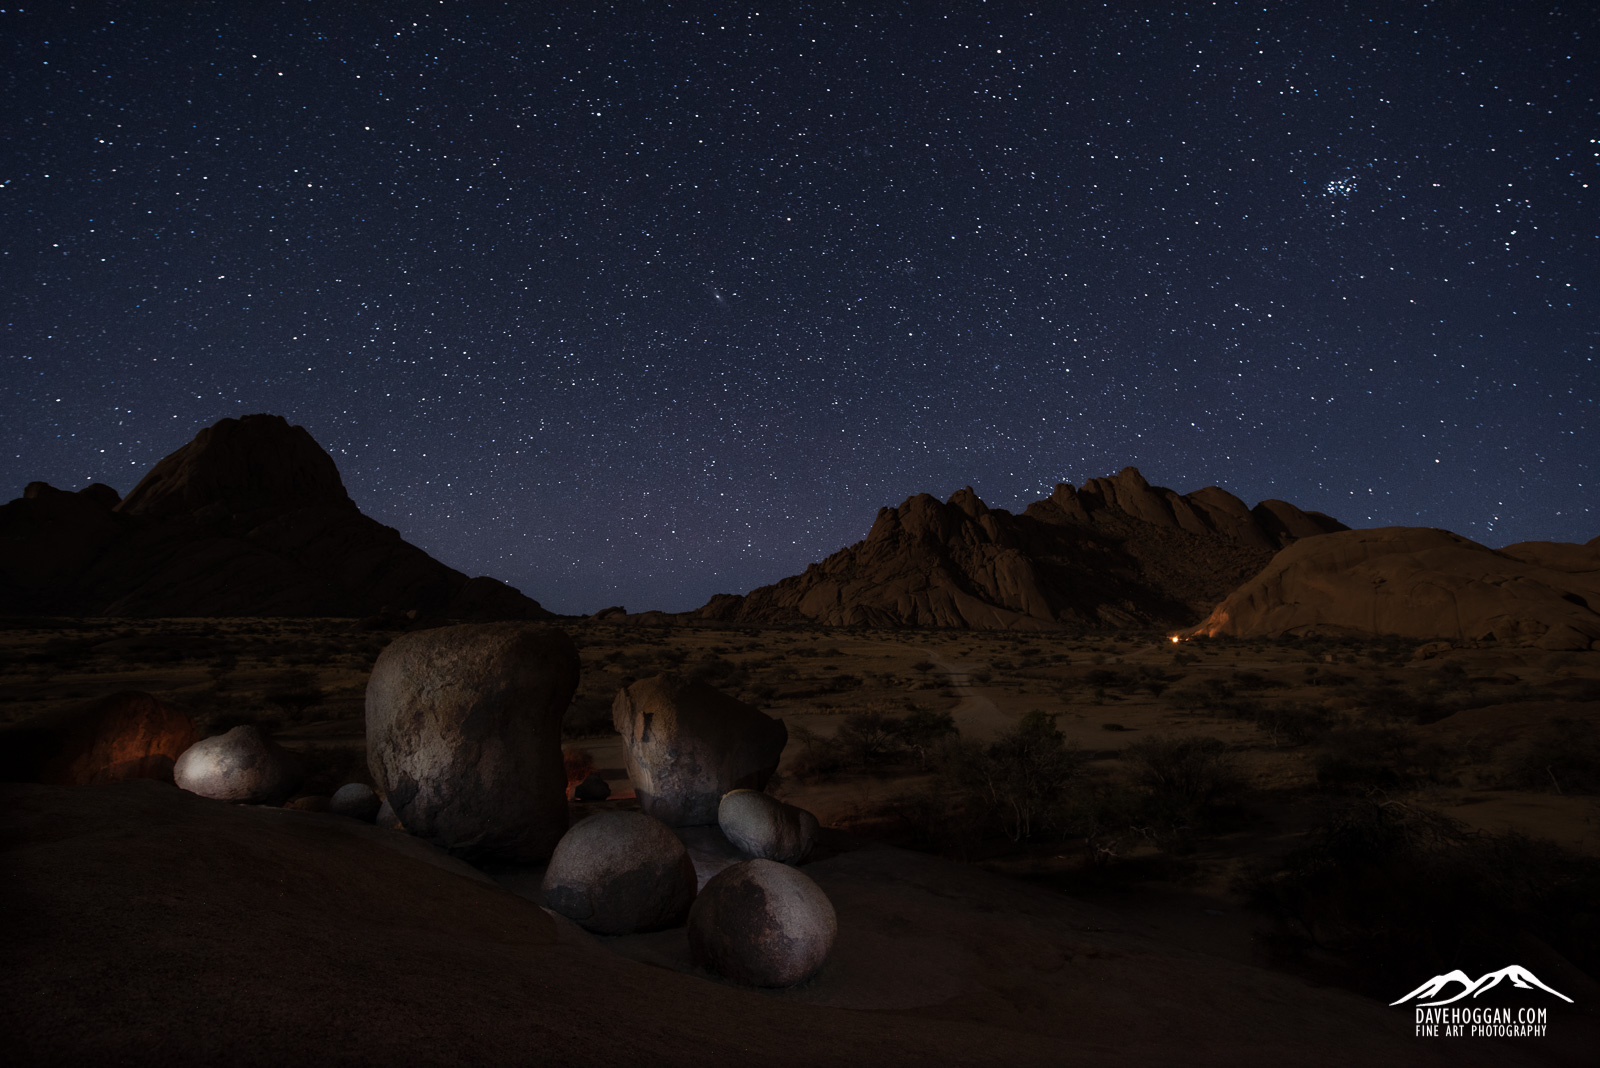
The warm glow from campfires across the plain add a nice contrast to the cool blue of the night…
After the last shoot of the trip it was time to head back and pack: Tomorrow we returned to the airport.
Day 13: Departure
After breakfast and with everything packed back in our own bags we drove the 200 kilometres to Windhoek stopping for breakfast at a Wimpy along the way. Ever since Romeo’s 24-70mm was broken back in Lüderitz Emil had been trying to sort out a replacement lens – that focal length was too important to be without and Romeo was staying in Namibia for another two week for voluntary work. So, with my not needing to be at the airport until 3:30PM and Romeo not really needing to be anywhere, we headed into Windhoek to go collect the lens that Emil had managed to find. In the end the lens cost was more than initially quoted and more than Romeo was willing to pay, but the effort had been made to try and resolve the issue which to me is the point.
The return flight was an experience in itself due to the infamous South African lightning storms but once on the flight to the UK I only remember two things: showering the lady in the set in front of me in red Namib sand as I put my camera bag in the overhead bins and sitting down. Apparently they couldn’t wake me so had to put my seat in the upright position for takeoff and, very kindly, reclined it again one in the air. That’s probably a sign of a good trip!
Conclusion
The conclusion is always the hardest part to write and perhaps the most irrelevant as by now you’ll have already made a decision based on my description above and what you have read elsewhere on the Internet. Also, as mentioned at the start of the review this was my first, proper, workshop and so cannot compare it to the various other choices you’ll have.
Over the course of 12 days we essentially had four locations: Keetmanshoop, Kolmanskop, Sossuevlei/Deadvlei and Spitzkopppe. There were other organised stops – Fish River Canyon and Sesriem Canyon for example – as well as dozens of ad hoc spots but these four were the locations where we had time to stop and think about composition and had the opportunity to return. It doesn’t sound like much but given the distance between them (hundreds of kilometres in each case) it averages out at about two days, or four shoots, each. Do I think that additional time at the locations would have been useful? Yes, for some of them. With two dawn and two afternoon/evening shoots I think Keetmanskop has plenty of time allocated. I think Kolmanslop could have an additional day giving two dawn and two sunset shoots – there is a lot there to see; individual details, the rooms and the exteriors. Again Deadvlei and Sossusvlei could benefit from an additional dawn and night shoot. We didn’t really have time to investigate Deadvlei’s little brother at night and although we could have walked up a dune for some aerial angles, it would have cost us a ground shoot. Surprisingly, being convinced the Spitzkoppe had too much time allocated to it before the workshop I now think it is about right.
Of course, following my recommendations would add an additional two days to the workshop, adding cost and perhaps meaning the workshop requires more time than some people can afford, so it is a bit of a compromise. But I would definitely take Fish River Canyon off the itinerary: Given the time of year the workshop runs you’re not going to get to the canyon floor where the great light is and thus the chances of producing anything that would be of portfolio quality is slim.
Given that I was not particularly bothered about having lessons before attending the workshop and now think that they were an excellent part of it says something about their usefulness. From knowing very little about using Photoshop I now can use layers and masks, including the very useful luminosity masks. I know now there there is more to astrophotography than simply pointing the camera at the sky and taking a long exposure. I knew this before but now I know how to shoot for astrophotography and subsequently post-process it. I know about focus stacking and exposure blending. I have left the workshops with a lot more knowledge than when I arrived, knowledge I can use on every shoot from now on.
That said, I don’t think the lessons were perfect, although my one complaint is easily remedied. I really think that something as simple as a piece of A4 paper with each step described and the commands and functions used in each step would be useful: When you’re tired or English in not your first language it is very easy to forget something from five minutes earlier. Of course the individual could write this for themselves, but steps get missed easily and then everything after that falls apart. I also think that, not spending time making so many mistakes due to missing steps and commands could have meant learning another technique. Nature’s Light seem to have taken this suggestion on board and plan to have printed material for the 2016 workshop.
But learning to clean my own camera sensors was a very useful bonus.
The critique sessions were good too although again I think they could have been more useful, perhaps because I didn’t make use of them in the best way. Given the schedule we were on I barely had time to take daily backups and do some basic keyboarding, let alone process images. Instead both Romeo and I often showed images from previous trips and ones we considered our “best”. Perhaps I should have missed every other critique session and used that time to select images to be critiqued from the trip itself. I have no answer to that.
Emil was, what can best be described as, “a machine”. Not only did he do all the driving, he was up before us – even at 2AM – to make coffee, up after we went to bed, adapted the schedule for things like my additional morning at Kolmanskop (meaning more work for him), spent time trying to organise a replacement lens for Romeo, kept on top of all the logistics of the trip and still managed to call his wife and children each day. That is no small feat and precisely the level of energy that drives a workshop to be a valuable and successful experience.
So, the question I ask myself at the end of every review: Knowing what I know now about Nature’s Light “Composing the Dunes” workshop and assuming none of it could be changed, would I still go?
The answer is a resounding yes! I left Namibia with skills that will see me develop in the future, some strong images and some unique experiences. And that, as the famous advertising slogan goes, is priceless.
Details of the Nature’s Light trip can be found here.


![The kit I took to Ethiopia consisting of the panel (top), the red cable connecting the panel and V72 battery, the black cable to connect the V72 to the camera charger and the white/black cable to connect to my MacBook Air. The car charger (bottom) also came in useful. The camera charger is not shown as it did not survive... [Click to enlarge]](http://davehoggan.com/wp-content/uploads/2015/01/IMG_0173.jpg)
![Although not part of the provided system the magnetic mount really made a huge difference - and one I recommend Voltaic Systems consider adding... [Click to enlarge]](http://davehoggan.com/wp-content/uploads/2015/01/MG_0190.jpg)
![A close-up of the panel on the 4WD showing the (home-made) silver metal magnetic mounts and the (provided) plastic loops in each corner for cable-tie mounting. The panel happily survived repeated bumps and knocks as well as being covered in dust and volcanic ash... [Click to enlarge]](http://davehoggan.com/wp-content/uploads/2015/01/IMG_0136.jpg)
![Using the ten foot cable I had a lot of flexibility as to where I put the V72 in the 4WD. All I then had to do was wait for the sun to work its magic... [Click to enlarge]](http://davehoggan.com/wp-content/uploads/2015/01/IMG_0130-2.jpg)
![Home at Erta Ale. "A compact, fully air-conditioned, one bedroom apartment backing on to a stunning panoramic landscape." it said in the brochure. It even came with free mice... [Click to enlarge]](http://davehoggan.com/wp-content/uploads/2015/01/IMG_0166.jpg)
![We relied on the Voltaic charger. Several Canons, a Fuji, two iPhones and even the quadracopter were all kept alive by the solar charger... [Click to enlarge]](http://davehoggan.com/wp-content/uploads/2015/01/MG_0701.jpg)
![The provided plastic attachments allowed the panel to be cable-tied to the shack and the cable fed inside via one of the many, many holes. The next nearest source of power was a 4WD somewhere in the distance... [Click to enlarge]](http://davehoggan.com/wp-content/uploads/2015/01/IMG_0162.jpg)
![By day three the lack of camera battery charger would have been catastrophic to the shoot and shots like this would have been missed... [Click to enlarge]](http://davehoggan.com/wp-content/uploads/2015/01/MG_1353.jpg)
