With the start of August comes the point of no return for those lucky enough to be heading for Antarctica this season. Most expedition operators require the final balance to be paid three months before the expedition and as the season opens in November, those who haven’t already paid the remaining balance will be making plans to do so now.
Once you’ve committed all that money at some point you’ll need to turn your mind to some of the other logistics such as how to travel between the international and domestic airports in Buenos Aires, differences in baggage allowances between different airlines and so on. However, at some point the same question is likely to crop up: Just what does a fashionable Antarctic-bound traveller wear this season?
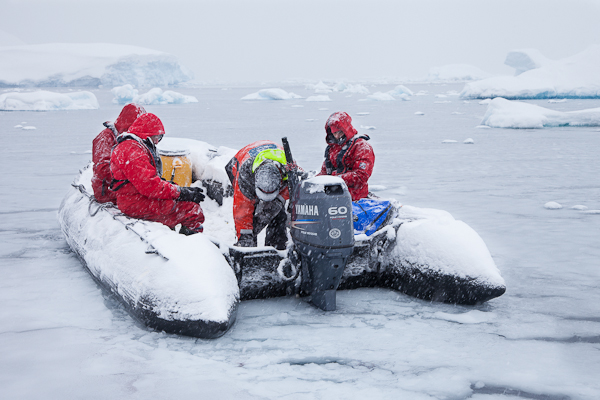
Zodiac propellers break several times a season due to ice. When they do and you’re on-board, being warm can be quite nice…
Keeping warm and dry is such an obvious requirement that I don’t see many people talking about it which can be a bit frustrating if you’ve just spent upwards of GBP £5000 on a trip and are not sure what or how much to prepare. Mention Antarctica and most people will reasonably imagine blizzards, breath that freezes as you exhale and the kind of cold that results in frostbite if skin is left exposed more than a few seconds. Which is all true, of course – just not when and where you’ll be going. First of all, expeditions only run from late Spring to late Summer when the sea ice surrounding the continent has melted sufficiently for an approach to be made. Second, even on the ‘Below the Antarctic Circle’ trips, you’re not really venturing that far onto the continent itself. In fact, look on a map of Antarctica and you may be forgiven for feeling a little let down. Don’t be – it’s stunning. In fact, were you to venture inland, without very specialist equipment and a lot of physical and mental expertise you really would end up a permanent resident. But, up on the Antarctic Peninsula, expect daily temperatures in the range of about -5C to +2C. This might be an inconvenient fact that you want to omit when telling friends of your Ranulph Fiennes-like exploration of Terra Incognita, but it does at least lend some reassurance as to not having to spend another vast sum of money on specialist clothing.
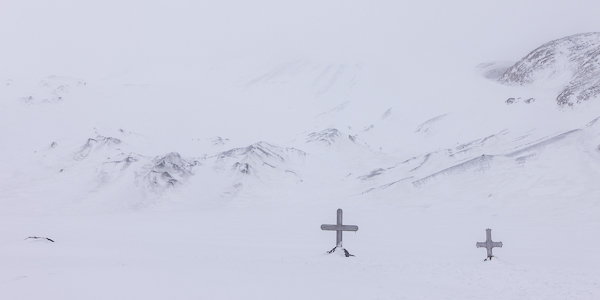
Your expedition leader is trained to ensure you don’t join these unfortunate souls on Deception Island, but being cold can really ruin your experience…
That’s not to say that you shouldn’t prepare. I didn’t want to be so cold that I hated the thought of venturing off the ship. Indeed, one of the other travellers on the trip I made was so visibly cold on one Zodiac cruise that we had to return to the ship to let him off. That would have both annoyed and depressed me had I been him as for me, like many others travelling to Antarctica, it is a one-time journey and missing out on any of it would be awful.
I spent ages reading blogs and travel sites looking for clues on the ideal wardrobe to take. It was all a bit frustrating really as many sites talked about following the layered approach to clothing, but none really got specific. For example, using base layers rich in merino wool seemed a consistently popular suggestion, but with prices ranging from GBP £35 to GBP £150 per garment, it didn’t narrow down the options much. I could go ‘cheap’ and risk the garments being not warm enough, or I could go expensive’ at the risk of needing a second mortgage. What I needed was a nice summary of items that someone on a budget had used when in Antarctic, how they had used them and what they thought of their effectiveness. That would have helped me a lot.
With the benefit of hindsight, you don’t have to go mad; many people wear ski clothing – which is fundamentally designed for a cold weather climate – and they do just fine. Others, like myself, checked out reviews on Amazon on clothing and asked friends who have an outdoorsy life if they could recommend items based on experience. So, here is the type of article that would have helped me this time last year when beginning to look for clothing.
The Outer Layers
These are designed with one purpose; to keep the rain and wind off you. They will not keep you warm. That is important as most expedition operators will offer (sometimes free) a hire of a outer jacket and trousers. Take the offer, but remember you’ll still need the mid- and base layers.
- Berghaus Gortex Jacket – I’ve had this jacket for almost twenty years and it’s been everywhere with me. It, and the equivalents from North Face and the like will be perfectly fine, but if you do not have one do not worry as the one offered by the expedition operator was perfectly fine and no one had any complaints of them.
- Thinsulate Beanie Hat – invaluable for warmth when under the jacket hood, especially on the Zodiac journeys.
- Outdoor Research Meteor Mitts – wonderful photographer gloves. In essence these are an outer layer and a mid layer in a set. As the name suggests, these are mitts as opposed to gloves which has the benefit of allowing your fingers to stay together for warmth. In situations where wind or rain could be an issue, such as the Zodiac journeys to and from landing sites, I’d keep the outer water- and windproof layer on. Other than this I’d take the outer layer off. The beauty of these mitts for photographers is that the finger and thumb sections of the fleece mid layer fold back revealing the top half of your digits and allowing you to operate fiddly camera settings. I also wore merino wool glove liners so my fingers were never totally exposed. This combination allowed me to keep shooting for hours with no discomfort. There’s even a pouch on the mitt for a chemical heat sachet such as the Little Hotties brand. I love these gloves, but had to buy them on eBay as, at the time, there were no UK distributors.
- Insulated Gum Boots – provided by the expedition operator. Others had their own boots, and for those who went skiing , ski boots were an option. I just took the standard, free offering was toasty warm when combined with my mid and base layers.
- Waterproof Salopettes – provided by the expedition operator. I did actually purchase a pair of waterproof trousers prior to the trip, but the provided ones were really quite good and so my pair never got used.
I would just re-iterate the need keeping your head warm as much as everything else. Woollen ski hats were worn by many and they were just fine. Again, the weather conditions will be similar to the average ski resort, just you’ll be travelling on the sea several times a day.
The Mid Layers
These add additional warmth control to the base layers and usually come with a zip to allow control over how much heat escapes. Mid layers are (usually) worn as a single item on each part of the body. If you’re worried about keeping warm, just double up on the base layers in the next section.
- Berghaus Polartec 100 Fleece – Most fleeces you’ll find in this category are pretty much similar and so I bought one could zip into my outer layer effectively creating a dual-layer item. I never used it this way as I’d keep the fleece on when on-board. So, any decent fleece will do, just not one designed more for fashion than function.
- Jeans – Yep, normal jeans. To be honest, so good were the base layers and the provided waterproof outer layer that when out-and-about off the ship I didn’t bother with these on excursions and simply wore two base layers and the salopettes and changed out of the salopettes into jeans upon my return to the ship.
The Base Layers
These are designed to provide basic warmth and to quickly wick sweat away from the body before it can cool down and cause problems. In truth I doubt you’ll be sweating much in Antarctica – aside from the coolness of the climate, you don’t really exert yourself too much.
- 2 Endura BaaBaa Merino Base Layer – recommended by an mountain biking fanatic at work with the added attraction the these merino wool tops come in on the lower end of the price scale (around GBP £40 at the time). They did a fine job of keeping my upper body warm. In fairness I usually wore one of these Endura base layers, with the Tog 24 zipped top as an additional base layer. How may you wear will depend on how easily you feel the cold.
- 2 Tog 24 Arctic Zip Neck Base Layer – Costing about GBP £10 each on Amazon and quite well rated I purchased these to wear when the merino wool tops needed to be washed. In the end I wore them on top just to add warmth. This way I was able to lie motionless for thirty minute or so on ice and snow with no discomfort. So that has to be a recommendation!
- 2 Trekmates Merino Long Johns – Wore both pairs at once and never felt cold – sometimes cool maybe – but not cold.
- 2 EDZ Merino Liner Gloves – These are thin gloves that work really well under bigger, bulkier gloves. For me they were bought to keep the chill off my fingers when photographing and coupled with the fold-back OR Meteor Mitts above they did a really good job.
- 4 Sealskinz Thermal Liner Socks – I wore these merino wool socks under the walking socks below and did they keep the provided gumboots fitting comfortably, they kept me toasty.
- 4 Kirkland Merino Wool Blend Walking Socks – At GBP £20 for four pairs these border on sounding too cheap to be any good – certainly compared to the prices I’ve seen in outdoor sporting goods stores. Obviously, a two week trip is not going to test their build quality, but from the warmth perspective, they did just fine.
- Sub Zero Meraklon Thermal Neck Tube – This was much appreciated on some of the Zodiac cruises as it allowed me to my neck warm and added another layer below my beanie. I could have lived without this, but it wasn’t expensive and certainly didn’t make me uncomfortable.
The other issue I had was just how much clothing to take. The average Antarctic voyage is between 10 and 14 days and so I started with the notion of a change of clothes for each day. This idea very quickly disappeared when I adding up the cost. Luckily all the ships have an on-board laundry and so you can quite easily get items washed with a good turnaround time – on the Akademik Ioffe it was under a day, but larger vessels may take slightly longer.
The idea of taking less clothing will appear even more when you look into the practicalities of travelling down to Ushuaia – namely that the domestic airlines that carry you between Buenos Aires and Ushuaia (where you board the ship) officially has a 15Kg per person baggage allowance. They often waive that, but be prepared to have to pay extra.
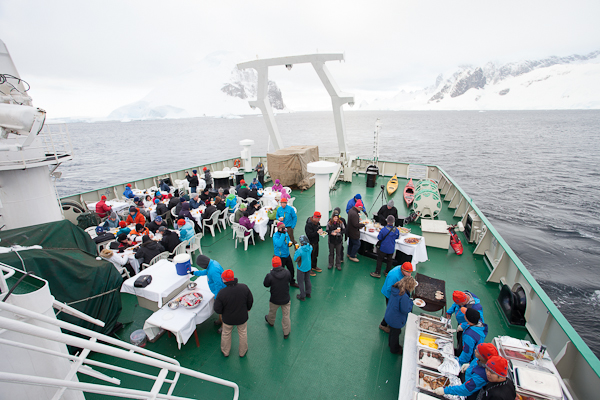
Don’t worry, you don’t eat outside every night, but you simply cannot go to Antarctica and not have a BBQ…
At this point, it’s worth mentioning that one of the benefits of natural fibres such as merino wool is that they’re very good at avoiding odours and this, coupled with the fact that I didn’t sweat when out and about meant that I could wear the same layers two or three times with no issue whatsoever. With a typical voyage to Antarctica of 12 days, this option, coupled with the on-board laundry, means that you can get away with three outfits. If you are in the same situation that I was and have no suitable clothing, the thought of only having to buy three outfits really is appealing.
I do hope that the above helps someone looking to travel to Antarctica, or maybe the Arctic, and who is trying to work out what and how much clothing they need to take. If you have ski clothing already then that’ll be fine, but if you do not, the above is field-tested by me 🙂
PS: If you are going, when you are given the chance to send postcards home, send one to yourself. You’ll regret it if you don’t!