Category Archives: Hints and Tips

Power on Location: Part 3 – Battery Packs

Every time I see a photographer using an old film camera it makes me smile. It doesn’t happen often – seeing a film camera that is, not smiling – but it does make me wonder about their reasons. The love of the art of photography perhaps, or maybe they’re after some ‘feel’ to the image without reverting to Photoshop? Perhaps one day I should stop and ask. Film cameras are, of course, extremely limited when compared to the capabilities of today’s DSLRs in virtually every respect. Except one: they don’t need to be constantly fed power.

Of course, depending upon the style of photography you pursue power may not be an issue. A healthy DSLR battery in normal conditions can usually cope with 700-1000 shutter operations and as long as you don’t make heavy use of live view, picture review or image stabilisation then a single battery may easily cope with a day’s shooting. Carry a spare or two and charge them back in the hotel room overnight and power will not be on your shoot’s “risk register”. But what if you don’t have a room to go back to – have no mains power at all? What if you do need to shoot video, use live view and stabilisation? What if you are not shooting in ‘normal’ conditions? How do you keep a ready supply of power then?

Power on location has become a bit of a crusade for me and I have written about it before when first looking at the Voltaic Systems’ Solar Charger and in my detailed Voltaic Systems’ 17W Solar Charger Field Review. But as I prepare for two upcoming trips – the uninhabited island of Batu Tara, Indonesia and central Siberia – I’ve been spending more time researching my holy grail – a reliable, capable, easily transportable power source. And I have learnt some interesting facts which may be worth sharing as they help demystify the confusing world choosing a battery pack.

Whilst this article does have a slight photographic angle it is equally applicable to choosing a battery pack for any purpose.

Identify Your Needs
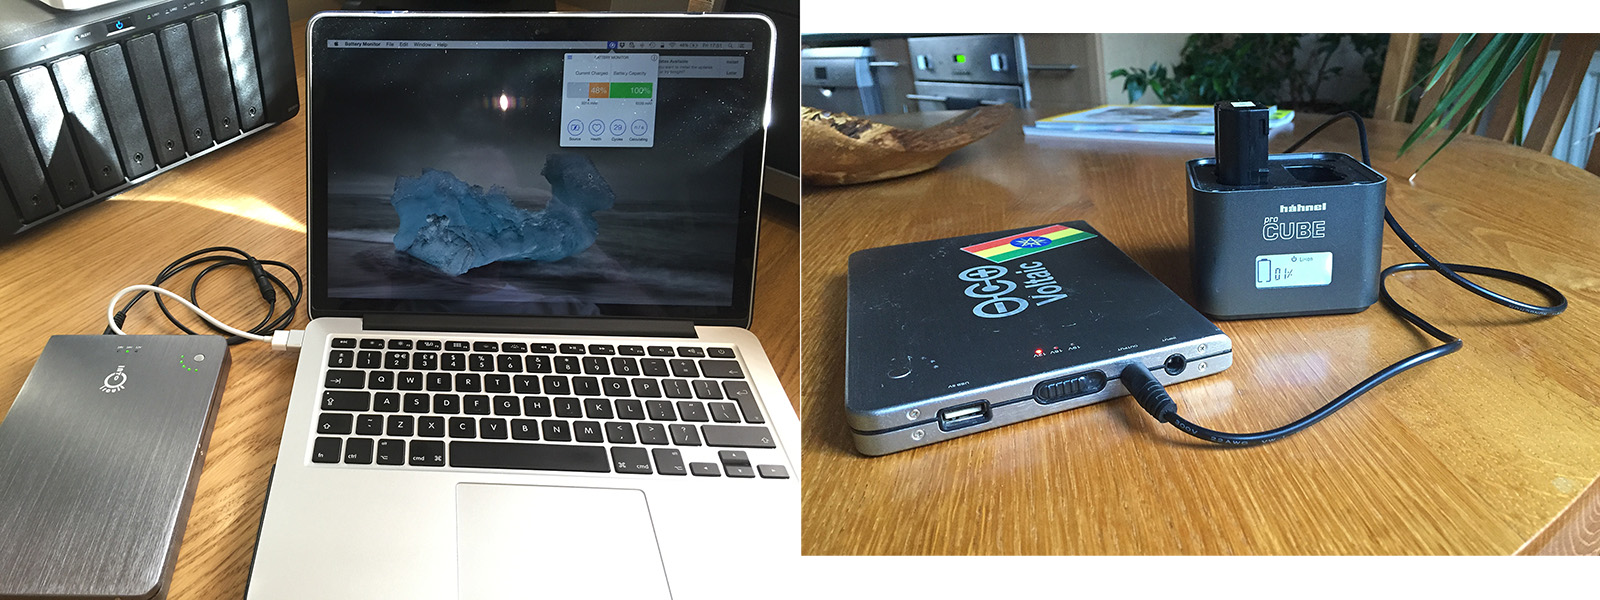
My two primary use cases for power on location; charging the laptop and charging my camera batteries.

My two primary use cases for power on location; charging the laptop and charging my camera batteries.

Perhaps obvious but worth mentioning is that what you want to keep powered on location will dictate the kind of solution you will need. Before travelling to Ethiopia I knew that I wanted to be able to charge not only my DSLR batteries but also my travel laptop and so the solution that I needed had to have the ability to provide 12V for the DSLR and 16V for the laptop. But once on location other requirements were discovered; my smart phone (for quick videos) and someone’s drone batteries, meaning that the more standard 5V USB port was needed. Given that most battery packs are USB only I could eliminate a lot of options very quickly.

If you have ever looked at battery packs on Amazon or similar web sites you’ll notice that they are almost always rated by their “mAh” or milliampre-hour value and it is human nature to assume that the bigger the mAh, the more you can charge with the battery pack. And if you are only looking at charging USB devices then you would be right. Well, that 26000mAh battery pack still won’t really be 26000mAH, but at least it will still be more than the 20000mAh one – which will also not really be 20000mAh. But, if you are looking at charging more than USB devices, for example camera batteries and laptops, mAh suddenly becomes far less useful and even downright misleading.

The Science Bit: The Watering Can

In simple terms any battery has three aspects that are relevant to us: the output voltage it can supply (measured in volts), the electrical current (measured in amps) and total power capacity (measured in watts). Like the relationship between ISO, stutter and aperture, volts, amps and watts are linked such that a change in one has to be reflected by a change in (at least) one of the other two. The equation that links watts, volts and current is very simple:

Watts (W) = Current (I) * Volts (V)

Equations tend to put people off, as does talking about current, volts and watts so a typical analogy may help: a garden watering can.

Every watering can has a capacity – it may be large or small but it can only hold a finite amount of water. In the same fashion a battery pack has a finite capacity for storing electricity. The capacity of a watering can is usually measured in litres (or pints); the capacity of a battery pack is measured in watts (W), or more specifically watt-hours (Wh).

The flow rate at which the water leaves the watering can’s spout represents electrical current. If you were to fill a cup from the watering can, it would take a long time if the water only dripped out but be very quick if the water gushed out. In the same way, electrical circuits require an amount of power to be supplied to them; just how much is their flow rate and delicate electronics usually require very low flow rates. The battery pack’s flow rate is termed its “current” and is measured in ampres per hour (Ah), or thousandths of an ampre per hour – mAh.

Voltage is a like the force or pressure of the flowing water. Imagine water pouring out of the watering can’s spout onto the earth. If the spout is simply the open end of a tube then the water is concentrated in one spot and it hits the earth with some force likely pushing the earth aside making a small hole. If you attach a sprinkler head to the water spout the water is spread over a larger area and it hits the earth with less force. In the same way a lot of water in one spot can make a dent in the ground, too much voltage can damage electrical circuits.

Ultimately what is important to us is the capacity of the battery pack as this directly determines just how much stored power we have for charging our camera batteries, phones, drones and laptops. And, as mentioned, stored power is measured in watt-hours. So when choosing a battery pack the value we are really interested in is not amps or millamps, but watts.

Now I promise this is the last of the watering can analogy. A full can could be emptied in one go or gently poured out – in other words how long the stored water lasts depends upon how quickly you use it. Power stored in battery packs is usually given in watt hours (Wh) meaning a 72Wh battery can provide 72 watts for one hour, 144 watts for 30 minutes or 1 watt for 72 hours. So how long it lasts depends upon how much power the connected device is using and that is a function of the voltage the device requires and the current it is drawing.

In the same way that watts can be expressed as watts per hour, amps can be expressed as amps per hours. So 10000mAh means that over a one-hour period 10 amps will flow; equivalent to five amps per hour for two hours and so on. But there is one crucial difference between watt-hours and ampre-hours: ampre-hours only measure the flow of power, not how much power has flowed. Knowing the mAh rating is all well and good but it does not tell us the actual capacity of the battery.

So, why then, when shopping for battery packs do manufacturers almost always rate their products in amps?

Lies, Damned Lies and Advertising

The best way to demonstrate why using the mAh can be misleading is by an example. I have picked the Maxoak battery pack below only because it is in my Amazon shopping basket and it actually – if perhaps inadvertently – attempts to be somewhat honest about the battery’s true capacity.
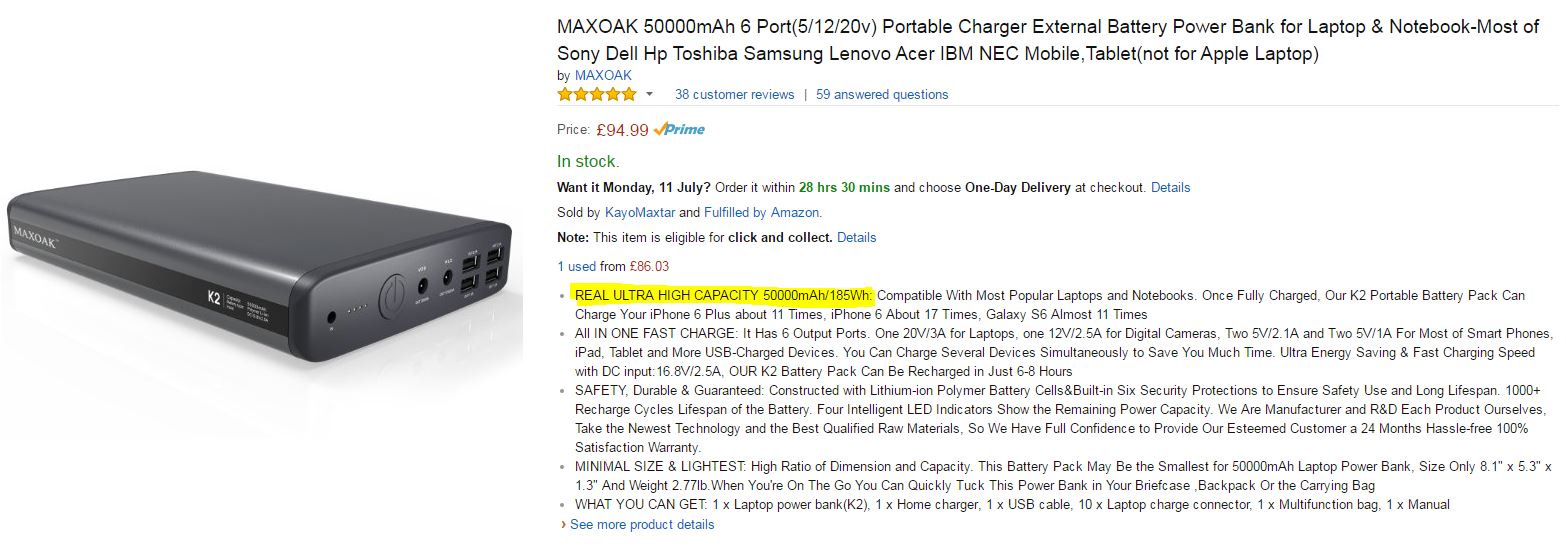
Some battery pack manufacturers provide the watt-hour capacity of their product which is much more useful than the mAh value.

Some battery pack manufacturers provide the watt-hour capacity of their product which is much more useful than the mAh value.

The obvious selling point of this battery pack is its 50,000mAh rating. If you were looking for a high capacity pack, this would be very hard to ignore. My Macbook Retina Pro 13” laptop has a rating of 6559mAh so in theory I can charge it about eight times from this battery pack. The maths is simple but do you really believe the result?

From the equation above we know that the actual capacity of a battery is the current – here 50 amps – multiplied by the voltage. The problem is this battery pack lists three voltages, so which one do we use?

Unlike many advertisers Maxoak actually provide the watt-hours capacity, here highlighted in yellow, but now things get a bit more interesting. It states a watt-hour capacity of 185Wh; if you put these values into the equation we get:

185Wh = 50000mAh * 3.7V

So, where did 3.7V come from? The advertised voltages are 5V, 12V and 20V. Something does not add up.

Single Cell Equivalency: A Universal Standard

As I am no expert on battery technology I will defer to Wikipedia:

A “cell” is a basic electrochemical unit that contains the basic components, such as electrodes, separator, and electrolyte. In the case of lithium-ion cells, this is the single cylindrical, prismatic or pouch unit, that provides an average potential difference at its terminals of 3.7 V for LiCoO and 3.3 V for LiFePO. A “battery” or “battery pack” is a collection of cells or cell assemblies which are ready for use, as it contains an appropriate housing, electrical interconnections, and possibly electronics to control and protect the cells from failure. In this regard, the simplest “battery” is a single cell with perhaps a small electronic circuit for protection.

So it appears that the Maxoak battery pack is using the voltage rating of a single cell, not of the voltage output by the battery. If it were possible to task the Maxoak battery pack with providing 3.7V to a device then it could (theoretically) provide 50 amps for one hour, or a more realistic 0.5 amps for 100 hours. The problem is of course that you can’t attach a 3.7V device; it provides 5V, 12V or 20V. Given that the capacity of the battery at 185Wh is fixed then using the rated voltages (and ignoring internal losses due to voltage conversion) we get:

185Wh = 37000mAh * 5V

185Wh = 15417mAh * 12V

185Wh = 9250mAh * 20V

Which is a big difference. Suddenly the mAh figure used by so many battery pack manufacturers is a little less meaningful as it depends upon the voltage requirement of the device being powered. What the manufacturer is doing is stating the theoretical current output of their battery pack as if it were a single cell. This is called Single Cell Equivalency, or simply SCE, and is very common.

Unless a manufacturer of a battery pack states otherwise then it is probably wise to assume that the mAh value they proudly claim for their product is based upon supplying a 3.7V load – the SCE. And, given that the vast majority of battery packs aim to provide a 5V USB for phones, tablets and, well, anything else USB, then you can see that the advertised mAh value is already a little meaningless as that 20000mAh (at 3.7V) battery pack is now only 14800mAh (20Ah * 3.7V = 74Wh / 5V = 14.8Ah).

Knowing about the SCE is really quite useful as it allows you to get a better idea as to the true capacity – the watt-hours – of a given battery pack.

Real World Examples

Above I mentioned that, even for USB-only battery packs, the advertised mAh is probably not what you will end up getting. This is simply as the USB port provides a 5V supply and the mAh rating is likely based on the SCE voltage of 3.7V. If we assume that there are no losses from the process of voltage conversion then we get:
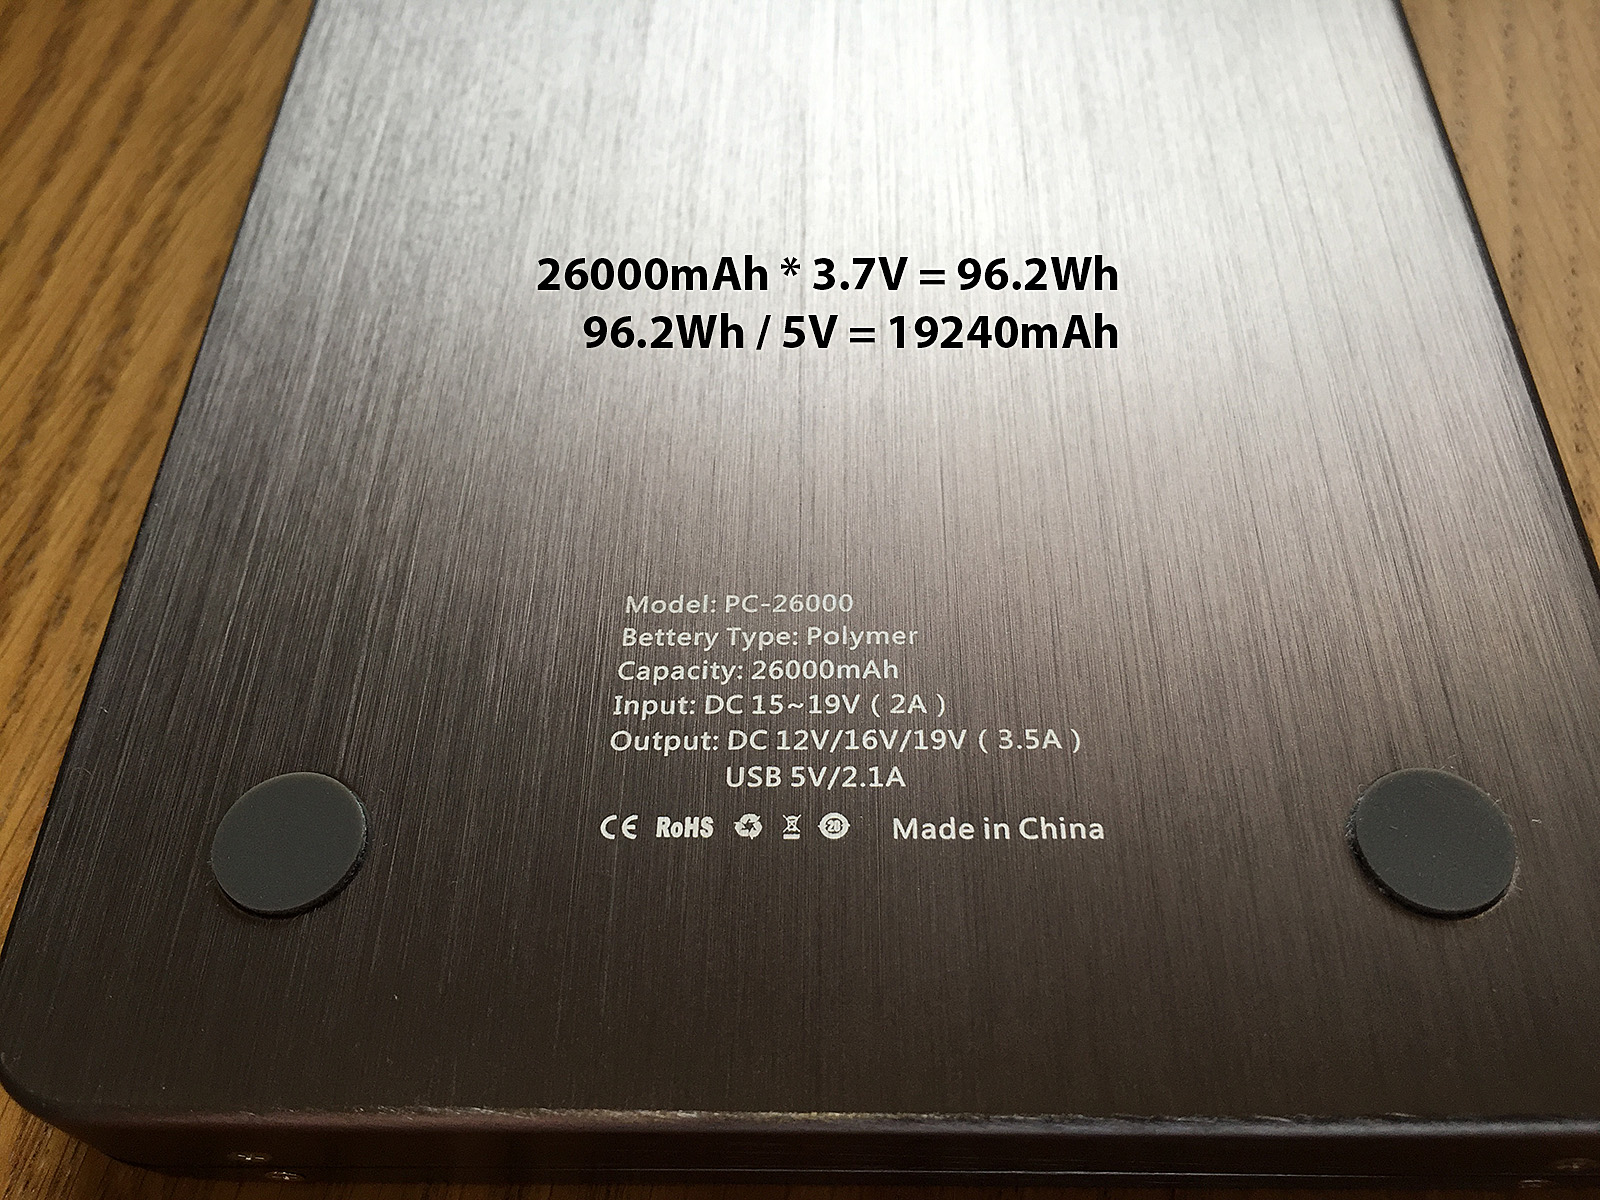
The Intocircuit battery pack specifies a 'capacity' of 26000mAh, but this isn't really what you get. It is not a lie, but, like most other manufacturers, they are using an industry standard that you won't be.

The Intocircuit battery pack specifies a ‘capacity’ of 26000mAh, but this isn’t really what you get. It is not a lie, but, like most other manufacturers, they are using an industry standard that you won’t be.

Our 26000mAH pack is now only 19240mAh. But there will be energy losses due to conversion. Depending upon the internal design of the battery pack its native voltage will be a multiple of 3.7V and the process of turning the native voltage into USB’s 5V requires some kind of circuitry such as a boost convertor. This type of conversion is inefficient and whilst I have no concrete evidence I have seen a figure used in a couple of articles: 30%. If we use this figure then we get a 5V USB mAh of 13468mAH, enough to charge an iPhone 6 (SCE 1810mAh) about seven times.

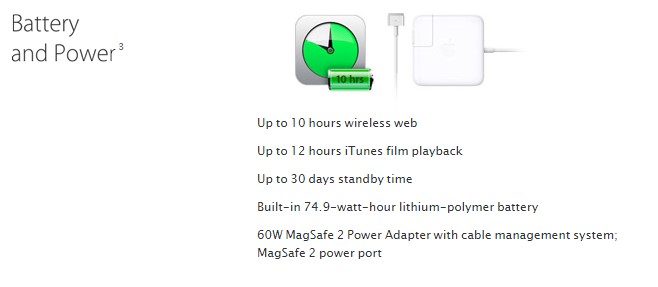
Going back to my Macbook and its 6559mAh capacity we now know that we really need is the watt-hours capacity of its battery which, according to Apple’s web site is 74.9Wh.

Apple are helpful in that they specify the watt-hour (Wh) of their devices.

Apple are helpful in that they specify the watt-hour (Wh) of their devices.

The Maxoak could therefore theoretically charge the MacBook twice with a bit left over, although again this is just the raw arithmetic without accounting for internal losses due to voltage conversion and other considerations. Assuming a 30% for conversion reduces this to approximately 1.7x charges for the MacBook.

More relevant to photographers is the camera battery which, in my case, is the Nikon EN-EL15. Like Apple, Nikon helpfully provide the watt-hours value on the battery casing itself:
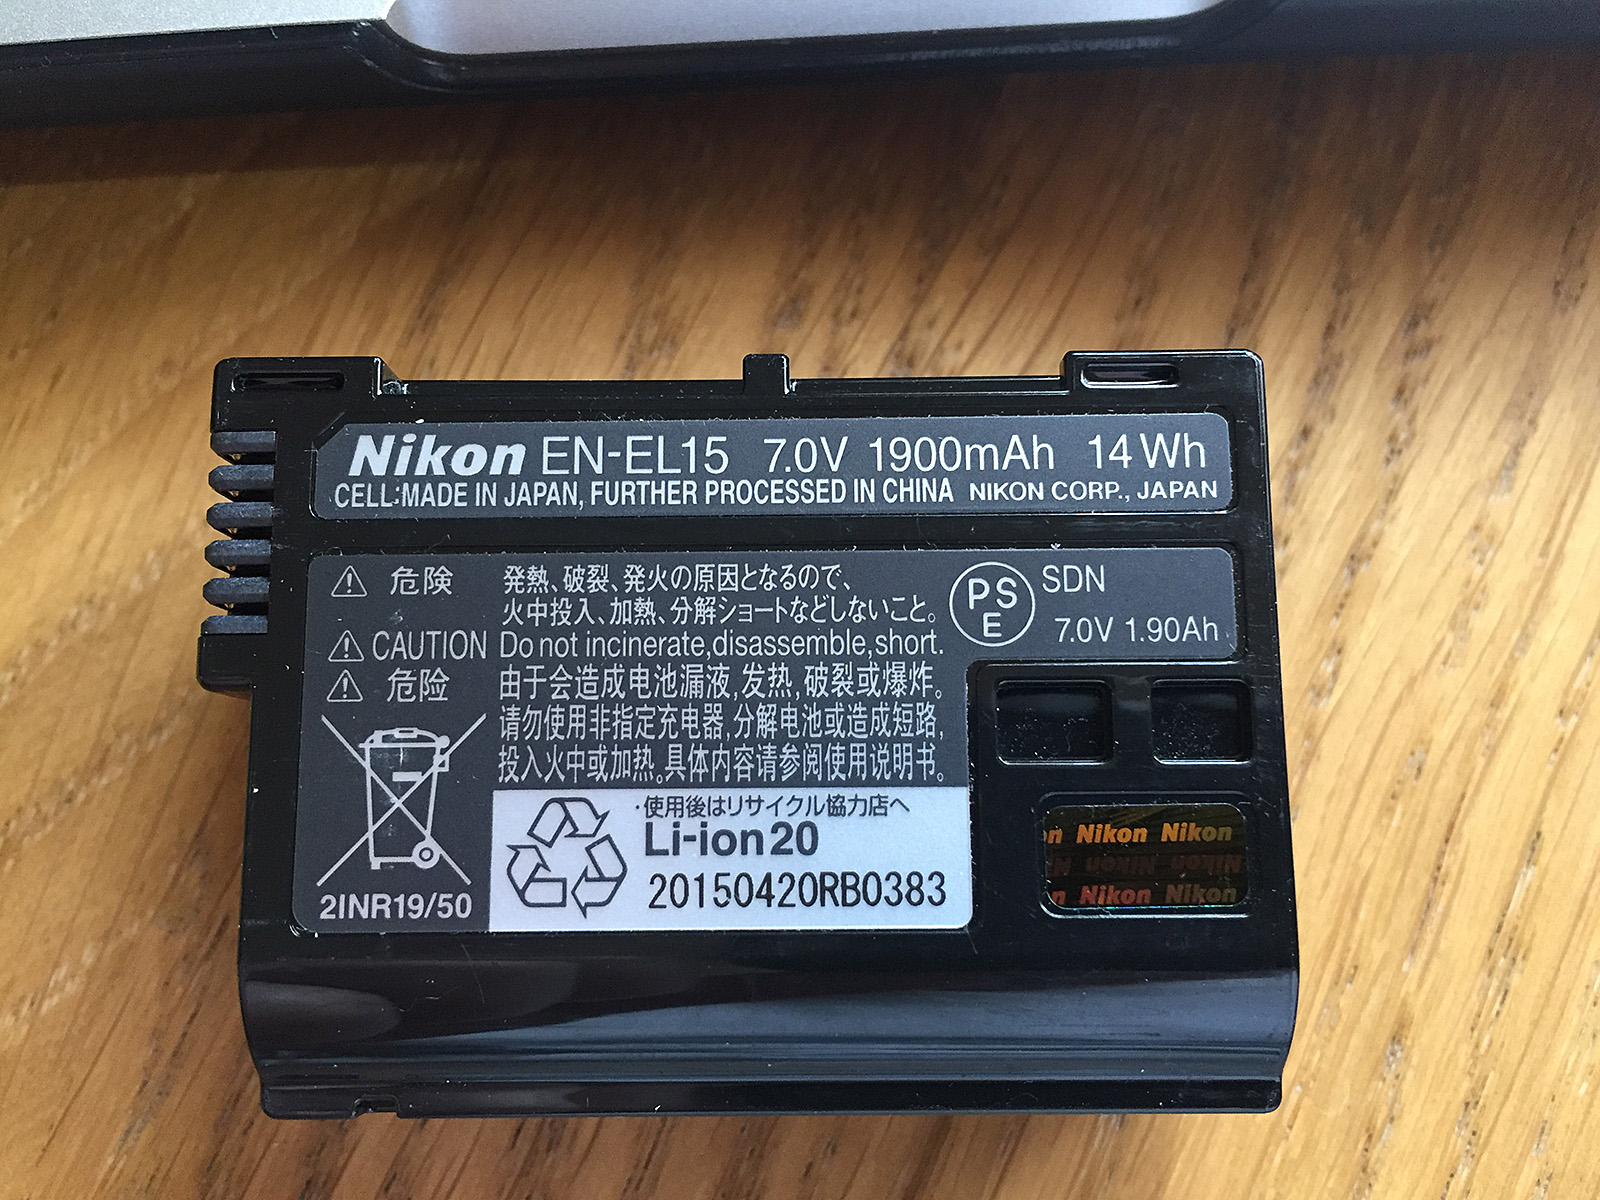
Here the Nikon EN-El15 specifies the watt-hour capacity from which we can calculate the single cell equivalency as 3780mAh.

Here the Nikon EN-El15 specifies the watt-hour capacity from which we can calculate the single cell equivalency as 3780mAh.

This is a more tricky example as, whilst the Nikon battery is a 7V battery pack the Hahnel battery charger I use for it specifies a 12V input. But I was curious to find out anyway.
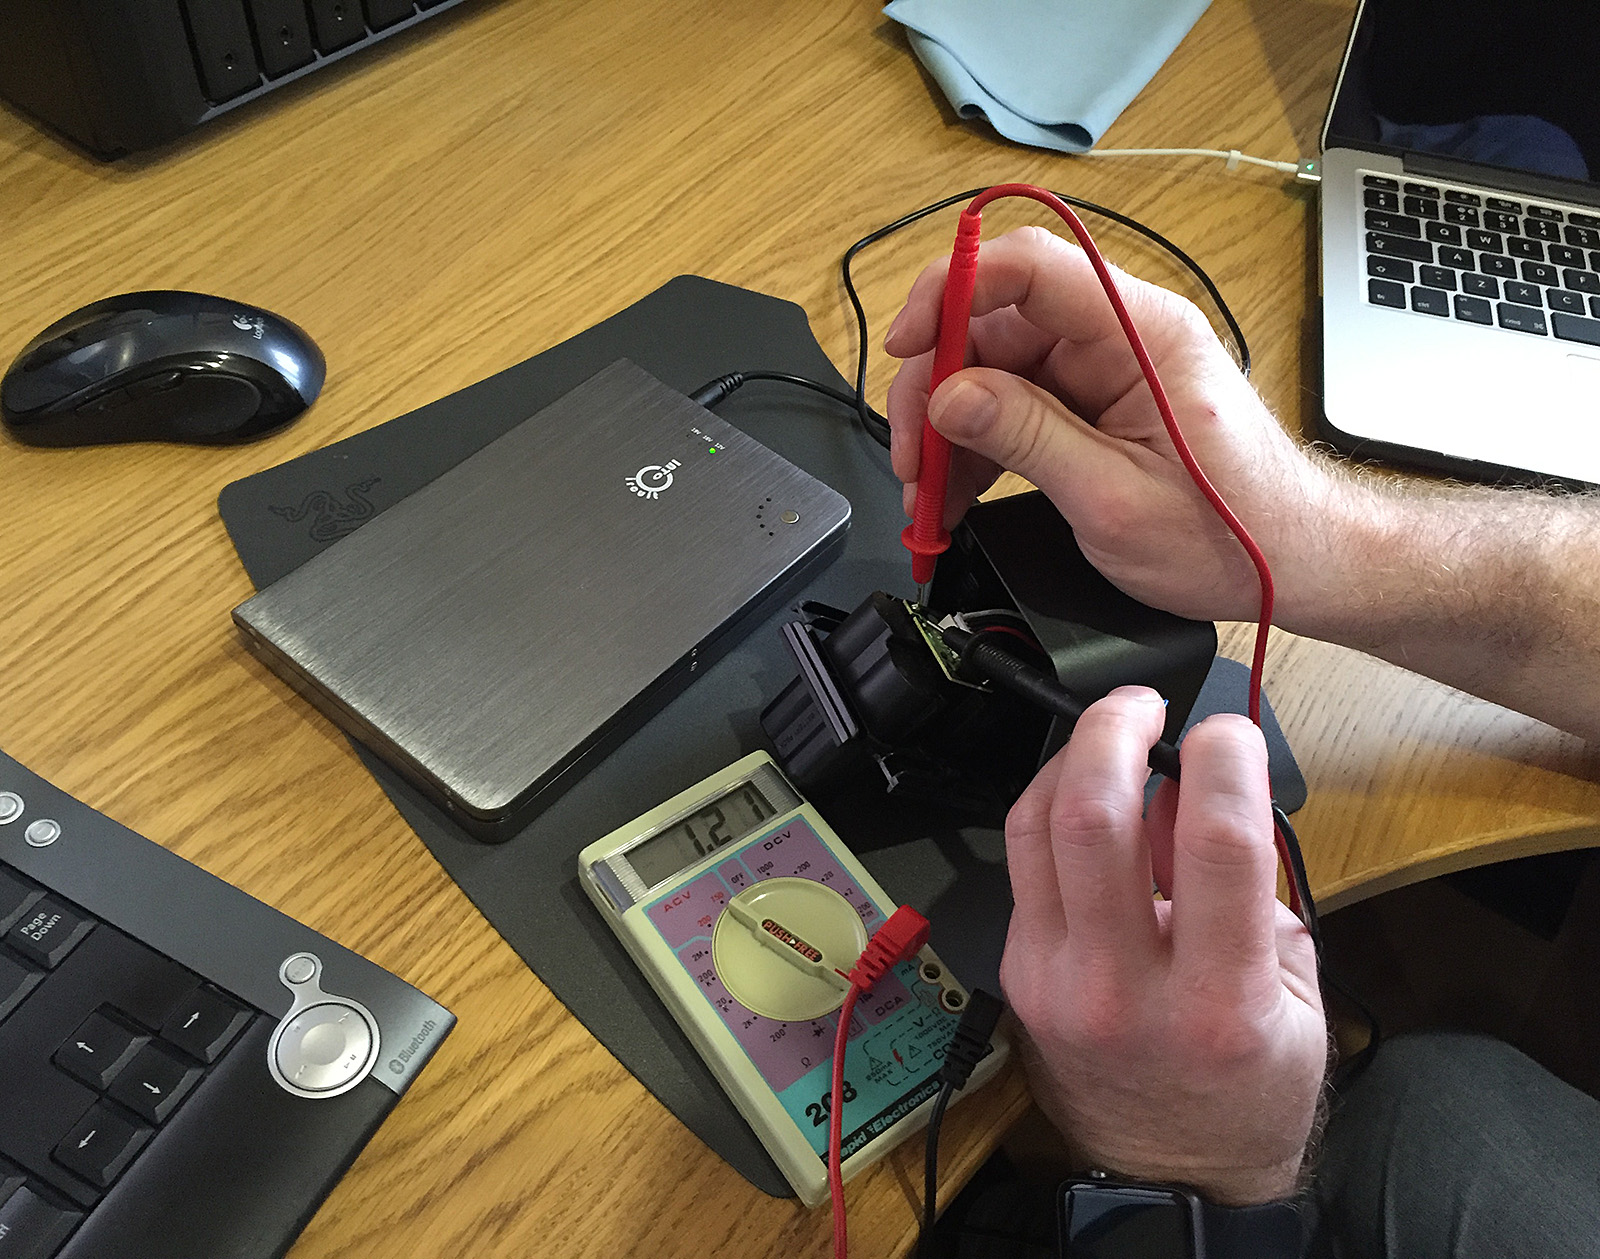
So what does the 7V Nikon EN-EL15 battery draw when charging from a 12V Hahnel charger? 8V at 1.2 amps. apparently.

So what does the 7V Nikon EN-EL15 battery draw when charging from a 12V Hahnel charger? 8V at 1.2 amps. apparently.

When charging a single Nikon battery I measured a 8V draw at 1.2 – 1.3 amps. I would not put any emphasis on these values as “intelligent” battery chargers vary the supplied current throughout the charging process. So let’s try our basic equation:

Allow for Conversion Loss:               26000mAh * 0.7 = 18200mAH

Nikon EN-EL15 SCE:                         14Wh/3.7V = 3780mAh

Theoretical Number of Charges:     18200/3780 = 4.8

If we believe the rudimentary maths my 26000mAh battery pack should charge 4.8 EN-EL15 batteries. I have so far managed just under three charges from the battery pack and there are still 2/5 LEDs lit so we might be in the right ballpark.

One final note is that all the above is assuming that the environment is not a factor. If the surrounding ambient temperature is significantly higher or lower then this will also have an effect of the number of charges as it affects the battery chemistry.

There’s Just One More Thing

Remember the 50000mAh (SCE) Maxoak battery pack above? It is attractive and despite the 50000mAh not really being what we have available it is has more capacity than a 26000mAh (SCE) battery. But there is a reason it is still in my Amazon shopping basket and not in the camera bag.

After a few incidents involving lithium batteries on aircraft the International Airline Travel Association – IATA have issued an advisory on the passenger transport of lithium batteries, both in cabin and hold luggage. The jist of the advisory is that the maximum capacity lithium battery that can be carried is 150Wh. The Maxoak is 185Wh.

Could I get away with it? Yes, probably. Do I want to risk losing the one power source I will be depending upon when on location and nowhere near mains electricity?. No.

Conclusion

A lot to consider when making what should be a simple decision:

  • That battery pack rated at 26000mAh (or whatever) is, unless stated otherwise, most likely the SCE value, not what you actually will get.
  • The battery pack will also have to do some internal voltage conversion which incurs power losses due to inefficiency. The loss may be about 30%.
  • If you want to approximate how much you can charge with a given battery pack, you will need to know its watt-hours (Wh) rating and the single cell equivalency (SCE) of both it and the device being charged.
  • Airlines tend to follow IATA’s guidelines permitting a maximum battery capacity of 150Wh, so bigger might not be better for you.
Also posted in Review Tagged , |

Gitzo Maintenance

The Jigsaw 1600px

There are certain sounds – blood curdling sounds – that should only ever be heard on the soundtrack of a horror movie. Certainly never from a tripod. But, after two weeks in the majestic sand dunes of the Namib desert, I’ve managed to turn the silky smooth, whisper-quiet operation of the leg locks on my Gitzo into an unholy grinding noise that make me wince every time I even think about using the tripod.

Now, I am a firm believer in the “Don’t buy it if you’re afraid to use it” philosophy. A tripod is a tool and if the means it gets soaked in the salty waters of the Greenland Sea, covered in Pele’s Hair from a volcano or sand from the Namib desert, well so be it. But there is a price to pay and, as any photographer will tell you, a good tripod is not a casual purchase. So, faced with the choice of ruining an excellent tripod, or not using it at all, it’s time to clean the tripod!

Now ordinarily I wouldn’t have bothered writing an article about this but a recent conversation on Facebook suggested that some may be apprehensive about pulling apart their beloved and costly tripod for fear of breaking it. As not maintaining a tripod will have worse consequences my hope is that this article will provide some reassurance that it is a fairly simple process.  Of course, if you have any doubts then it would be best to seek a professional: Or, in other words, I’m not responsible it you break it.

Disassembly

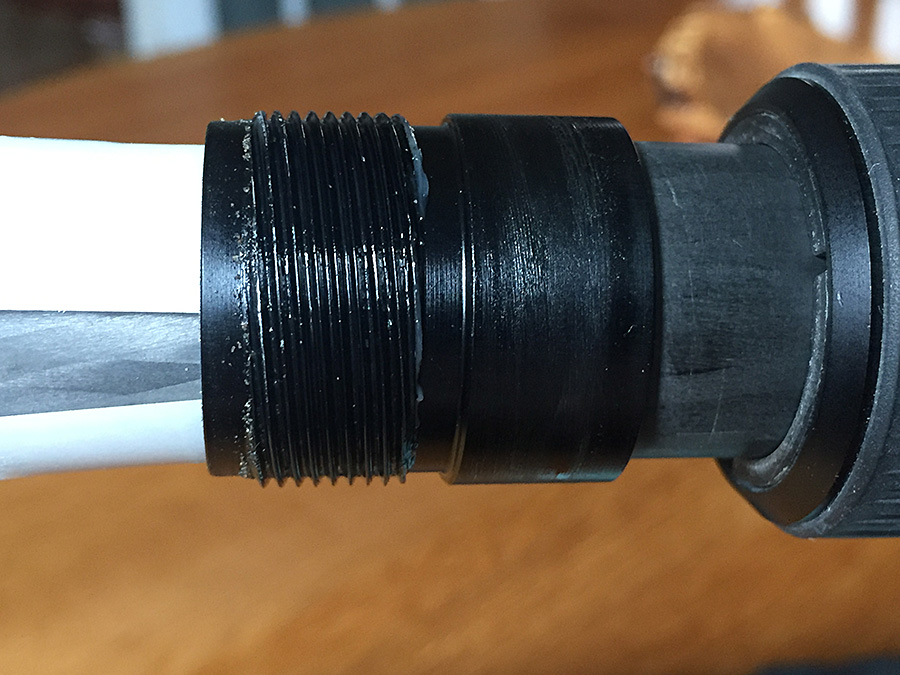
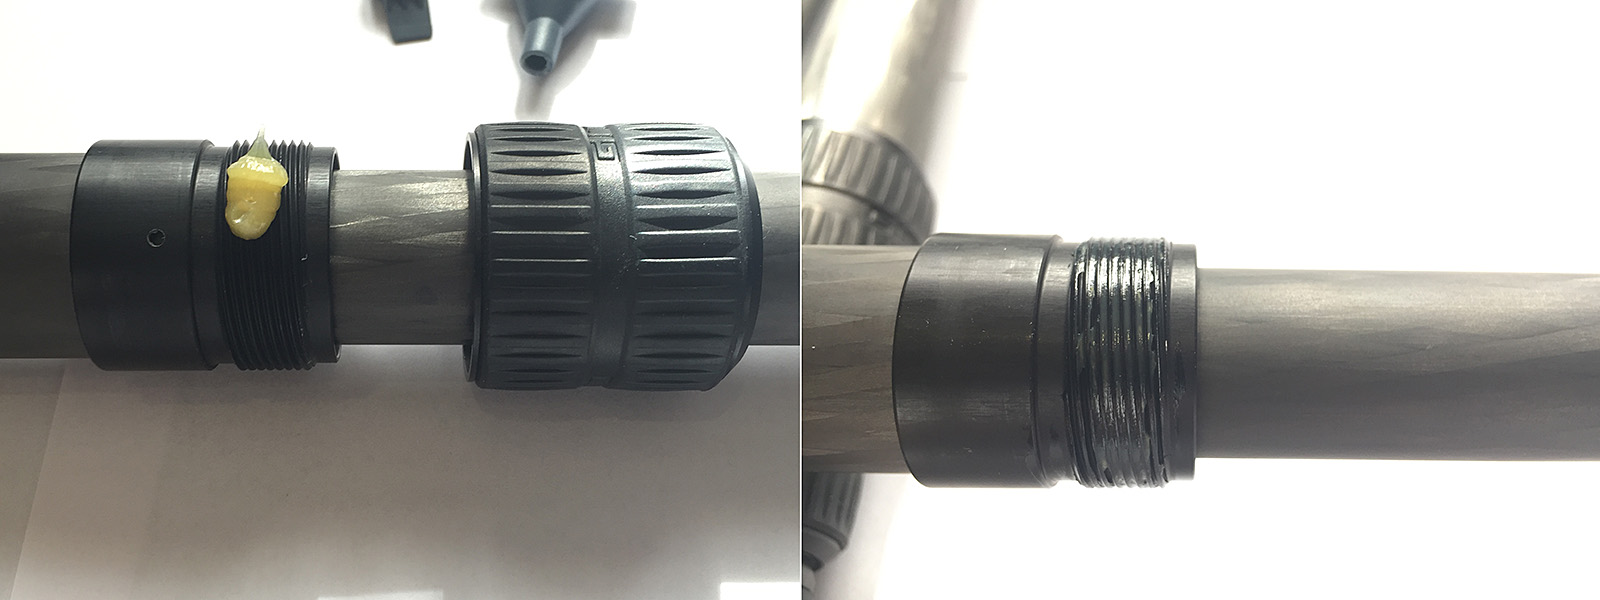
Upon unscrewing the first leg lock things don’t look too bad. There is some sand in the grease but no damage to the thread, which is the real concern:

Minor Grit 900px

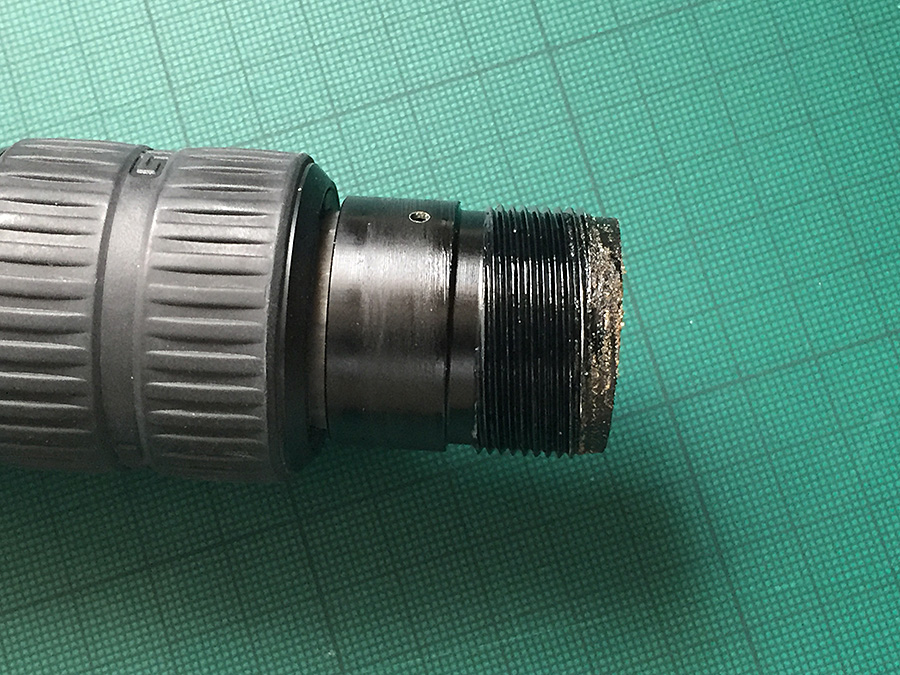
But as I work my way through each leg lock, things do get worse. Here sand is in the threads themselves and has already started grinding the black anodised coating away:

Major Grit 900px


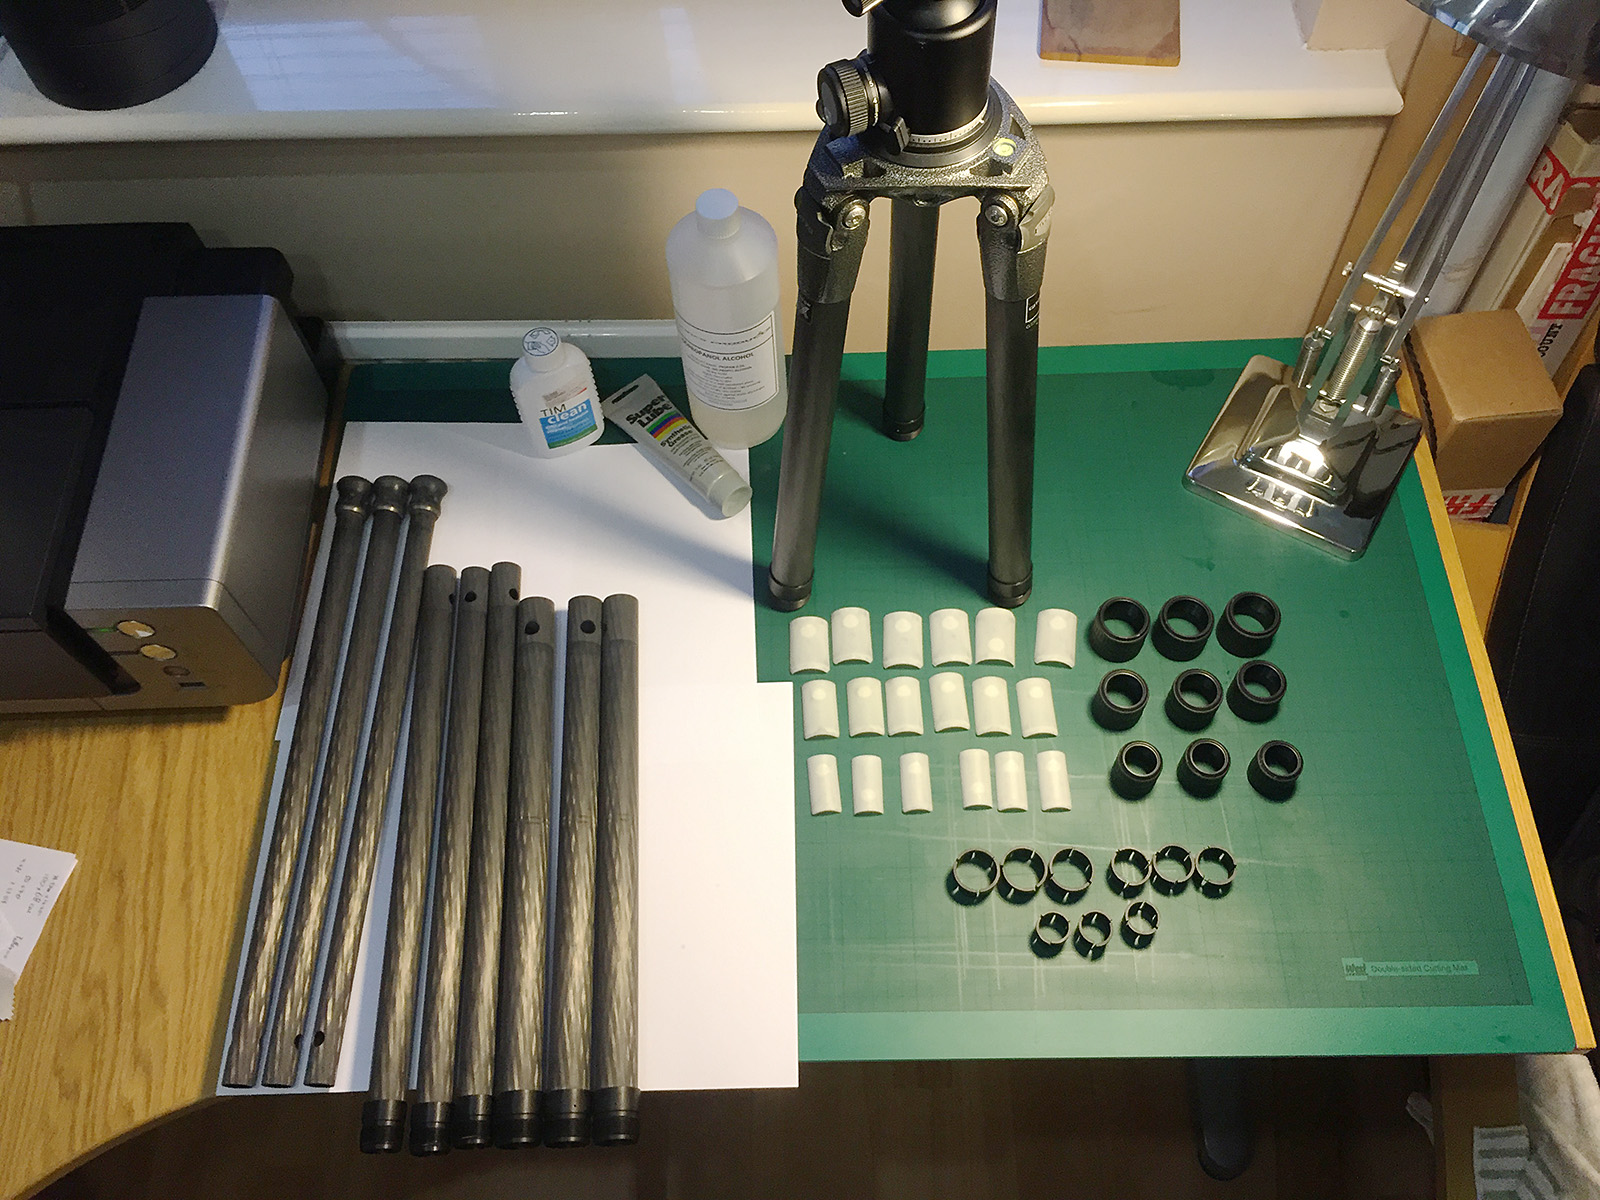
Luckily Gitzo tripods are pretty easy to disassemble. The first thing is to make a note of which bits go where (and this is where a smartphone camera is really useful):

Leg section 1600px

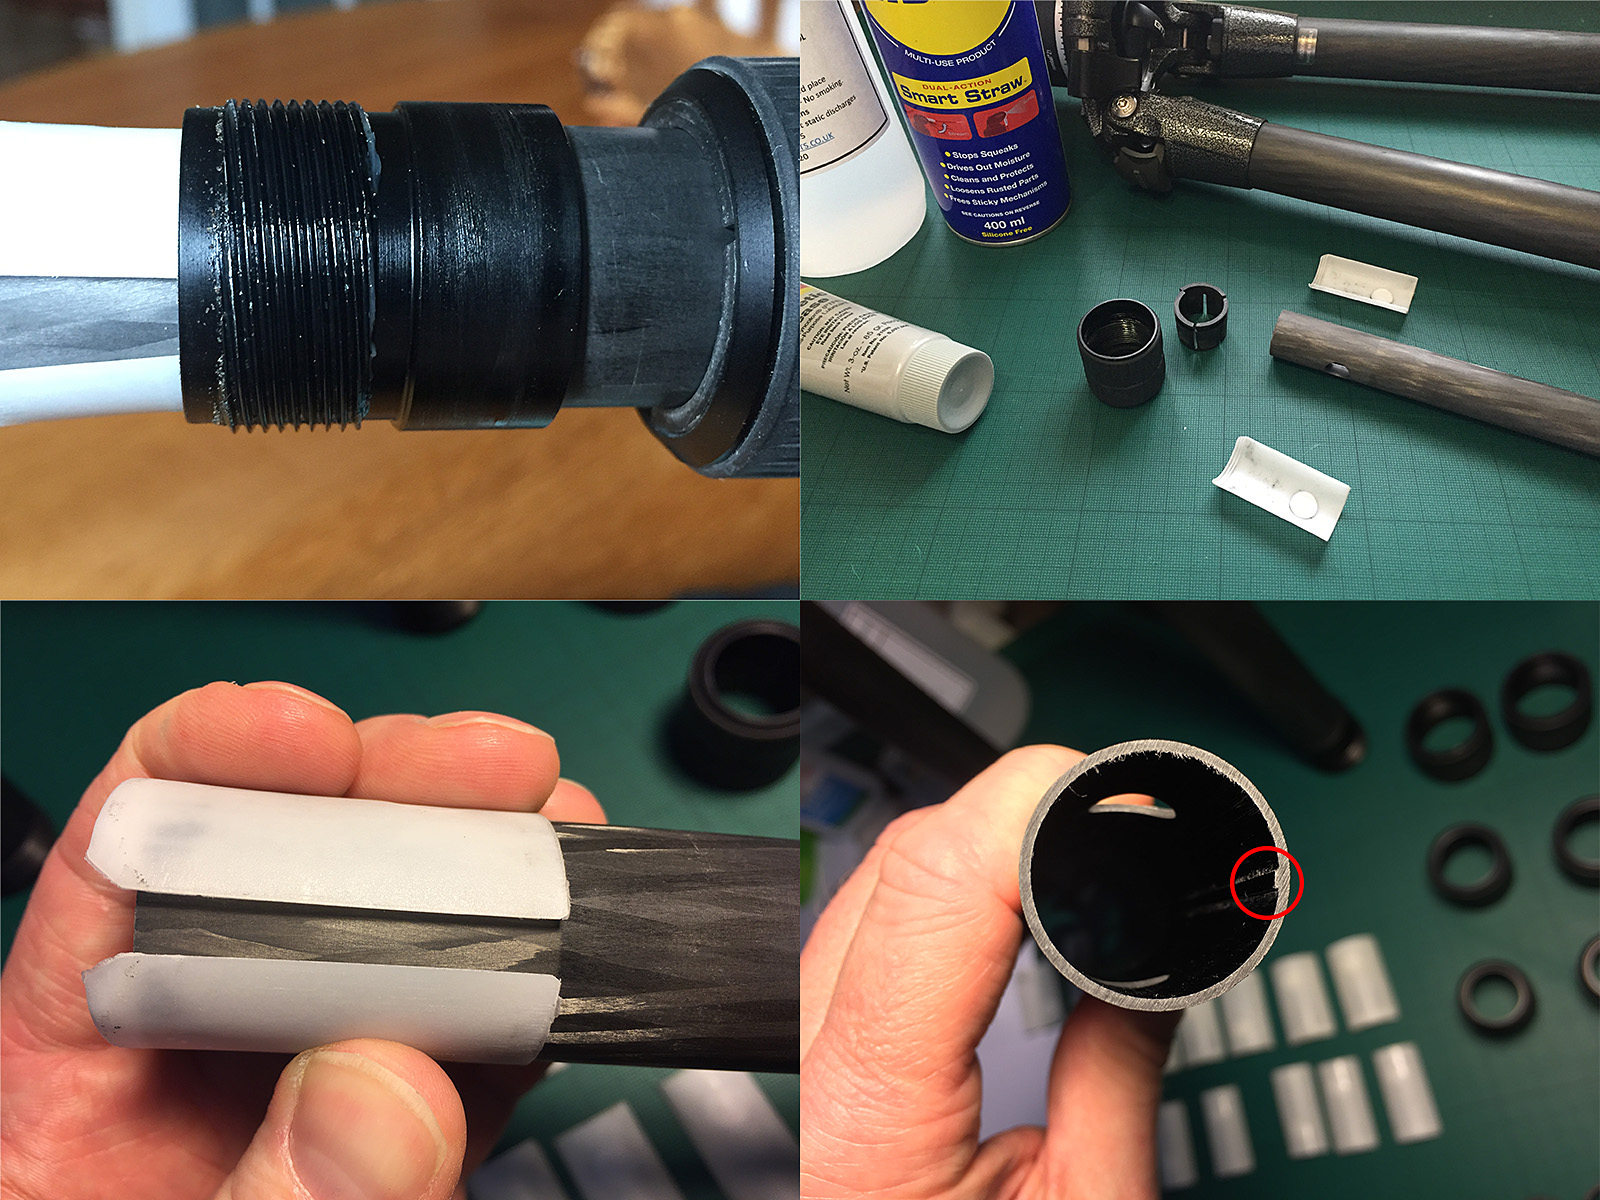
[Top Left] You can see that each leg is topped by two white, half circular, plastic shims – the anti-twist sleeves – that fit in the gap between the leg sections and which form a snug, but not overly tight fit. [Top Right] Once you take the leg section out completely you’ll see that the plastic shims are not physically attached to the leg at all but simply rest on it and the only thing that stops them from ending up rattling around inside the parent leg section is a raised circular node on the inside of each one. This raised node fits inside a cut-out on the top of the leg and it is this combination of node, hole and snug fit that keeps the shims in place. [Bottom Left] The shims don’t extend all the way around the circumference of the leg and leave a small gap on each side. [Bottom Right] The raised channel that fits in the gap left between the shims of the lower leg section. It is this that stops the leg blindly rotating – it is the anti-twist mechanism. It is a snug fit, but nothing more;

Whilst this seems like a basic way to secure the leg section, I presume that is also its benefit; it is very easy to replace parts when needed, and very easy to do this on location.

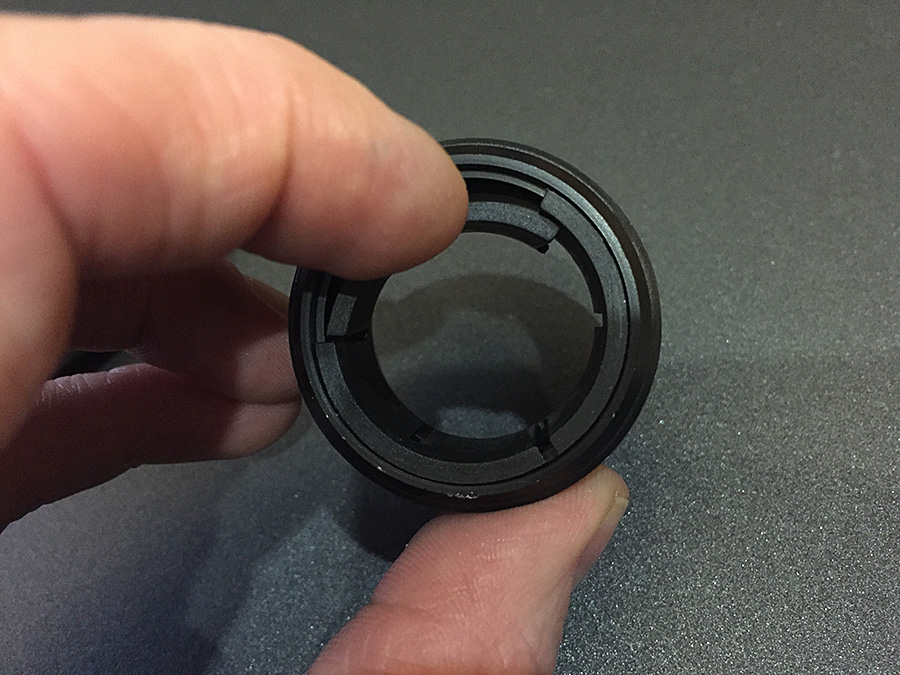
The final part of disassembly that you’ll need to do is to remove the plastic clips from within the locking nuts. This is probably the part the requires the most delicacy as the clips are connected by thin plastic links and so they have to be teased out. The best approach that I found is to get a fingernail in the gap between the metal outer and the plastic inner sections and to gently try and push the plastic part in. If there is no ‘give’ then rotate the locking nut a bit and try again. If you keep doing this, you eventually get to a section that gives a bit – see below:

Delicate 900px

The idea is to gently pull this section away from the metal and ever so slightly down which will have the effect of taking the plastic (which has a groove) off the metal (which has a lip). Once the first section is off the lip, slowly work backwards along the plastic, easing it inwards and downwards. Eventually the plastic will drop off the metal nut completely and expose its threaded section.

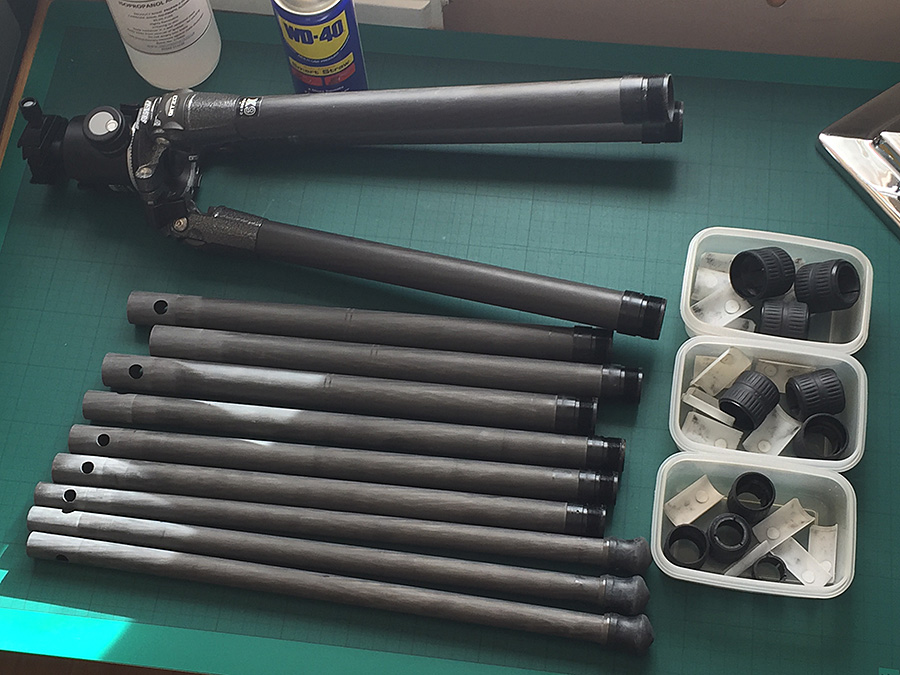
You’ll eventually end up with the tripod disassembled and ready for the cleaning. You may want to take the top leg sections off the spider (i.e., the top plate) but unless you’ve seriously abused the tripod it likely won’t be necessary.

Ready to Clean 900px


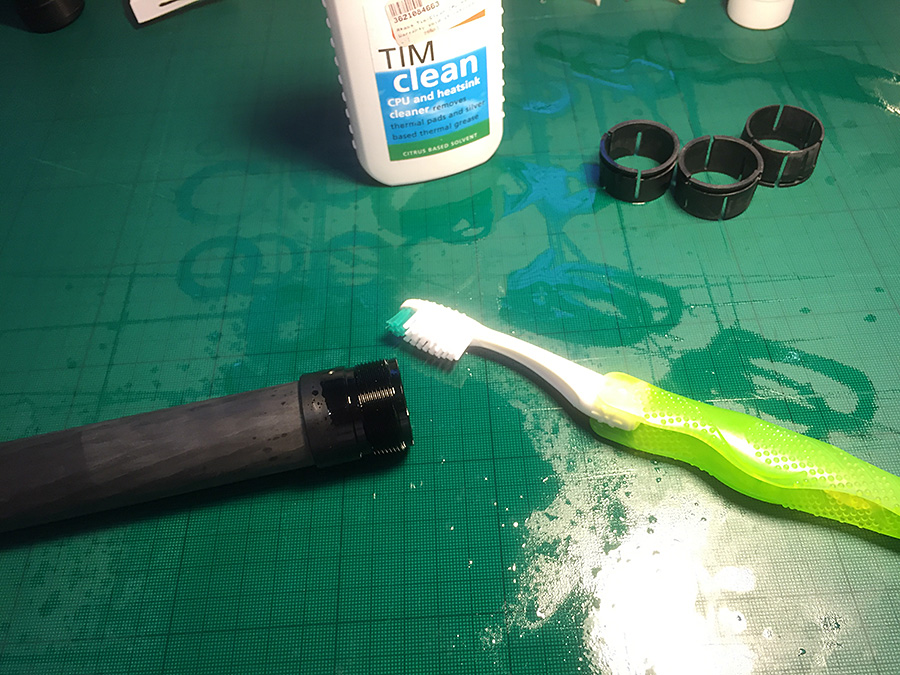
Originally I followed the advice gleaned from a number of guides and ‘how-to’ documents on the Internet, where the general advice was to use isopropanol alcohol or WD-40. Neither worked really well and a ‘test twisting’ of a locking nut on a leg section still made horrid crunching noises. So now I use citrus degreaser which has several domestic applications including cleaning bike chains and gear systems and cleaning thermally conductive paste off computer CPUs. Citrus degreaser is awesome stuff, and makes cleaning the old grease and gunk off the legs very easy.

TIM Clean

All you need is a few drops on the thread, gently spread it around (don’t scrub) with the toothbrush so that it gets in the nooks and crannies and leave for a couple of minutes. Repeat the process with the locking nuts.

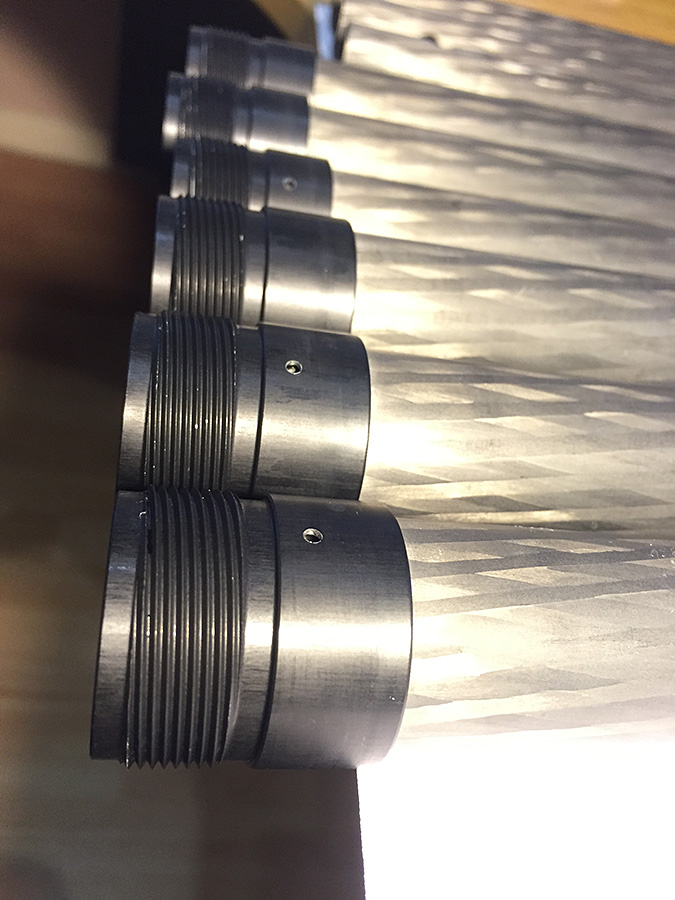
After a couple of minutes – it doesn’t need more than that – remove the degreaser and gunk with warm water mixed with some household dishwashing detergent. Again I use the toothbrush – this time gently scrubbing – to get right into the grooves on both the leg sections and locking nuts. Once thoroughly cleaned I give it a thorough wash under a shower head although a kitchen tap would be just as good. Then, with all nice and clean, it is time to leave in the air to dry.

Threads Clean 900px


Reassembly

Reassembly is simply a case of reversing the disassembly process. I’m trying an experiment and using a different type of grease on one leg – Super Lube Synthetic Grease – and the normal Gitzo tripod grease on the others, simply as Super Lube is a lot cheaper. If you’re only cleaning your tripod once a year then it is probably not worth using anything other than the Gitzo grease, but if your tripod is likely to see repeated abuse in the field then a cheaper option is handy, as long as it works just as well. Only time will tell whether Super Lube is a viable option.

When reassembling the tripod it is important to get the gap between the shims lined up with the raised channel in the parent leg;  if you meet a lot of resistance upon reassembly, double check the plastic shims are correctly seated on the leg section and that the gap lines up with the raised channel.

The other thing is to not overdo the amount of grease used. You only need to cover the threaded section – any more than that and you’ll risk having grease leaking out of the locking nut and acting as a magnet for any dust and grit in the air, and if you were heading back out in the desert with grease on leaking out that would be a quick way to cause problems. Also, I find it easier to put the locking nut on the leg, put the anti-rotation shims in place and slide it all into the parent leg section before applying the grease. Once you’ve evenly spread the grease over the thread you can screw the locking nut back on and then tighten and untighten it a dozen times to spread the grease around on the leg and the locking nut itself. Note, you don’t have to completely undo the locking nut, just a couple of turns back and forth.


Regreasing 1600px

If things are really bad, you may need to take the top leg sections off the spider, but usually this is not necessary – only if the tripod had fallen in the sea and become completely submerged for example. Even sand storms won’t penetrate into the upper mechanism. That said, sand, salt and grit do accumulate on the outside of the legs but brushing this off with a firm bristle paint brush should be sufficient.


Spider 900px


Hopefully this article shows how easy it can be to strip down, clean and reassemble your tripod. Other tripods have different mechanisms – my Feisol for example doesn’t have an anti rotation mechanism and so no channel in the leg section to worry about and the shims are in three sections – but in essence a tripod is a blissfully simple part of the photographer’s arsenal. And whilst maintenance can be a pain it is even more painful when you’re trying to take a long exposure on a tripod with leg wobble due to a worn leg lock. It may be the difference between a usable and unusable shot.


Tagged , |

Displaying Photographs: Part 1

A little while ago I mentioned that I’d be discussing the various options for hanging prints of your own photographs at home and today’s post aims to give you some ideas of how to go about this. I should point out that, far from being an exhaustive discussion of every possible option, I’m actually only going to discuss one option in detail, although I do mention some others. The reason for pushing one particular option is that I feel it serves a dual purpose. For those who just want a low cost, low effort way of displaying their work – one that doesn’t have to last for years – this may be a simple way to achieve an elegant result. For those wanting to move a bit further into the art of framing, this same process acts as the very basis for that option.

Before I dive into this I’m making an assumption: You’ve already got a printed image, either from your own printer or from a high street or online company, and that it is an inkjet image. The fact that it has been printed on an inkjet printer will be important when considering certain display options although after talking to a few professional framers I’m becoming convinced that some of these “old-school” techniques for mounting a photograph to a rigid surface are becoming less relevant. In many ways this is good for the home framer as those techniques involve expensive and bulky equipment.

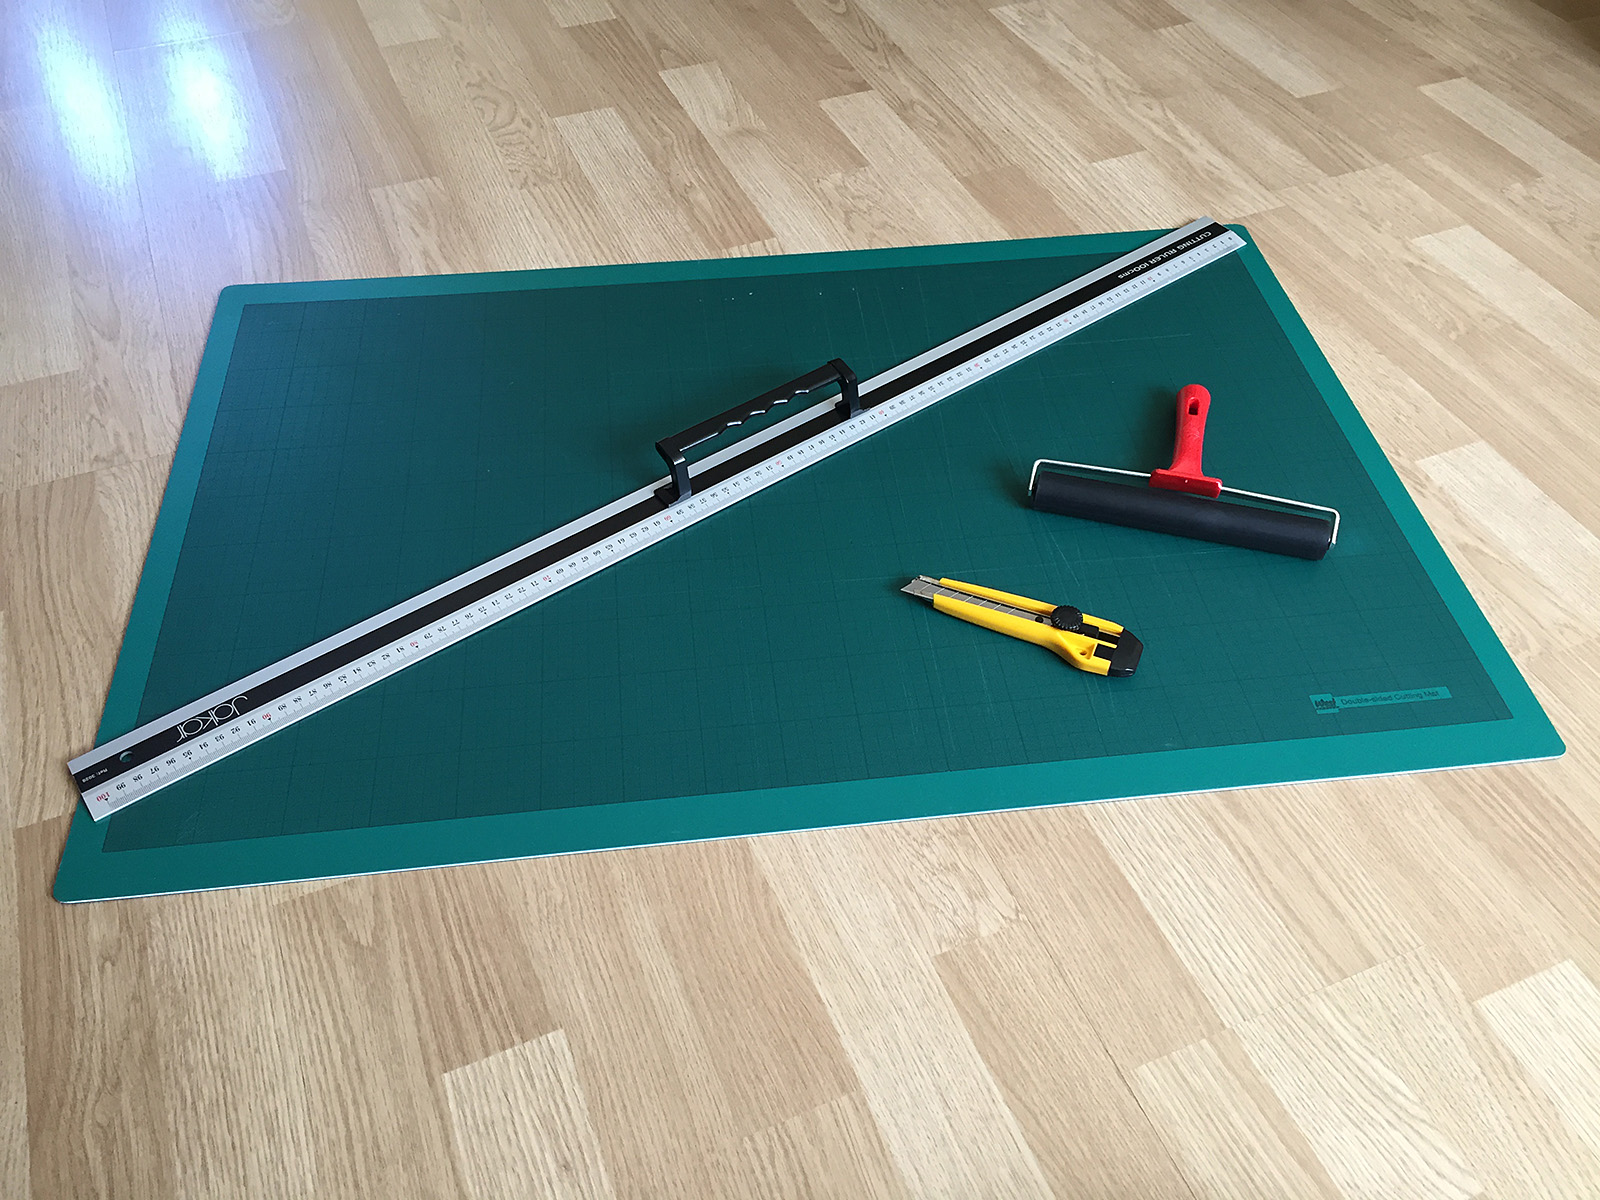
Luckily the outlay on tools is minimal - you may even already have most of what's needed.

You don’t need many tools – you may even already have most of what’s needed.

Speaking of equipment you are going to need some although thankfully it is not only cheap, but you may already have some it.

  • A cutting board, needed to protect whatever surface you’re working on.
  • A very sharp craft knife, such as an X-Acto.
  • A clean straight edge for cutting, longer than the longest edge of your image.
  • A roller of some kind to flatten the photograph against the mat board or foam board.

As with everything there is some terminology to try and remember, simply because you’ll have to buy some supplies and asking a shop assistant for the right thing usually helps.

  • Backing board – the rear board (usually 2mm hardboard) that sandwiches all the parts of a framed image in place. Not needed unless you’re framing the image.
  • Mount board – the flat and rigid board that the image rests on, typically mat board or foam board. All images will need to be mounted in some way.
  • Mat board – A piece or card or cotton fibre board usually 1.4mm thick. There are several grades available depending on how expensive/important the artwork is.
  • Mat – Mat board with a window cut out that surrounds the image and provides visual separation from the surrounding wall and keeps the front glass from touching the image.
  • Foam board – a lightweight board with a dense foam core coated in paper. Usually comes in white or black. Also called foamcore.
  • Moulding – the material that makes up the frame itself – usually wood or metal.

The “Off-The-Shelf” Compromise

Before I talk about materials there is one option to discuss: The pre-made frame. The theory behind pre-made frames is pretty straightforward – give you a professional finish but at a fraction of the cost of a bespoke frame. There’s a big pre-made market too and searching an online retailer such as Amazon shows an almost overwhelming choice, but I do have a couple of issues with pre-made frames because, if you’re going to the trouble of actually putting a frame around your image, you may as well do it properly.

For me a frame should achieve three basic aims: Support, protect and compliment. Support is a fairly easy job and really entails keeping the artwork flat and rigid – if you’re hanging the image on a living room wall you’re going to want to avoid curling corners or the image sagging under its own weight. Protection covers three elements: protection from the environment such as dust, tiny airborne droplets of everyday household liquids such as cooking oil and furniture cleaner and protection from the frame itself. And finally, the frame should complement the artwork, not detract or otherwise stand out.

The problem I have with pre-made frames is they often fail to achieve at least one of these three goals. Most of them allow the glass (or these days more likely acrylic) to come into direct contact with the artwork which for inkjet images is a pretty bad idea. Not only can it cause the photograph to smudge but try changing the image in the future and you’ll find that part of it has stuck to the glass/acrylic due to trapped moisture in the inkjet print and the air itself. The way to avoid this is to use a separator between the glass and the image, usually a white card frame with a hole in the middle called a mat, but that then means either finding a pre-made frame with a mat that just happens to be cut to the right size for your image (otherwise we’ll fail the ‘compliment’ requirement), or getting a local or online framing company to cut a mat for you adding more expense to what was meant to be a low-cost option and simple option!

So, unless you’re very lucky – or simply don’t care – the pre-made option isn’t really an option.

Basics

The most basic element of framing is that of support – keeping the image flat and rigid. Luckily there are a number of ways to do this and you can achieve excellent results with very little cost as it simply entails sticking your image to a board of some kind – a process usually called mounting. There are two common choices for the mount board.

Mat board is a paper or cotton sheet, usually about 1.4mm thick. If you’re considering framing then you’ll have to buy mat board anyway because, as the name suggests, it is used to create the mat that separates the image from the glass. There are several types of mat board available such as museum, archival, conservation and standard and I’ll look at these in a future article but in essence if you’re looking to keep the image in top condition for a few years, a low acidity mat board is required. There is a huge range of different colours for mat board – remember that framing is not meant to detract from the artwork and so the mat has to compliment the colours of the image.

If you hate having too many options then choosing foam board is wonderful: Black or white.

If you hate having too many options then choosing foam board is wonderful: Black or white.

Foam board and Foamex for our purposes achieve the same goal and differ only in whether you can print directly onto their surface and whether they are for indoor or outdoor use. Usual thicknesses are 3mm, 5mm and 10mm. Again, for long-term display, low acidity board is better. As foam board is not designed to be seen colour options as much more limited and usually come down to black or white.

To Frame or Not To Frame?

If the ultimate goal is to display your work in a frame then there isn’t an awful of difference between the two mounting options – mat board and foam board will achieve the same goal unless you’re getting very creative with mounting and looking at something like float mounting. I’m going to be looking at framing – and float mounting – in a future article but for today we’re trying to keep things as simple as possible.

The alternative is to simply not frame at all. The most common form of unframed art display is the canvas and these days you’d be hard pushed to find a hotel or trendy bar that doesn’t have art canvases on the wall. It’s a popular choice for the home environment too being hard-wearing and cheap compared to the professionally framed option. But, home-made canvasses are definitely not easy to get right.

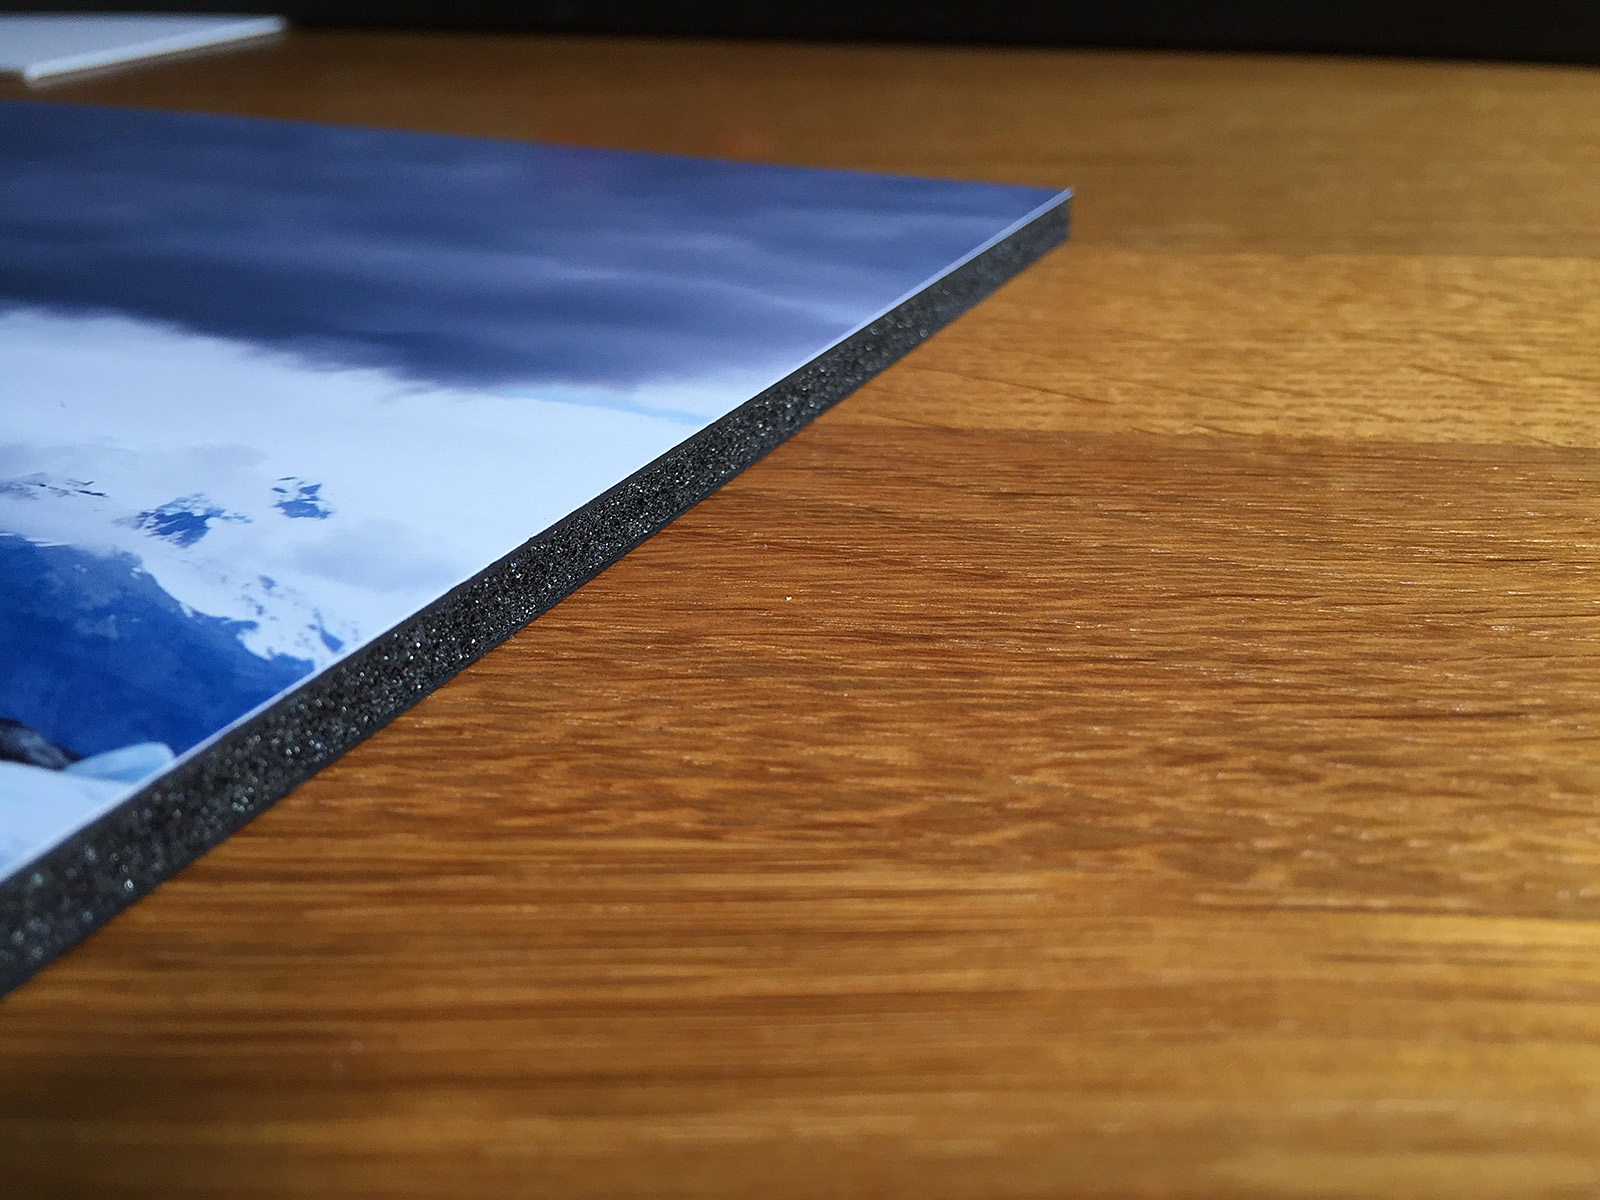
Another option would be to display the image simply mounted on foam board, making use of the thickness of the foam board to provide a visual separation from the surrounding wall. It won’t work for everyone as one of the uses of a mat is to separate the image from the distracting ‘noise’ of the wall and so if the wall is patterned (for example wallpaper) then this approach won’t give very good results. But as naked as the final product is, it has a contemporary feel and some exhibitions use this approach.

The other advantage is that it is simple and inexpensive, great if the artwork is to be changed frequently or likely to get damaged (children’s bedrooms, for example).

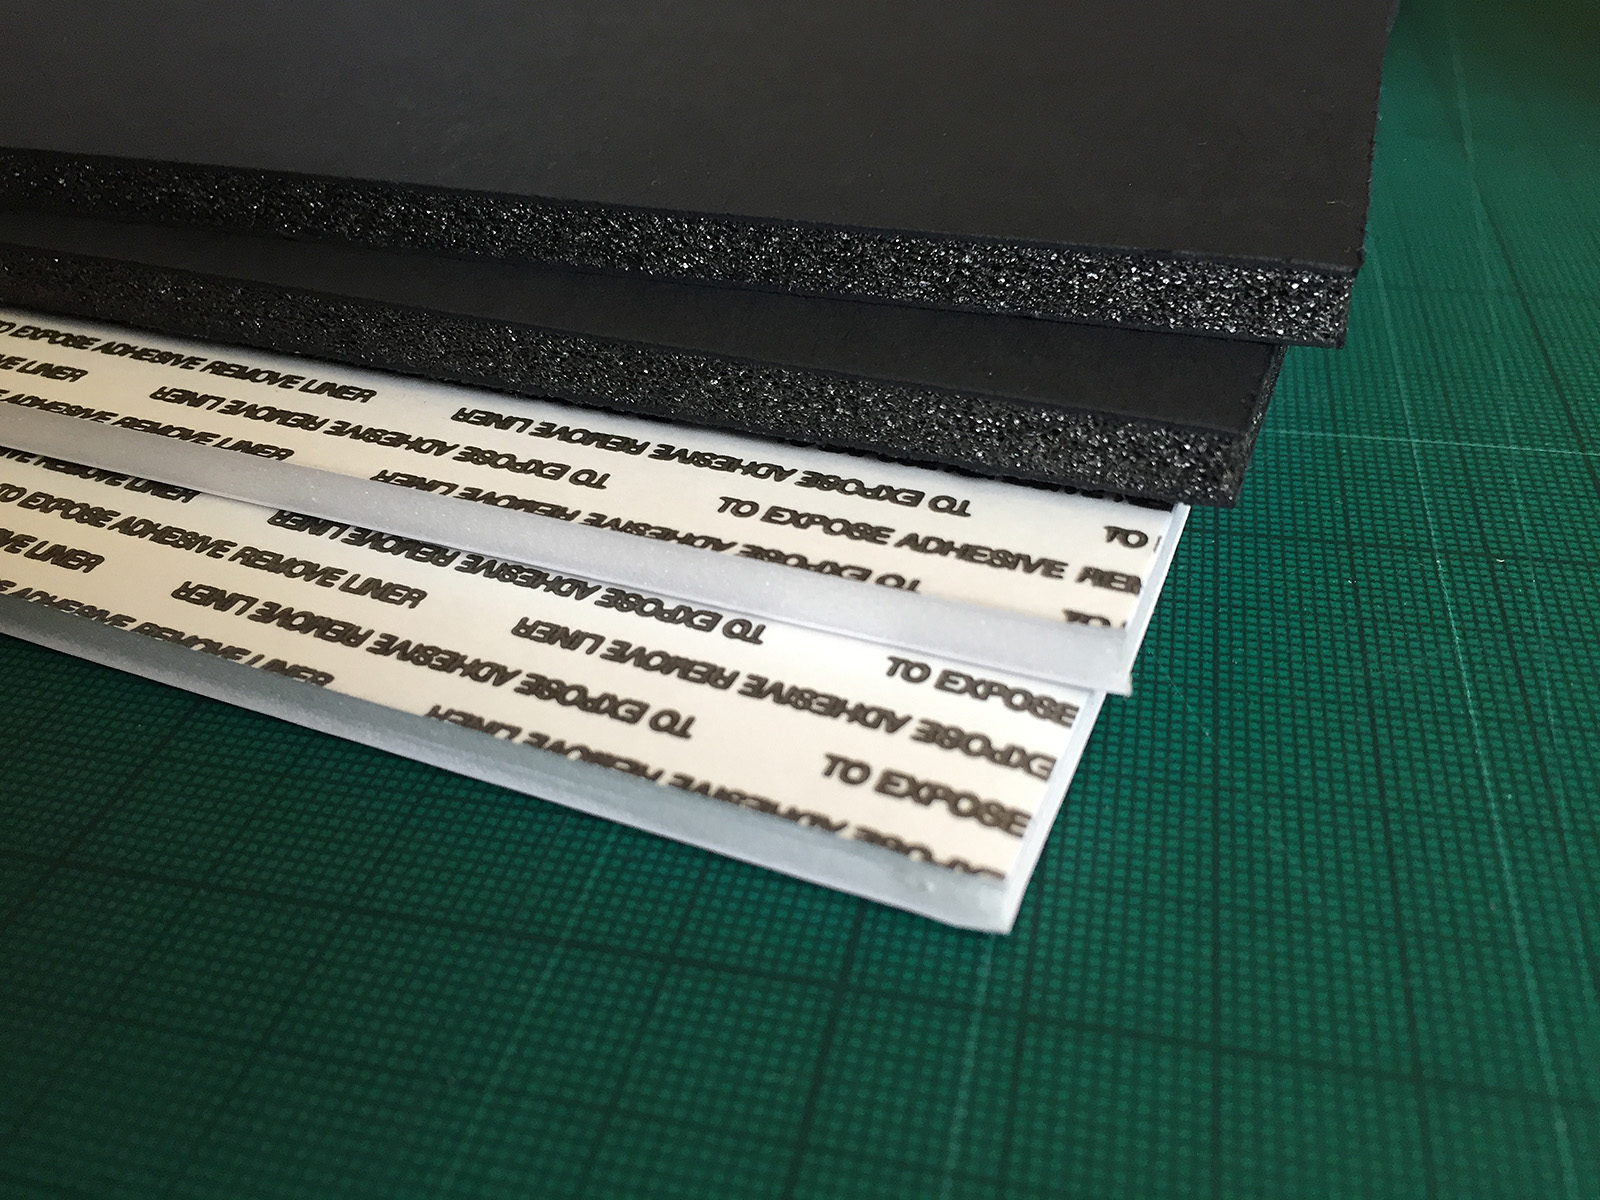
Buying foam board isn’t a difficult process. It is common enough that most hobby and craft stores carry it as a stock item and as mentioned earlier, colour choice is limited to white or black.  I bought foam board off Amazon simply because I was buying in bulk and the cost savings were significant – half the price of buying in the local craft store – but even in store an A2 size foam board was approximately £4.50. The other thing you’ll need is some means of attaching the image to the foam board. The most common way to do this is using spray adhesive – again a common item in craft stores, although you can also get self-adhesive sheets of foam board.

About all you need to get your image ready for display is the foam board and some glue - both easily found in a craft supply store.

About all you need to get your image ready for display is the foam board and some glue – both easily found in a craft supply store.

The Process

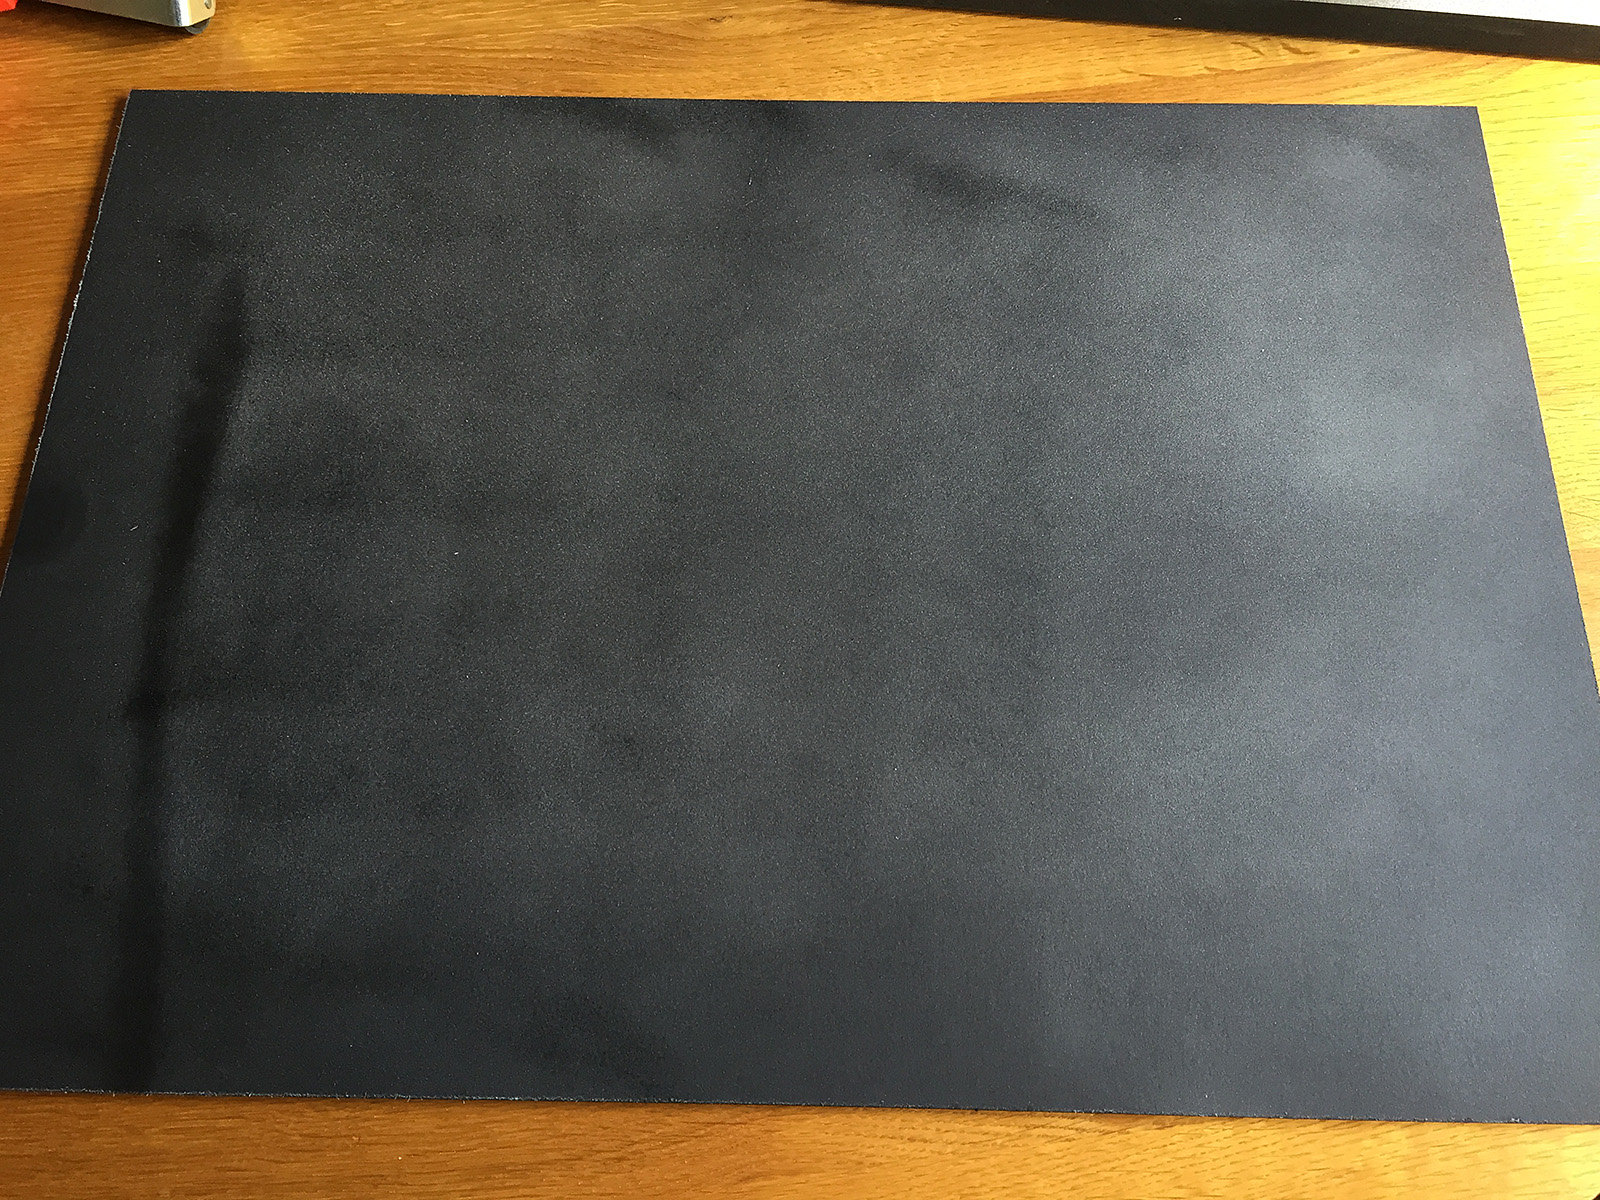
Now I’m going to assume that the next step really needs no detailed instructions – you have a photograph, a board and some glue and you really would have to try exceptionally hard to get it wrong, but there are a couple of tips worth mentioning. First, unless you have stunning hard/eye co-ordination, cut the foam board to be larger than the photograph and that way you won’t have to worry about perfectly aligning the image. Once the glue has dried we’ll trim it with the X-Acto knife. The other tip is to lay the image starting at one end and slowly lowering it much as you would when applying a screen protector to a phone. This way you’ll reduce the risk of air bubbles.

Here are some pictures of the process:

Spray adhesive usually requires a couple of minutes to become tacky.

Spray adhesive usually requires a couple of minutes to become tacky.

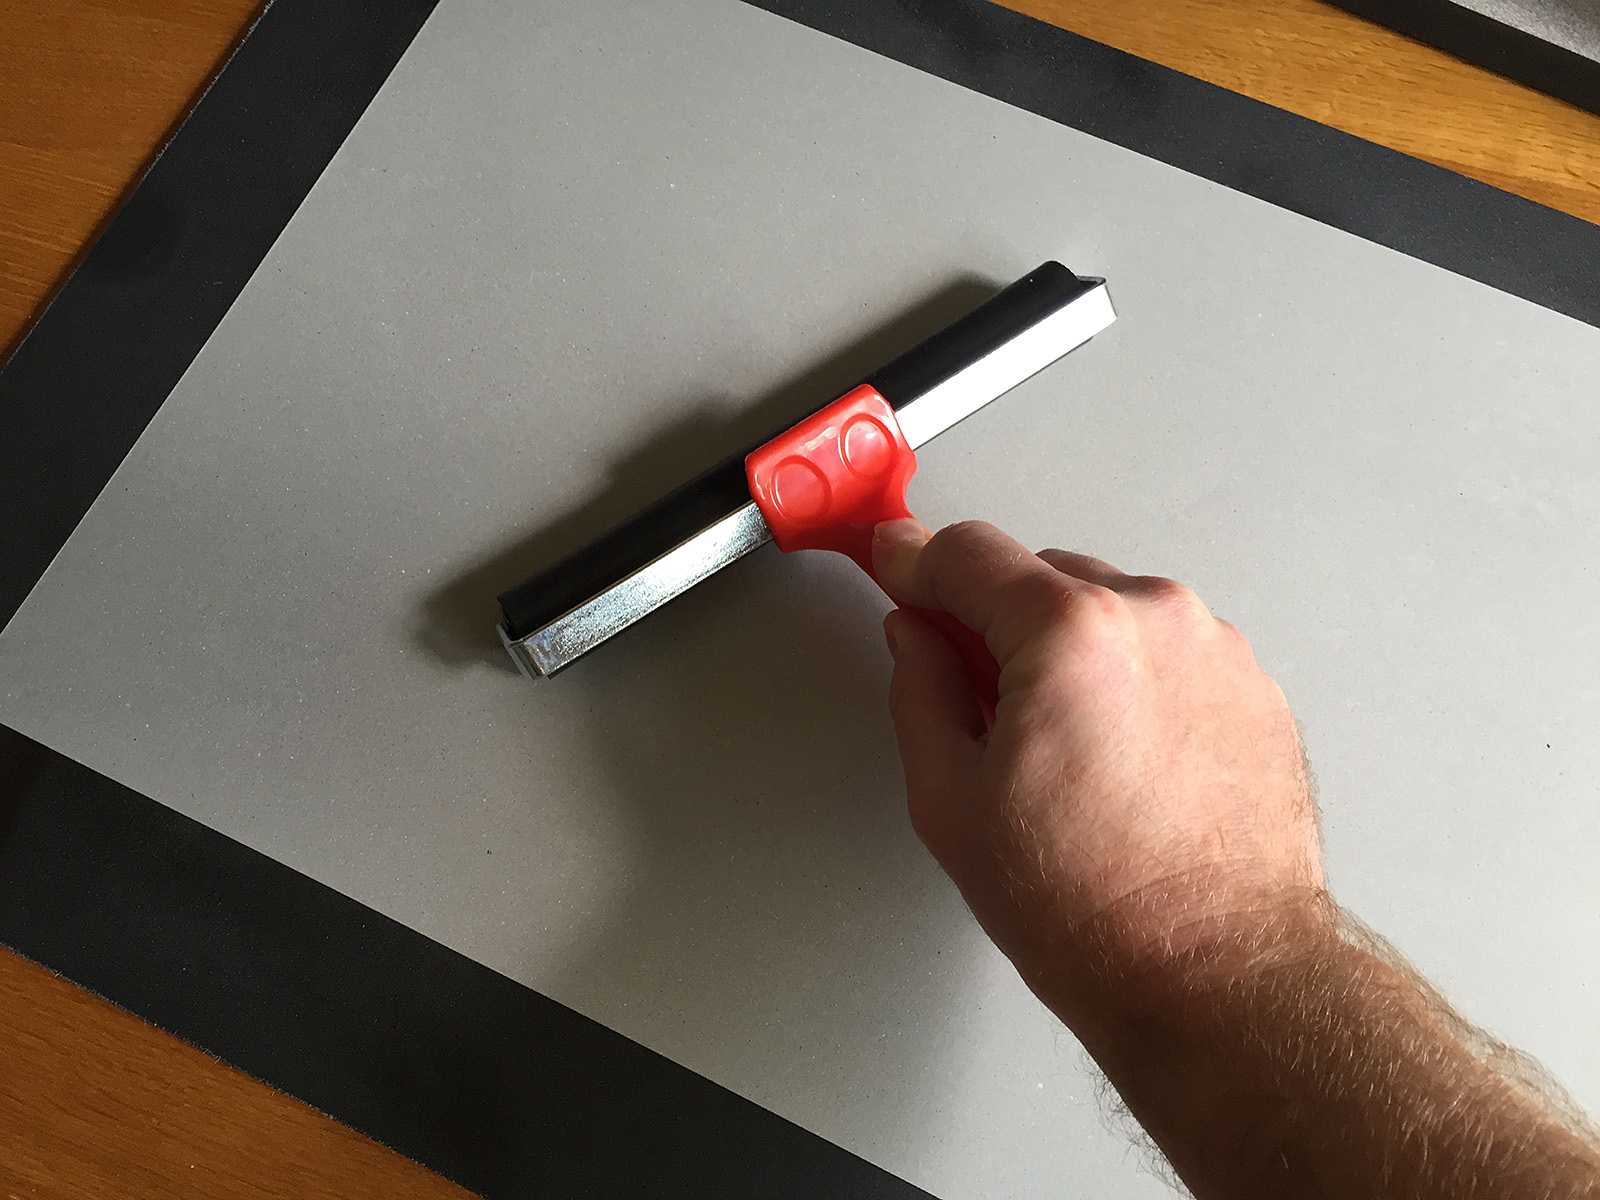
Cover the image with a protective sheet and the use a roller to press the image to the glued surface.

Cover the image with a protective sheet and the use a roller to press the image to the glued surface.

Check the photograph is firmly attached to the board. I covered the whole board in adhesive just to make sure.

Check the photograph is firmly attached to the board. I covered the whole board in adhesive just to make sure.

As exciting as the whole process is, leave the adhesive to dry before attempting to trim the foam board to size.

As exciting as the whole process is, leave the adhesive to dry before attempting to trim the foam board to size.

Trimmed to size.

Trimmed to size.

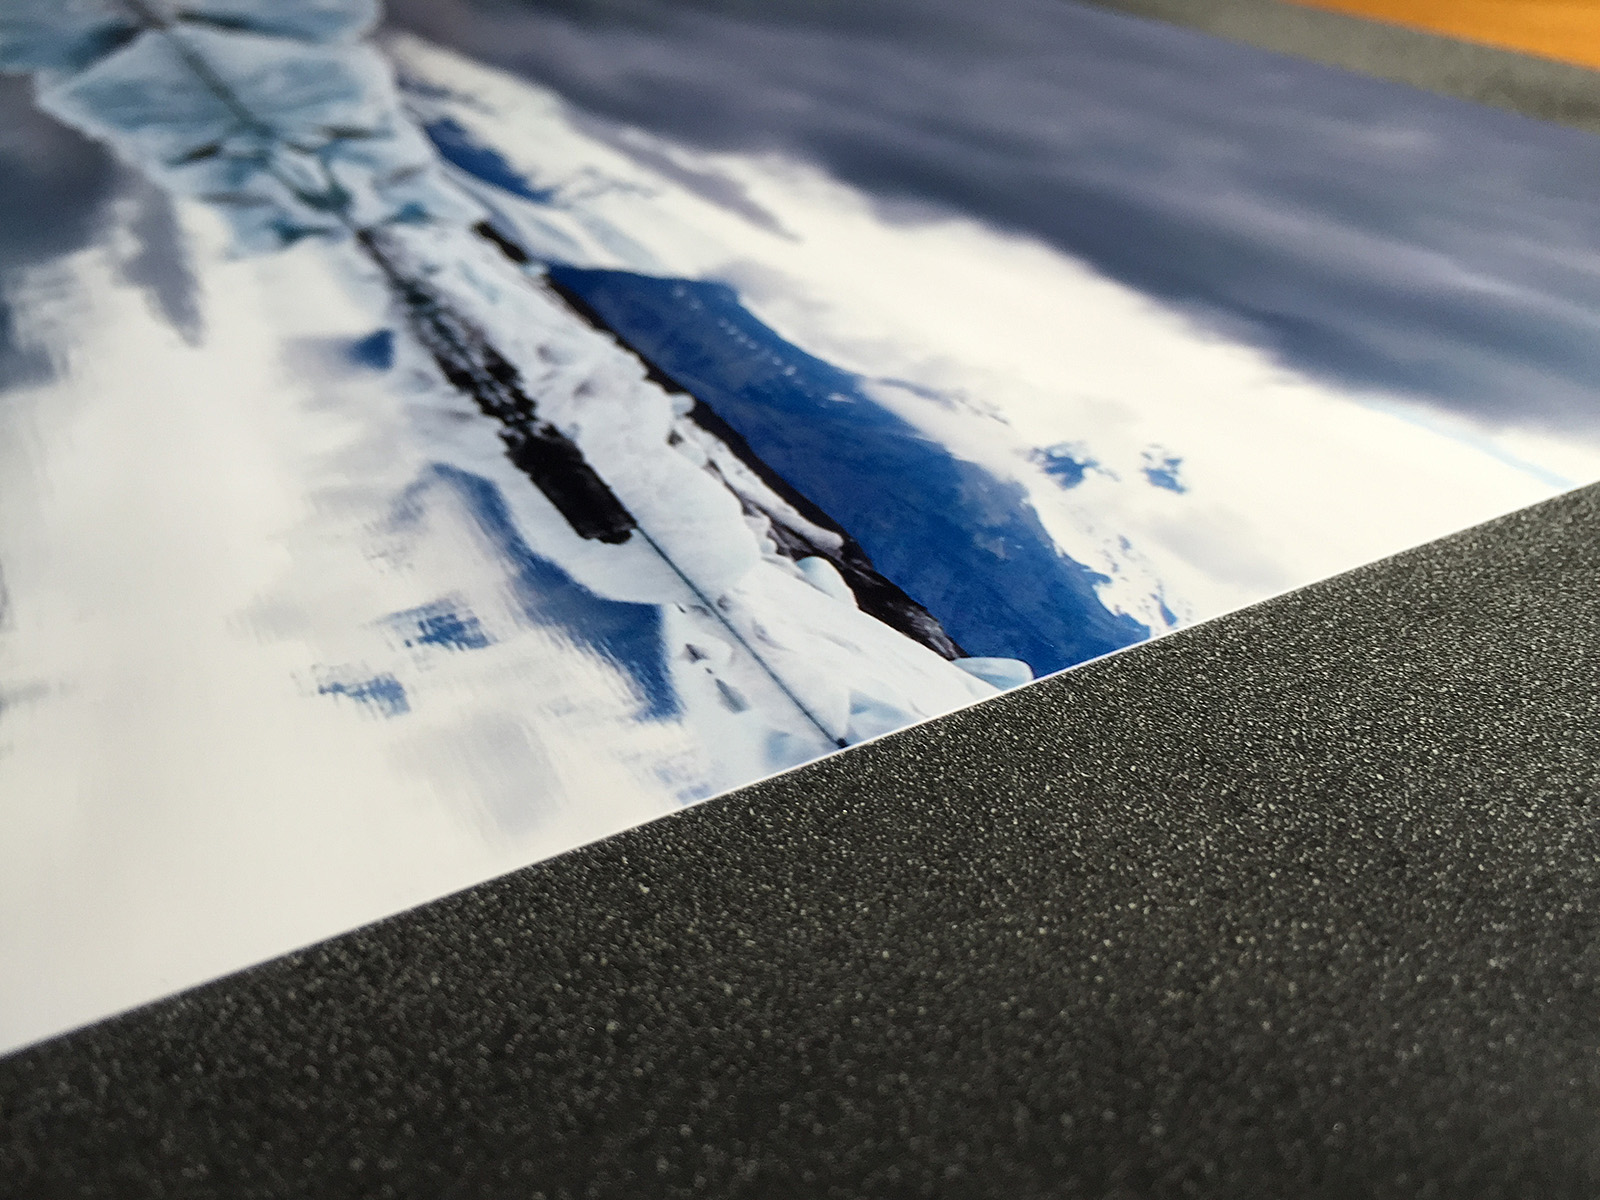
I’d suggest leaving the glue for a few hours to dry before trimming the image.

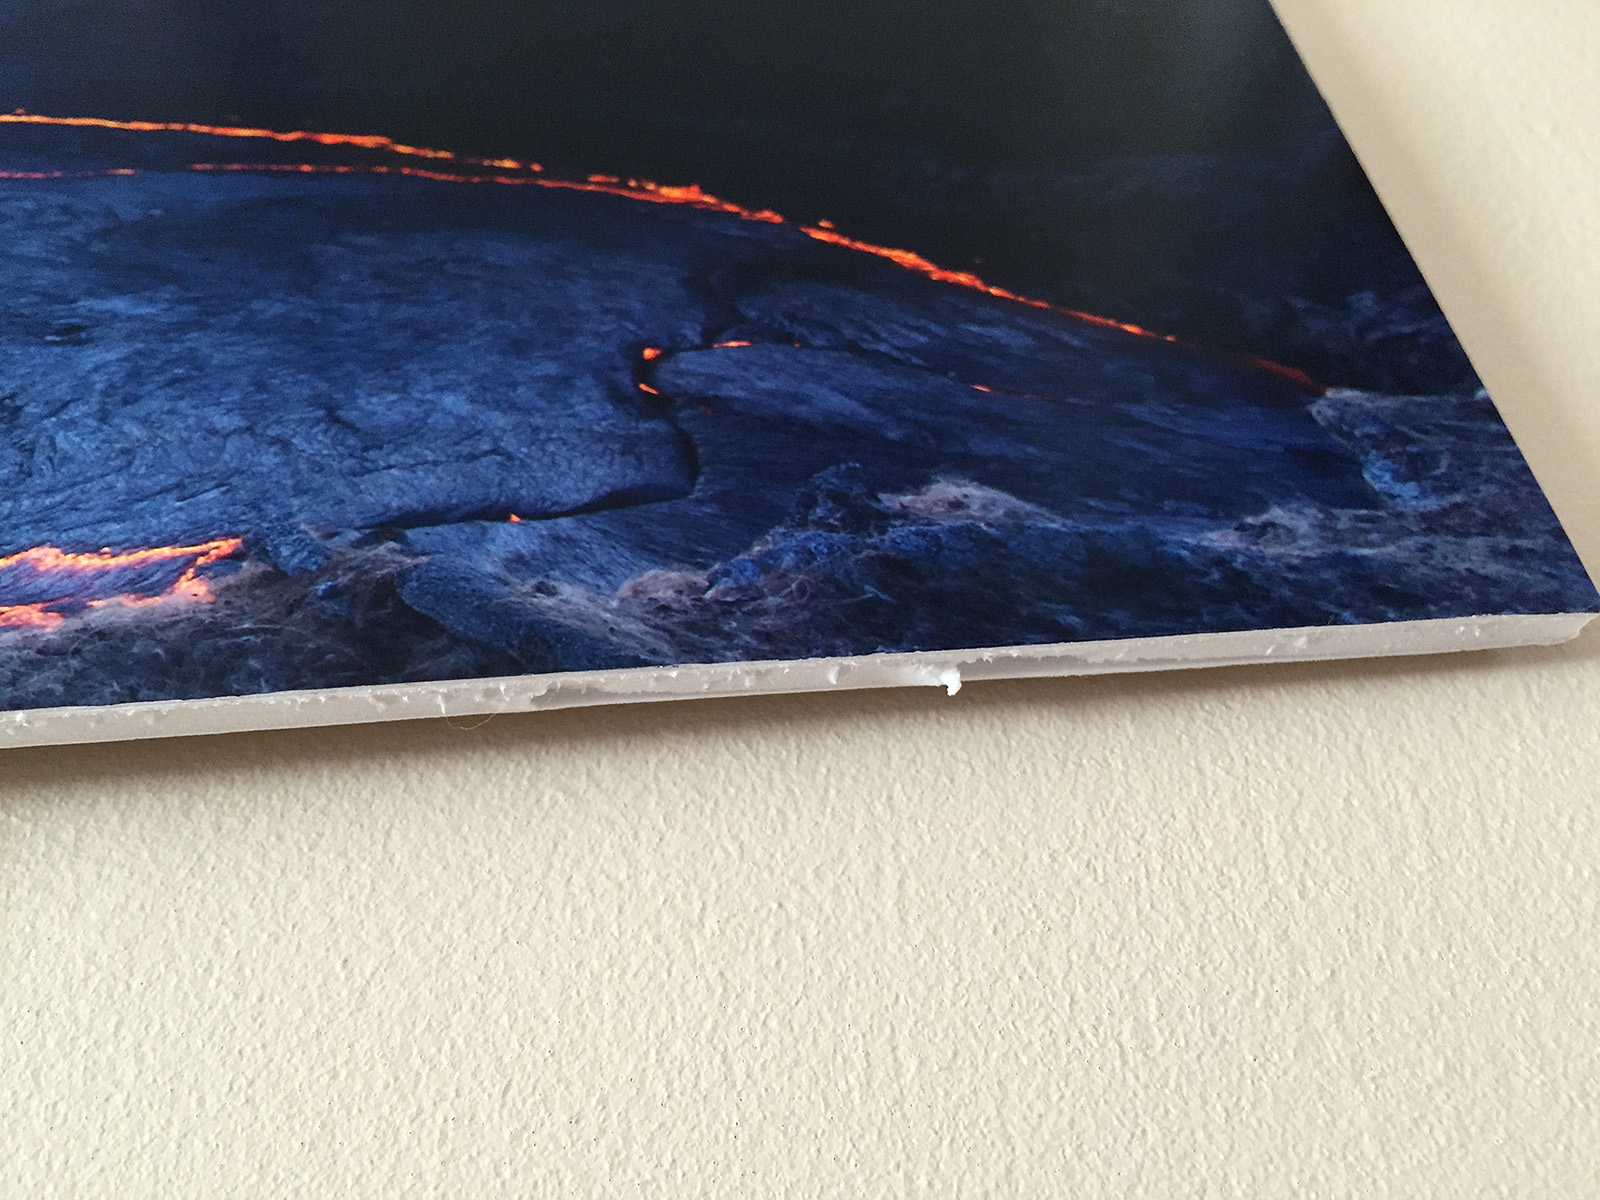
When trimming make sure that the blade is VERY sharp; cutting foam board with anything less will likely cause it to ‘bobble’ and as the foam board is now acting as the separator between wall and artwork it really has to look right.

It won't matter how good the image is - all you will see if the shabby cutting.

It won’t matter how good the image is – all you will see is the shabby cutting.

Display Options

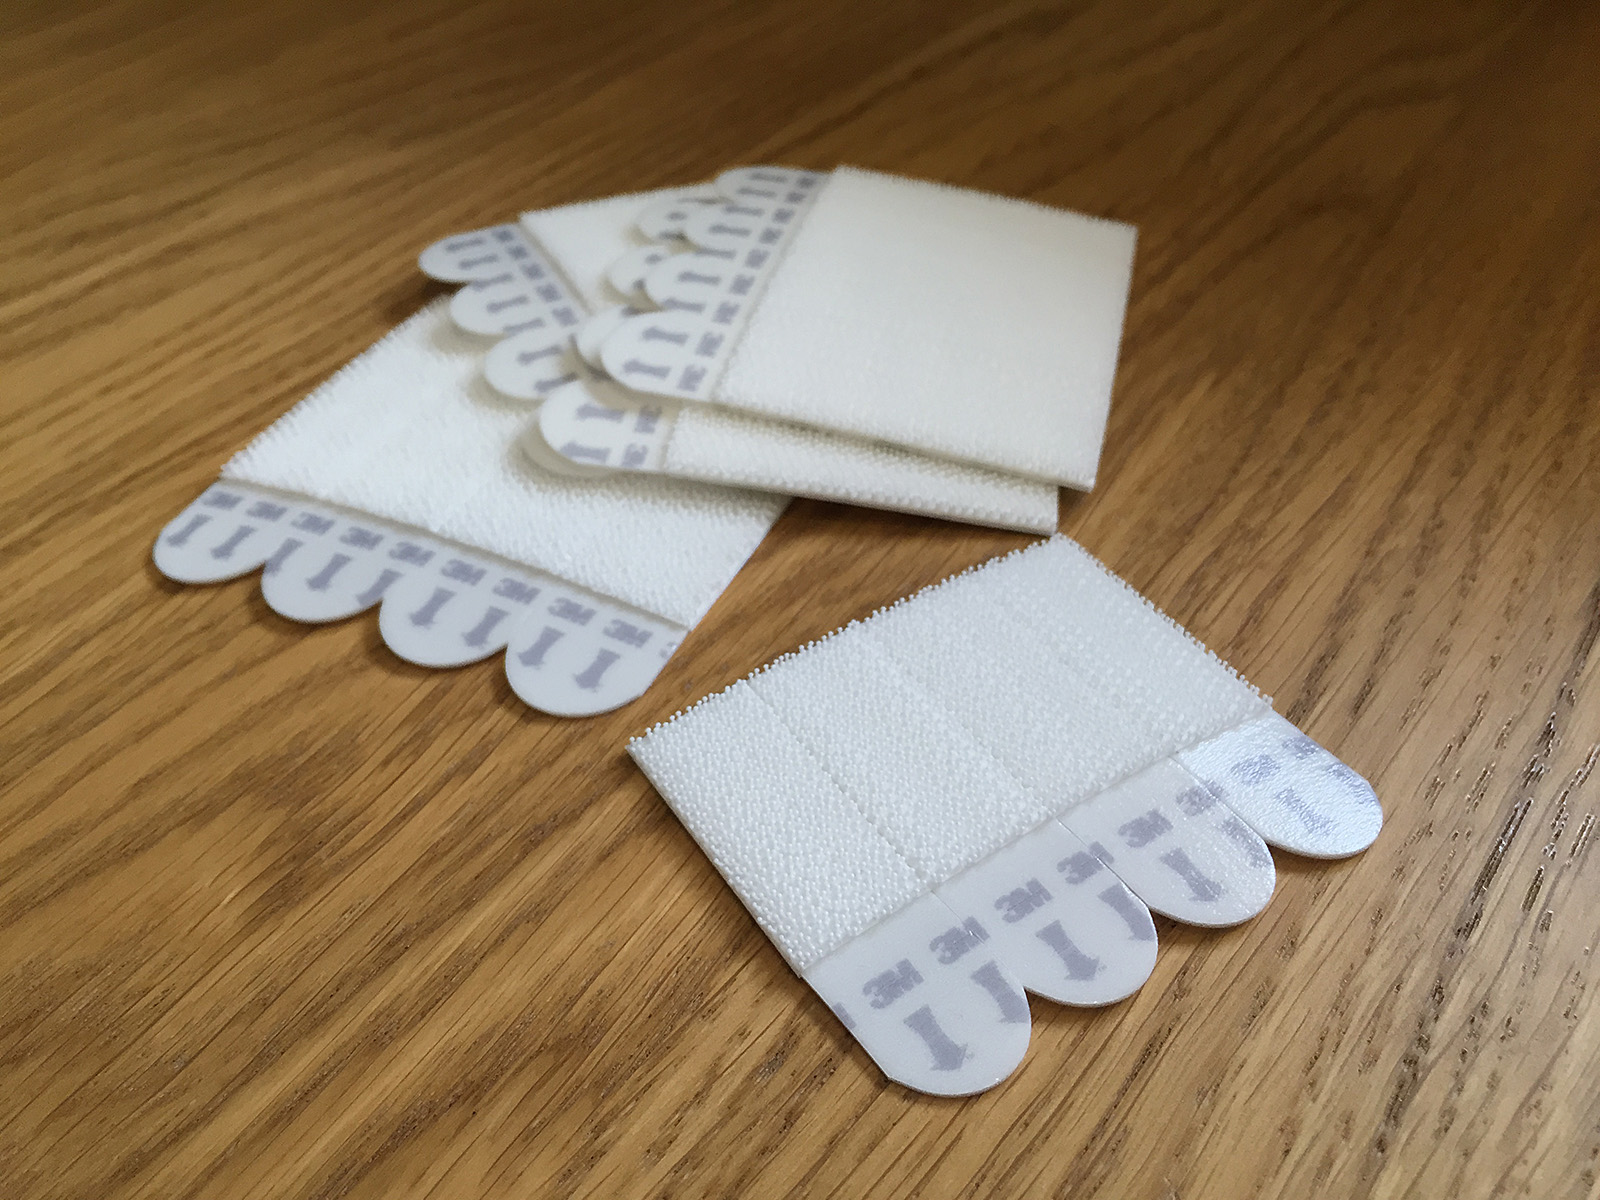
One of the things to bear in mind with mounting in this way is that the result is quite fragile; the foam board is delicate and banging the edge will likely result in it being dented. It can be passed around to people or left on a coffee table, but its best use would be for display on a table top easel or placing on a wall. One of the benefits however is that the final product is really lightweight and so you can make use of a simple wall mounting option such as the 3M Command picture hanging strips – inexpensive velcro pads – so no need to make holes in the wall.

For lightweight work the 3M Commander strips should do a perfect job.

For lightweight work the 3M Commander strips should do a perfect job.

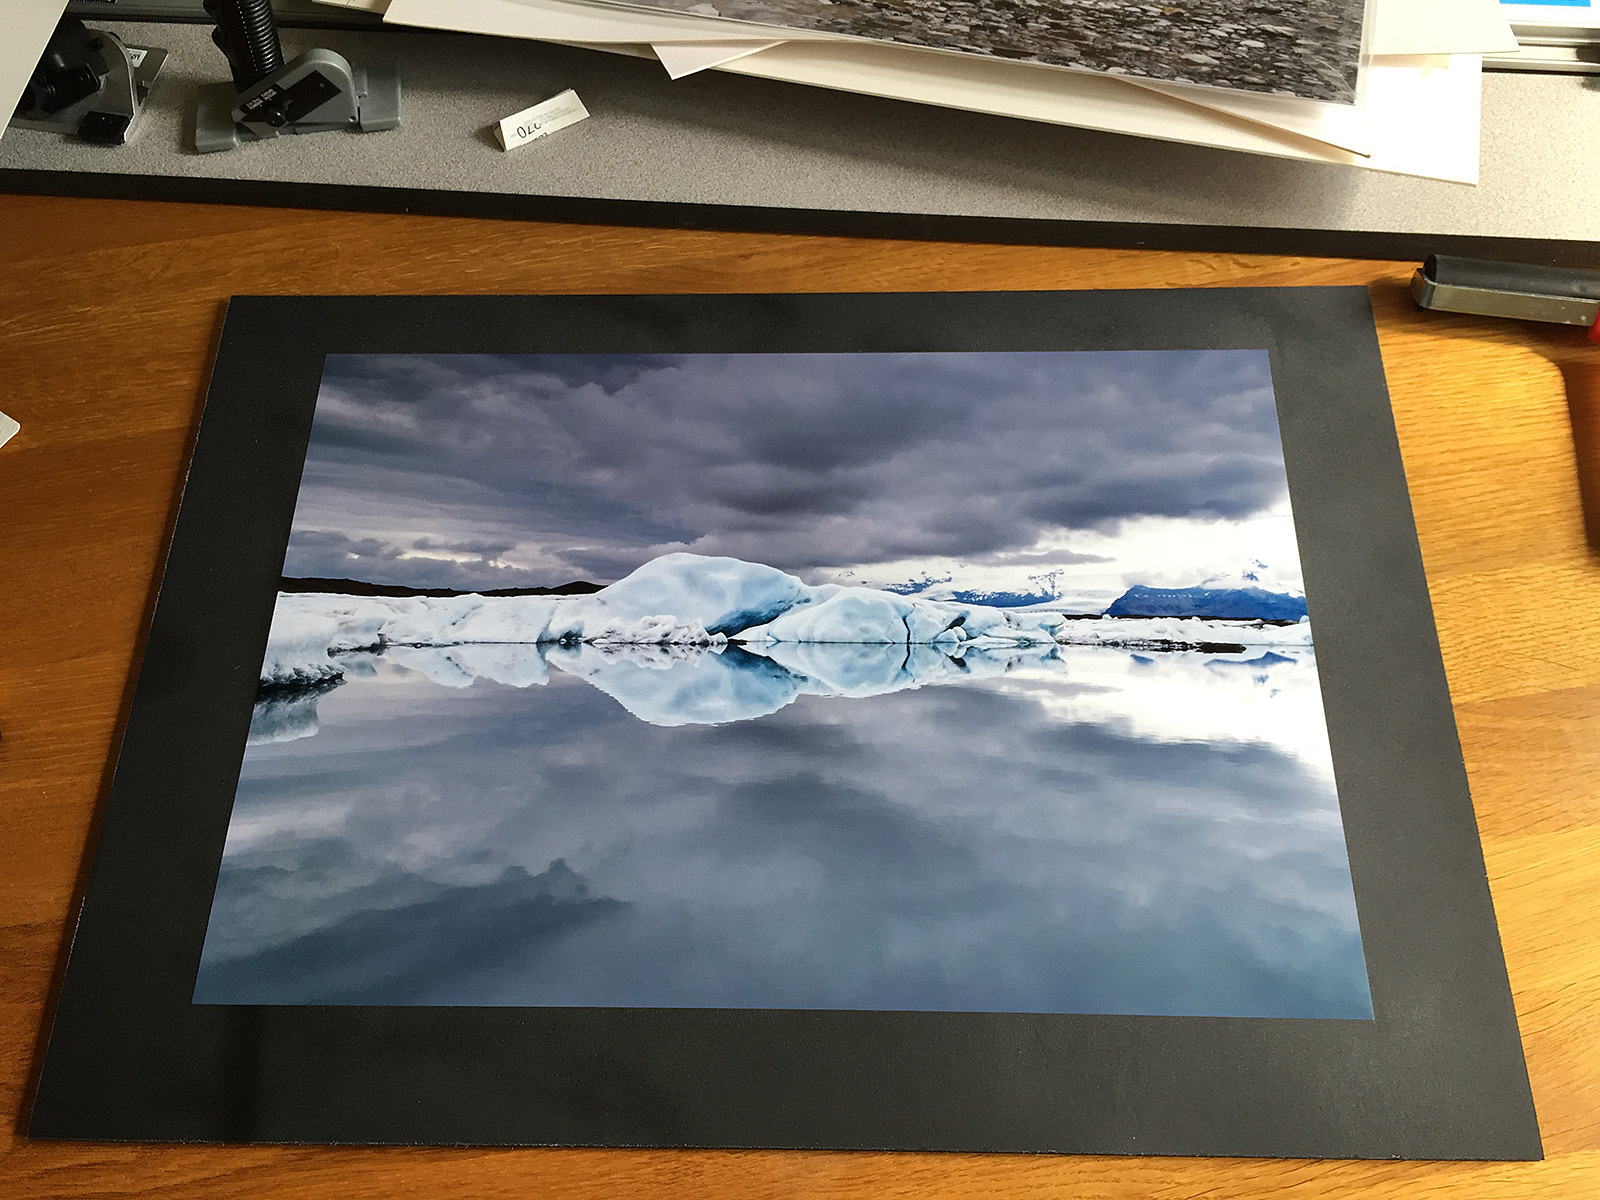
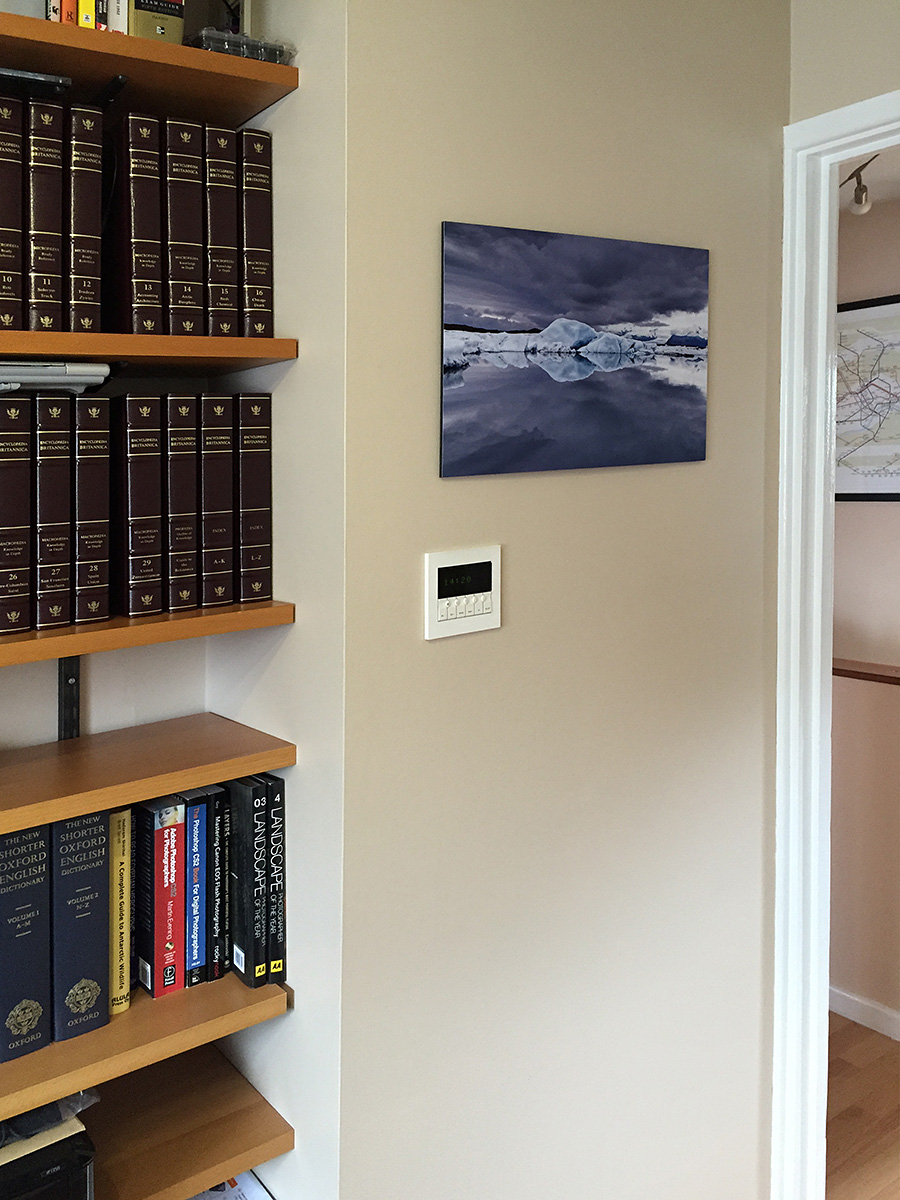
So, how does it look?

For an inexpensive contemporary feel I'm very happy with the result, especially as it is very easy to change the image whenever I want.

For an inexpensive contemporary feel I’m very happy with the result, especially as it is very easy to change the image whenever I want.

Like songs, everyone has a favourite photograph – one that has the power to lift the spirits when we are feeling down. So why not get these images out in the open and on your walls? Hopefully today’s article will convince you that doing so needn’t be an expensive, difficult or messy process.

Tagged , , , |

How to Choose a Compact Flash (CF) or SD Card For Your Camera

Buying the right memory card for your needs should be simple, but it isn't. The sales staff will convince you that only the fastest, biggest card will do, but that's far from the truth...

Buying the right memory card for your needs should be simple, but it isn’t. The sales staff will convince you that only the fastest, biggest card will do, but that’s far from the truth…

It’s a tense moment when you’re on location in the middle of nowhere about to shoot that “killer shot” and you suddenly realise that you’re very quickly running out of storage. It happened to me, for the first time ever, on the last trip and had it not been for one of the other guys very kindly donating a spare card I would have been faced with a nasty decision: stop shooting or re-use a card full of unbacked-up images.

Now, in my defence I should point out that I do have a pretty good strategy for image storage. For a start I have four 32GB and two ‘emergency’ 4GB memory cards that can handle approximately 4,500 images, usually more than enough capacity. I also perform, religiously, an end-of-day backup of all images to my trusty MacBook Air and a 500GB portable hard drive. So, should the worst happen and I do fill up all the cards, I can at least reformat one and use it again.

But the recent trip saw a number of factors conspire against me. First, we were in a location that did not have any electricity and had been there for a few days. Power was at a premium and as impressive as the Voltaic Systems’ solar charger (reviewed here)that I was carrying was, it was struggling to keep up with charging everyone’s camera batteries. Using it to recharge the laptop would have resulted in someone losing camera power. So no end-of-day backup.

Second, I was shooting a lot more video than expected on both the Canon 5D2 and 7D cameras and this was chewing its way through the memory cards. Third I was shooting a demanding scene – a moving landscape of lava in this case – where virtually every image was ruined by heat haze and so a lot of the shooting was using burst mode to try and capture the dancing lava in a pleasing and undistorted shape. In the course of two days I shot over a thousand images of lava and could have shot more.

So, with my excuses out of the way, I’m I the market for some more memory cards. Now I’m all for the idea of buying the best that you can afford and firmly believe the “you get what you pay for” mantra. But I don’t see the point in throwing money needlessly away, especially as I have two trips coming up (and still wondering how I’m going to pay for them) and so, rather than simply blindly buy the most expensive, I decided to do some research. What I discovered was that making an educated purchase was harder than it looks.

Hundreds of images were very nearly harmed in the making of this shot... [Click to enlarge]

Hundreds of images were very nearly harmed in the making of this shot… [Click to enlarge]

Depending upon the make and model of your camera you’ll either be in the market for a compact flash (CF) or Secure Digital (SD) memory card. Whilst there are some technical differences between the two standards most people won’t have a choice, although if your camera does support both, the general advice seems to be use CF due to slightly more advanced control circuitry and wear-levelling to prolong the card’s life.

But, irrespective of which format you use you’ll likely be judging the hundreds of available choices on the criteria of reliability, capacity, speed and cost.

Reliability

In a recent – and completely unscientific – poll I ran on Facebook reliability was the one common requirement. Not that this is surprising as, no matter whether the images are of a volcano, your child’s birthday, your wedding or you and the lads on holiday, no-one is going entrust their images to something unreliable.

Now it doesn’t take very long with Google to discover that a few brand names keep getting mentioned when the subject of reliability comes up. SanDisk is by far and away the most popular choice although Lexar and Transend also have a loyal following. Dig deep enough and you will always find a one-star review stating that the card failed, but sticking to any of the big name brands is usually a safe bet.

One argument that could be raised is that the memory market is so commoditised that a memory card is simply a standard memory chip inside a standardised case – in buying a brand name you’re simply paying for the name. Whilst there is undoubtedly an element of paying a brand premium, a well-made memory card is much more than a “chip in a box”. I look for brands with anti-shock gel (because it’s easy to drop these little things when wearing thick gloves), and also those that have a good working temperature range. If you’re a diver or passionate yachtsman some form of water resistance (or all-out water proof) will be important.

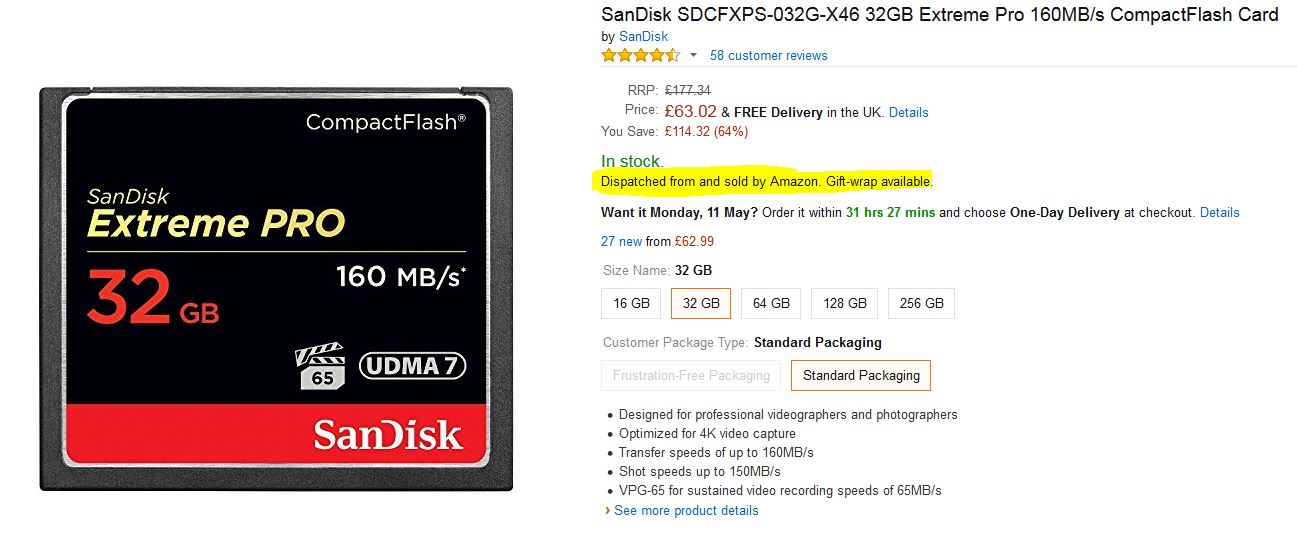
Be warned though: These days where you buy is just as important as what you buy. The memory card market is rife with counterfeits and it is worryingly easy to buy a counterfeit card on eBay, on Amazon and even on the high street. Avoid eBay altogether. With Amazon, look for the “Dispatched and sold by Amazon”. Amazon are an official reseller for most major memory card providers and so you’re going to get the real deal, but Amazon can also dispatch goods on behalf of other sellers who may be less legitimate.

Buying from Amazon falls inside most people's comfort zone, but for peace of mind you should check that it is sold by Amazon and not one of their 'authorised'' sellers.

Buying from Amazon falls inside most people’s comfort zone, but for peace of mind you should check that it is sold by Amazon and not one of their ‘authorised” sellers.

Amazon isn’t the only official source, of course and here are some links to find authorised resellers in your country:

http://www.lexar.com/where/

http://www.sandisk.com/about-sandisk/find-a-retailer/

http://ca.transcend-info.com/support/buy

Yes, an official card from an authorised reseller will cost more, and no one likes paying more, but when the temperature is so hot that the glue holding the soft grip on your camera has melted – and you’re still shooting – you’ll be glad of paying extra.

Capacity

Contrary to popular myth, bigger (capacity in this case) is not better. My 32GB cards hold approximately 1000 images from my 21 megapixel cameras and you don’t need a maths degree to work out that a 64GB memory card will hold 2000. If the card fails I lose, potentially, all images on that card. One thousand images may sound like a lot, but whilst I shot that in two days on my last trip a sports photographer can shoot that in an afternoon and cards always fill up just as that crucial photographic moment is about to occur. Memory cards – CF and SD – are now readily available in capacities up to 256GB and modern camera firmware is capable of handling such large capacity cards. So, why not make use of them?

First off, memory cards fail. It is not “if” but rather “when”. Most manufacturers publish a mean time between failure, or MTBF, figure that can be used to gauge the average expected life of the card, but it is only an average. A card can fail a long time before or a long time after the ‘average’ and when the card fails, you have to assume that the data will not be recoverable, or at least recoverable in a financially acceptable way. The big brand names offer recovery software, for example SanDisk’s Recovery Pro, that may recover some or all of the images in a failed card but you have to assume that a dead card cannot have its contents salvaged.

Second, you can lose the card. They are small and lightweight and one falling out of a bag or shirt pocket won’t make a lot of noise hitting the ground. Whilst I’m sure that most photographers have checklist when wrapping up on location to make sure they have everything, sometimes circumstance forces you to head off in a rush. On the last trip we were quite happily camped out on some high ground, camera bags open and gear laid out ready for use when the call came in that the snipers had seem something in the DMZ and we had to leave. Immediately. In the seconds it took us to throw everything in the bags and go, a loose memory card would have been easy to miss. Perhaps less melodramatic, but equally final, is dropping one in the sea when swapping a full one for a fresh one.

Or it could simply be stolen.

So, the size of the card you choose will be a therefore be a trade-off off between the inconvenience of having to frequently replace full cards against the effects of a lost, damaged or stolen card full of images.

Speed

Whilst both CF and SD cards are beginning to show their speed rating in megabytes per second (MB/s) many still use more cryptic means.

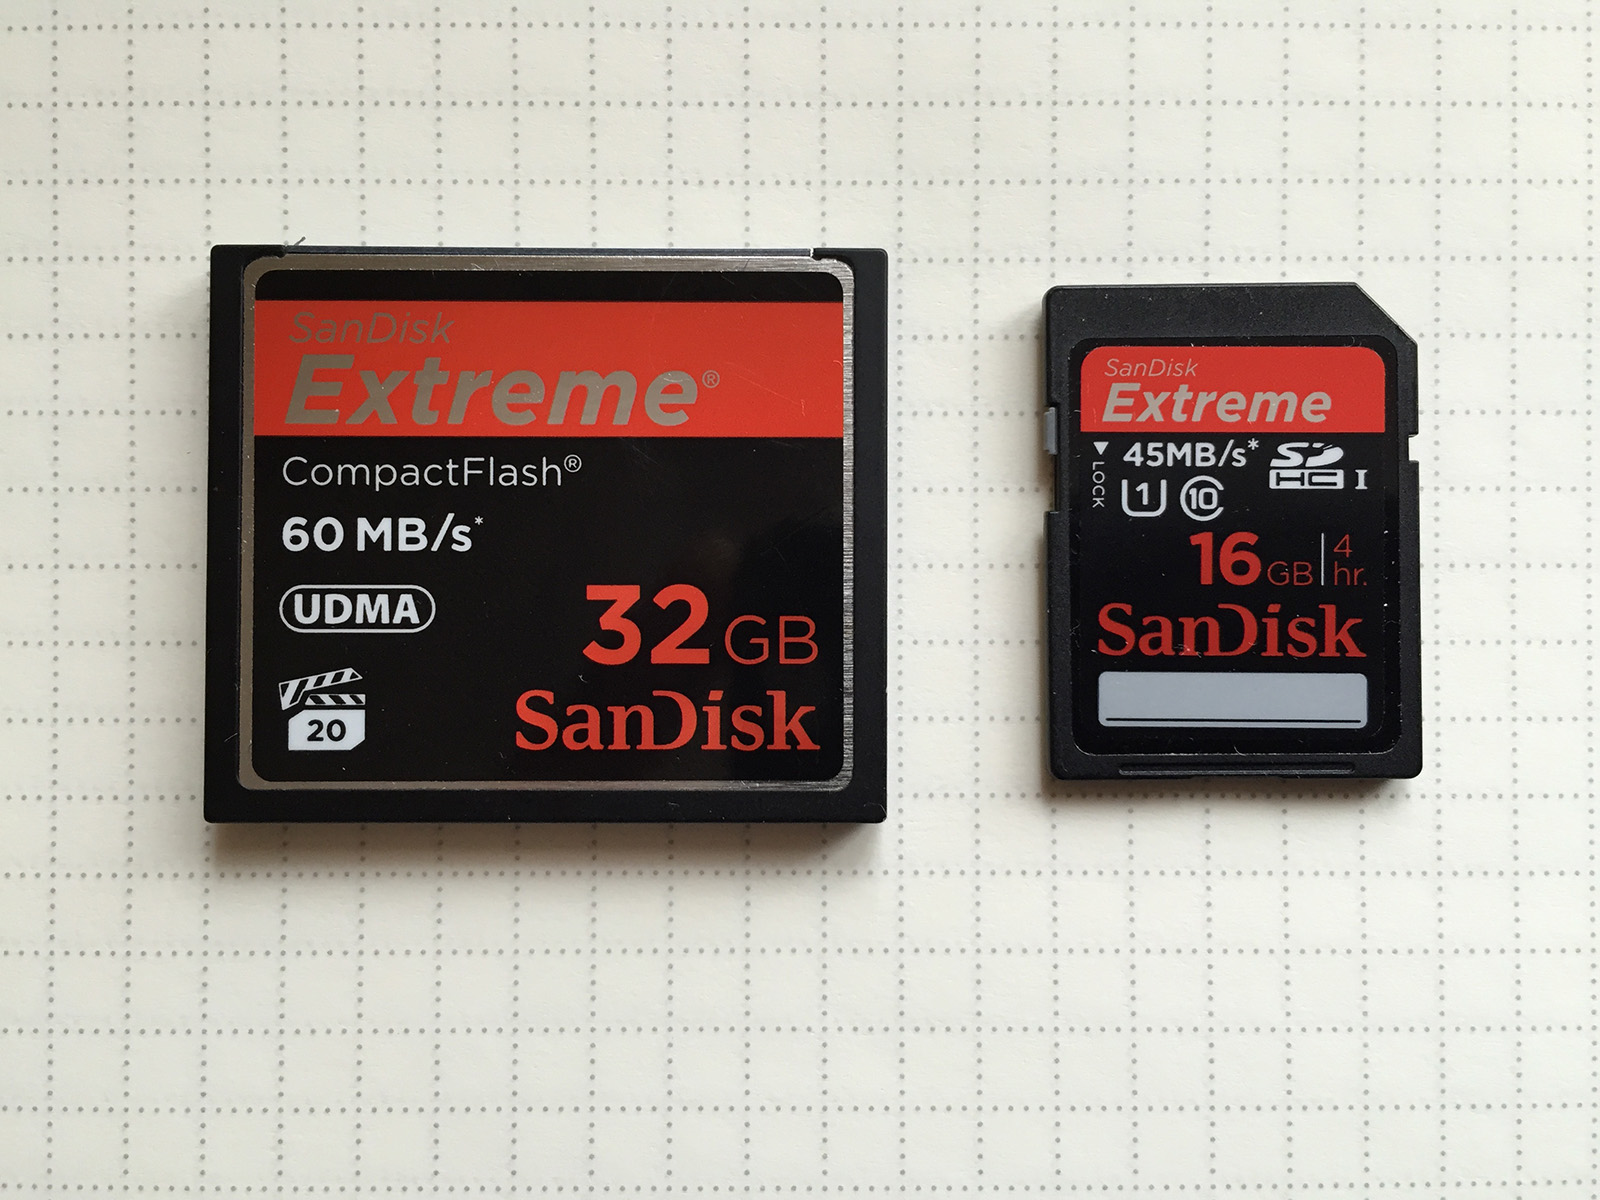
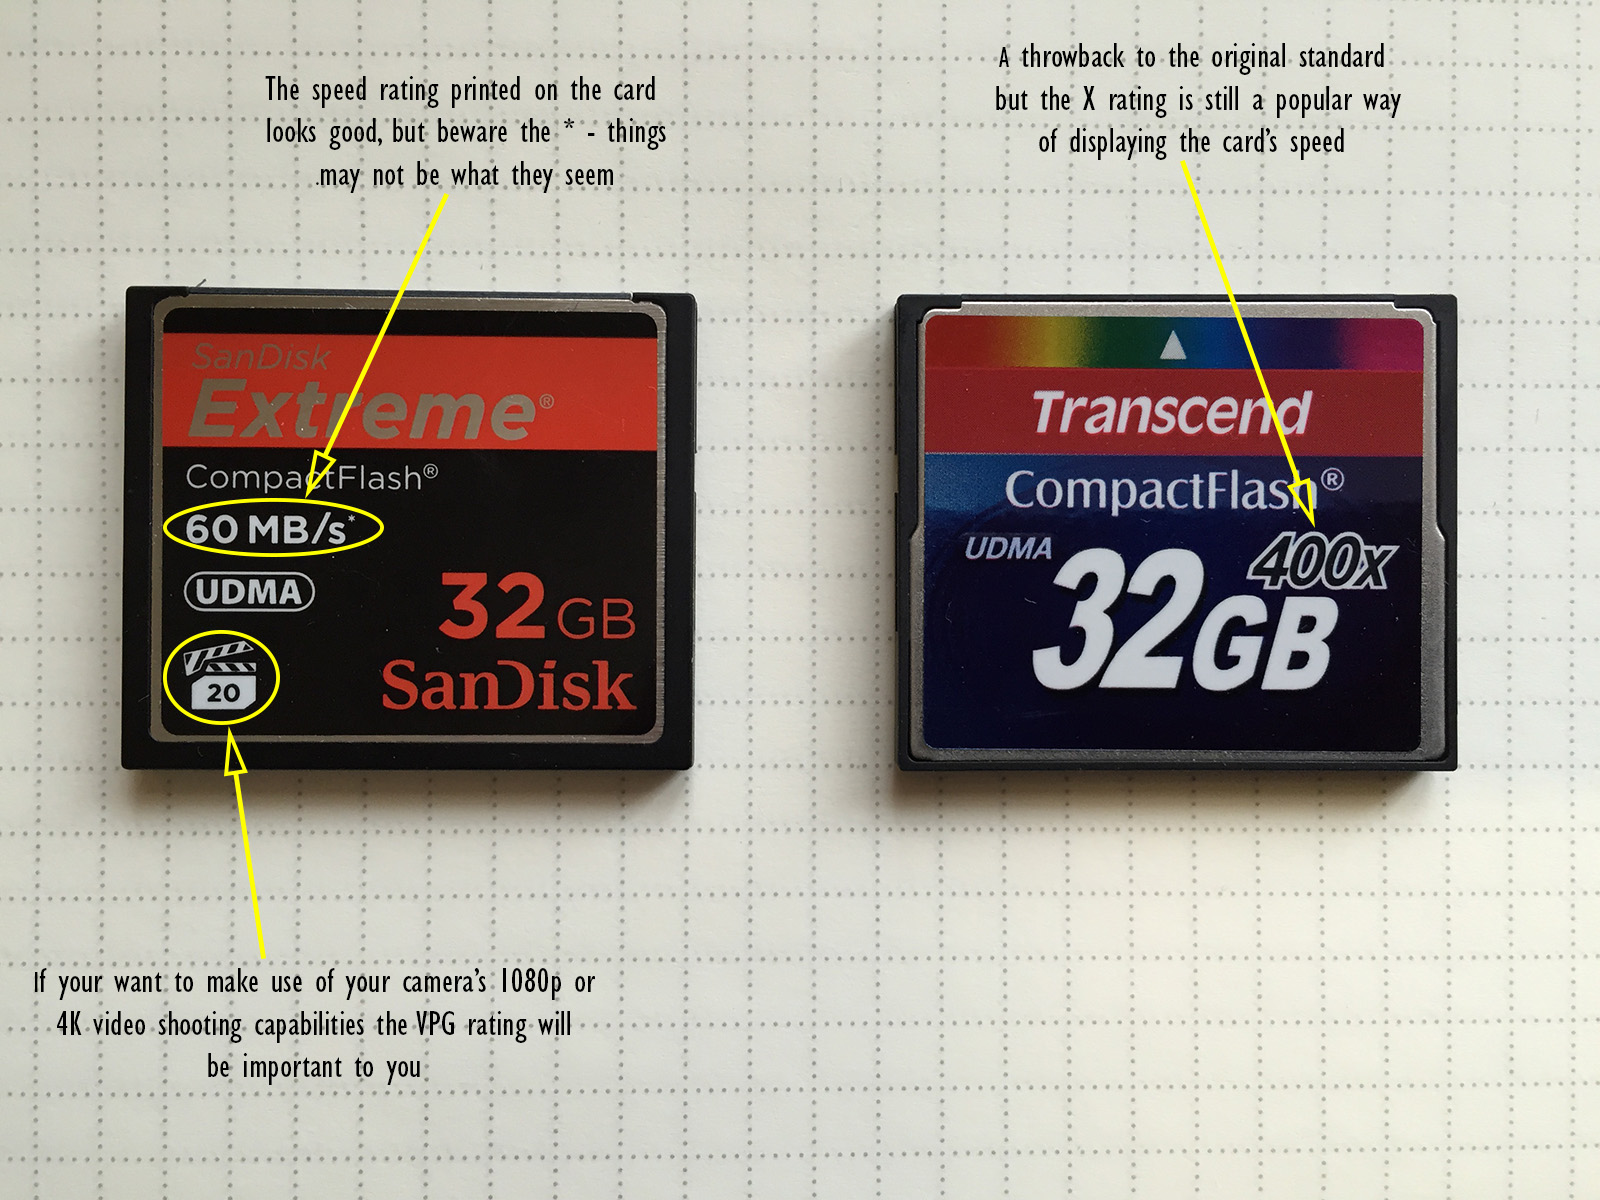
CF cards are a great example of this. The image below shows two cards from brand name manufacturers. But, which is faster?

No standard ways of indicating speed and lots of symbols can be confusing, especially when all you need to know is the card's speed in MB/s.

No standard way of indicating speed and lots of symbols can be confusing, especially when all you need to know is the card’s speed in MB/s.

Compact Flash is a standard, created by SanDisk, at a time when CD-ROM reigned supreme in the computer world. The CD-ROM standard defined a transfer speed of 150KB/s (approx. 0.146 MB/s) and so it was natural to express the speed of Compact Flash relative to this. So in the above image the Transcend CF card has a rated speed of 0.146 x 400, or 58.4 MB/s. On the face of it, the two cards are the same speed.

But it is a trick question, and the answer should be “Faster for reading, or faster for writing?”

The speed of a memory card will affect you in two important ways: How fast you can write images from the camera to the card and how fast you can transfer these to images to your computer. Whilst a slow transfer speed can be irritating, a slow write speed can result in lost shots or ruined video.

All cameras have an on-board memory buffer that allows you to hold the shutter down and take a rapid burst of images in quick succession. But at some point that buffer fills up and the camera has to move the images to the memory card before more can be taken. Cameras are clever enough to be writing images to card whilst adding new ones to the buffer, but the write speed of the card will play a key role in keeping the on-board buffer empty enough to accept incoming images.

In the above photograph the SanDisk is rated at 60MB/s, but note the *. This is the theoretical maximum speed of the card and actual read and write speed will depend upon the make and model of your camera, and even the specific firmware your camera is running.

It is a minefield as essentially you could buy an older generation 60MB/s card and a newer 160MB/s card (for double the cost) but both may give the same performance. Or, as I see it, I could spend the same amount of money for twice the storage.

Luckily, there are web sites that run “real-world” tests of memory cards in various devices and cameras and one that holds a great deal of information is http://www.cameramemoryspeed.com/. For me it didn’t have any tests of memory cards in my cameras but the (no longer updated) http://www.robgalbraith.com/camera_wb_multi_paged527.html?cid=6007-9784 did and it lists the burst mode test of my 60MB/s card at 35.6 MB/s on my Canon 5D2 and 40.1 MB/s on my Canon 7D. By comparison the same site lists the SanDisk Extreme Pro (90MB/s card) at 40.7MB/s on the 5D2 and 45.1MB/s on the 7D, not a huge increase in actual performance.

The issue gets more complex when looking at faster memory cards as the camera’s firmware begins to have an effect. Take a quick look on Amazon and you’ll see speeds of 160MB/s or 1000x – fantastic speeds but of no use to you if your camera doesn’t support the UDMA7 standard these memory cards employ. My 5D2 and 7D did not until I updated the firmware. But the average consumer should never get to the point where they’re considering firmware limitations.

If you’re shooting video – and 1080p is the standard here – you need a minimum write speed of around 20MB/s to ensure that you don’t get pauses in the recording. You can go lower – down to around 8MB/s – but it isn’t recommended. The SanDisk CF card shown above clearly states its suitability for video by showing the Video Performance Guarantee (VPG) logo, but the Transcend would be equally capable.

And we haven’t even mentioned SD card speed rating yet.

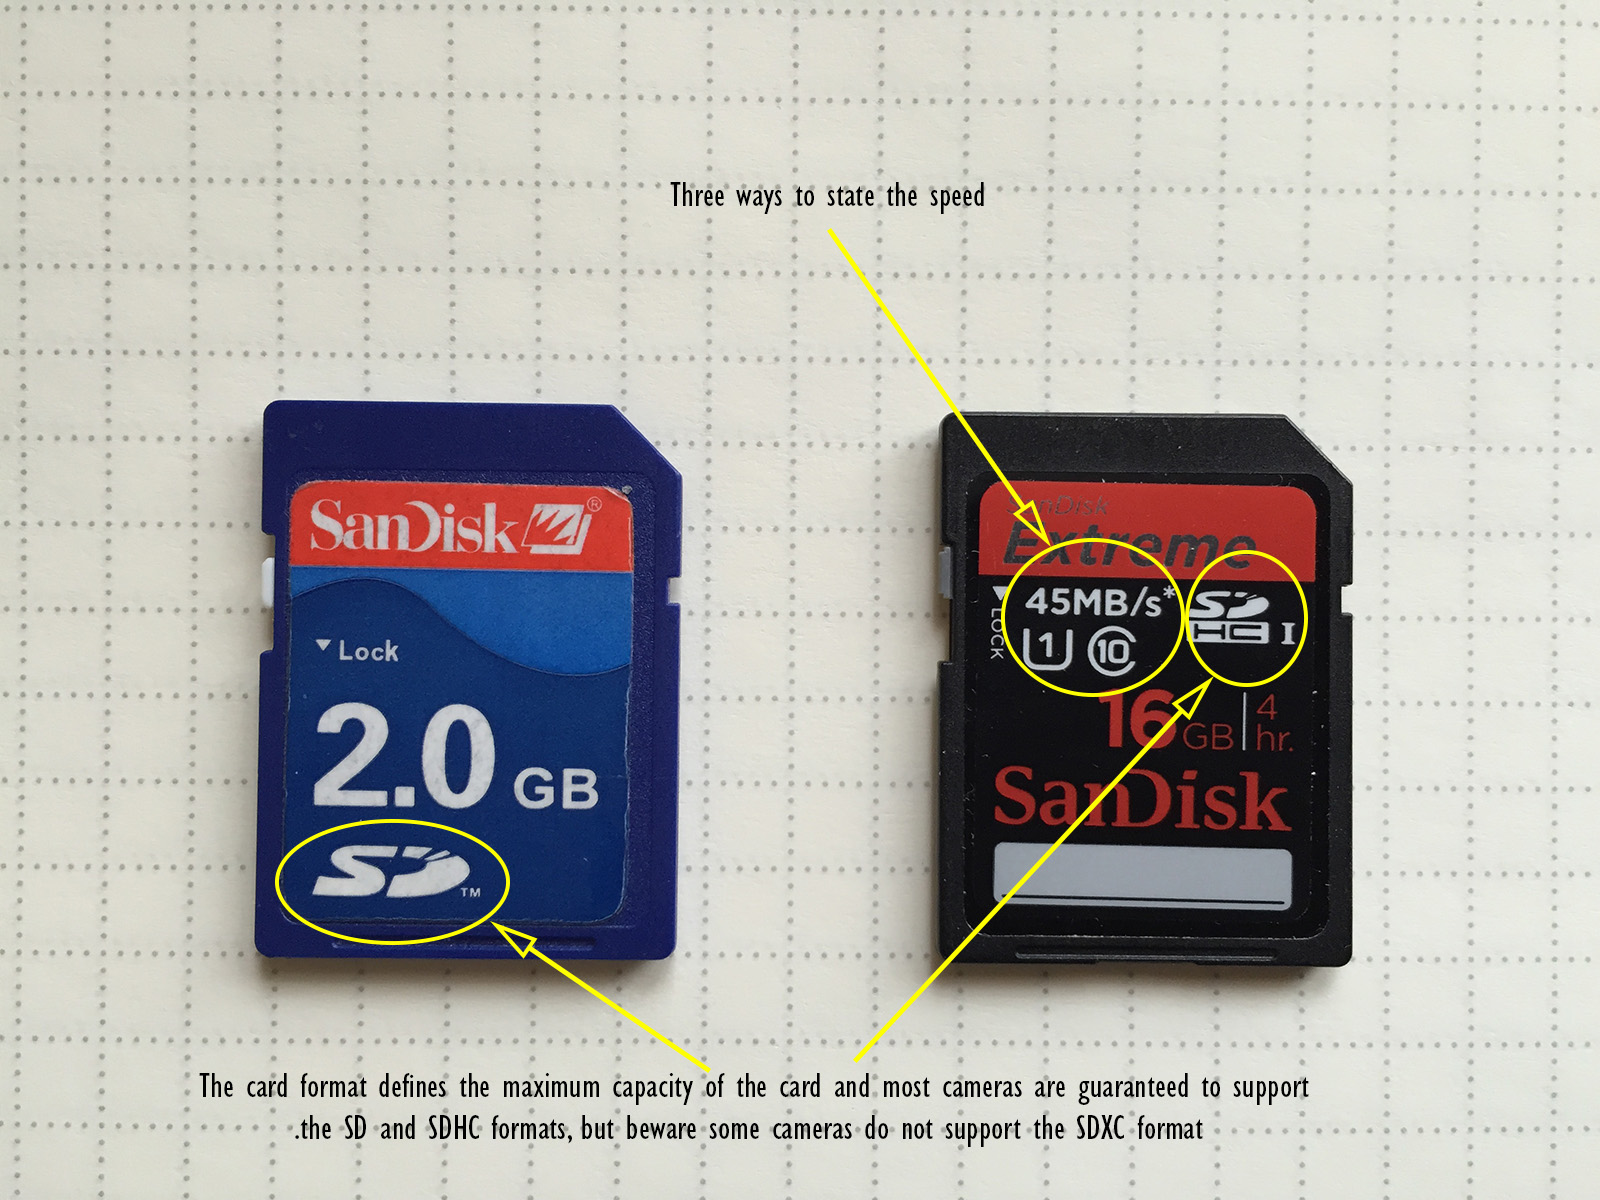
SD labels

SD cards complicate the issue slightly by not using a multiplier, but rather the class system, although this is being replaced by the newer UHS speed class system, simply as it is no longer relevant to today’s high-speed cards. Still if the black SanDisk card in the image above didn’t clearly state its speed in MB/s, you wouldn’t know if this UHS class 1 card could reliably support 1080p video.

SD classes and UHS speed classes decoded into MB/s. Courtesy of Wikipedia.

SD classes and UHS speed classes decoded into MB/s. Courtesy of Wikipedia.

Like Compact Flash the maximum speed you actually get will depend upon the camera and firmware but unless burst mode photography is important to you any card with a guaranteed speed of 20MB/s or above will be fine and even cope with 1080p video recording.

Cost

The final consideration is cost and thankfully and easy point to address. No matter what your budget is, the sales staff will convince you it isn’t enough. But if you’ve read the above you’ll have a better understanding of what factors are important to you and there’ll likely be a couple of options to choose from. If that is the case and you have a choice of, say, a 16GB card at 160MB/s and 32GB at 60MB/s – within your budget – get the 32GB card as you’ll not notice the difference when taking photographs and video, or buy the cheaper card and save the money.

Summary

Buying anything on a budget means that compromises have to be made, but hopefully the above gives some help in deciding how to choose a memory card for your budget. It is another big article, and so I’ll summarise the key points here:

  1. Buy a reputable brand name and to avoid counterfeits ensure the seller is an authorised reseller. For example, buy from Amazon as a seller and not simply one of Amazon’s retailers.
  2. Don’t worry about speed unless you’re doing something very specific, such as shooting 1080p video whilst simultaneously taking photographs or shooting a very long series of burst mode photographs (or lots of bursts in quick succession). As long as the card has a write speed of 20MB/s you’ll be able to shoot 1080p video.
  3. For most people the only thing a faster memory card will give is better transfer times to their computer, not better in-camera performance.
  4. It is better to buy four 16GB cards than it is to buy a single 64GB card. That way loss, theft or damage to the card won’t have such a devastating effect.
Tagged , |

The Dark Side Of Modern Photography

I’ve long held the view that one of the worst aspects of modern photography is that it has made it very easy to never actually produce anything – anything physical that is. In the ‘good old days’ of film cameras you had no choice and,  whether you has access to a darkroom or you relied on a high street store to develop your photographs, at some point you would end up with a physical item. You really felt that you had created something.

The digital (r)evolution has changed everything. Images can be born, live and die without ever once seeing the light of day. Not that this is a wholly bad thing; for certain aspects of modern life such as social media, the speed and ease of an all-digital workflow is fantastic and not only allows us to keep our friends and loved ones up-to-date, but allows for individuals in oppressive regimes to get their story heard quickly and with less risk of censorship. So no, I’m not suggesting that ‘all-digital’ is necessarily a bad thing, but I do think that it is one that we will regret and here’s a case in point.

I was speaking to my parents recently who are in their eighties and in the process of clearing up a house full of a lifetime of gathered possessions, including thousands of photographs. Many, by their own admission, are not worth keeping, but the process of having to go through boxes of images has sent them down memory lane in a kind of retrospective of their own lives; things they had forgotten about have been remembered once again. And that’s the real power of a photograph: Photographs don’t have to be professionally taken, framed properly with the right light and capture a “wow” moment to be important photographs. They just have to move you. And everyone can take photographs that move them!

The problem I foresee is that, unlike paper which hasn’t fundamentally changed as a medium for a few hundred years, digital storage has. I remember using punched cards on computers, and floppy disks (remember them?) and my first hard disk used the ST506 interface. If you’re wondering what a ST506 interface is, then that has already proved them point I am trying to make as most technically adept friends of mine won’t have heard of it. Even if I still had the hard disk, and magnetic degradation had not rendered it unreadable, the chances of me finding anything that could read the data are close to zero. Twenty years from now we’re going to be saying the same thing about the current storage medium of choice, SSD. And the new kid on the block – cloud storage – is not a solution either. Even if the cloud service provider is still in business in 40 years time, will the digital format that the images are stored in be readable? What if the images are not yours, but a parent or relative unable to access the account? I’m not a betting man, but I can guarantee that paper will still be around. 

Photographers, whether they make their living from the art or pursue it as a passion, already know the importance of print. So today’s post is really for the two groups most “at risk”:

If you have no interest in photography, but just use your smart phone to capture your mates on holiday, your other half when they’re not looking or your kids at the zoo, buy a cheap printer (they’re only £30), print those images and 40 years from now they will bring those distant memories back in an instant. Will they be perfect photos? No. Will they be priceless? Absolutely!

If you have an interest in photography and are just starting out go buy a moderate inkjet and print your work. Holding your image in your hands will show more about composition – and the value of photography – than a screen ever can.


Tagged |

There’s Big Money in Battery Packs

After the heat of a lava lake caused a couple of my Canon LP-E6 batteries to begin show issues when charging it is time to replace them. Better now than forget about it until two days before I head off on the next expedition and then panic ensues. In any event, as the recent Ethiopian trip proved, you can never have too many batteries.

Up until now I have been using a mixture of official Canon LP-E6 – which came with the camera bodies – and aftermarket batteries. Without actually looking at them I would be hard pushed to tell the difference between the official and aftermarket cells; both appear to last a for a high shutter count and the Canon 5D MkII body happily shows the charge left on both.

But, as both battery packs that have now developed issues are the aftermarket ones, I have decided to replace them with the official Canon ones. It was not an easy decision to make: £79 for an official battery pack versus £20 for a good quality aftermarket one. But as my work takes me to more extreme and remote locations, I do have to rely on the kit I take. As the old proverb goes “For want of a nail” – the nail in this instance being the battery pack the powers the camera and lens.

Now, whilst I didn’t buy the battery pack because of the packaging, I do have to say that I’m impressed. A lot of time and effort and been spent on the whole presentation. It oozes quality. In fact, had I not actually been examining every detail I would have never known.

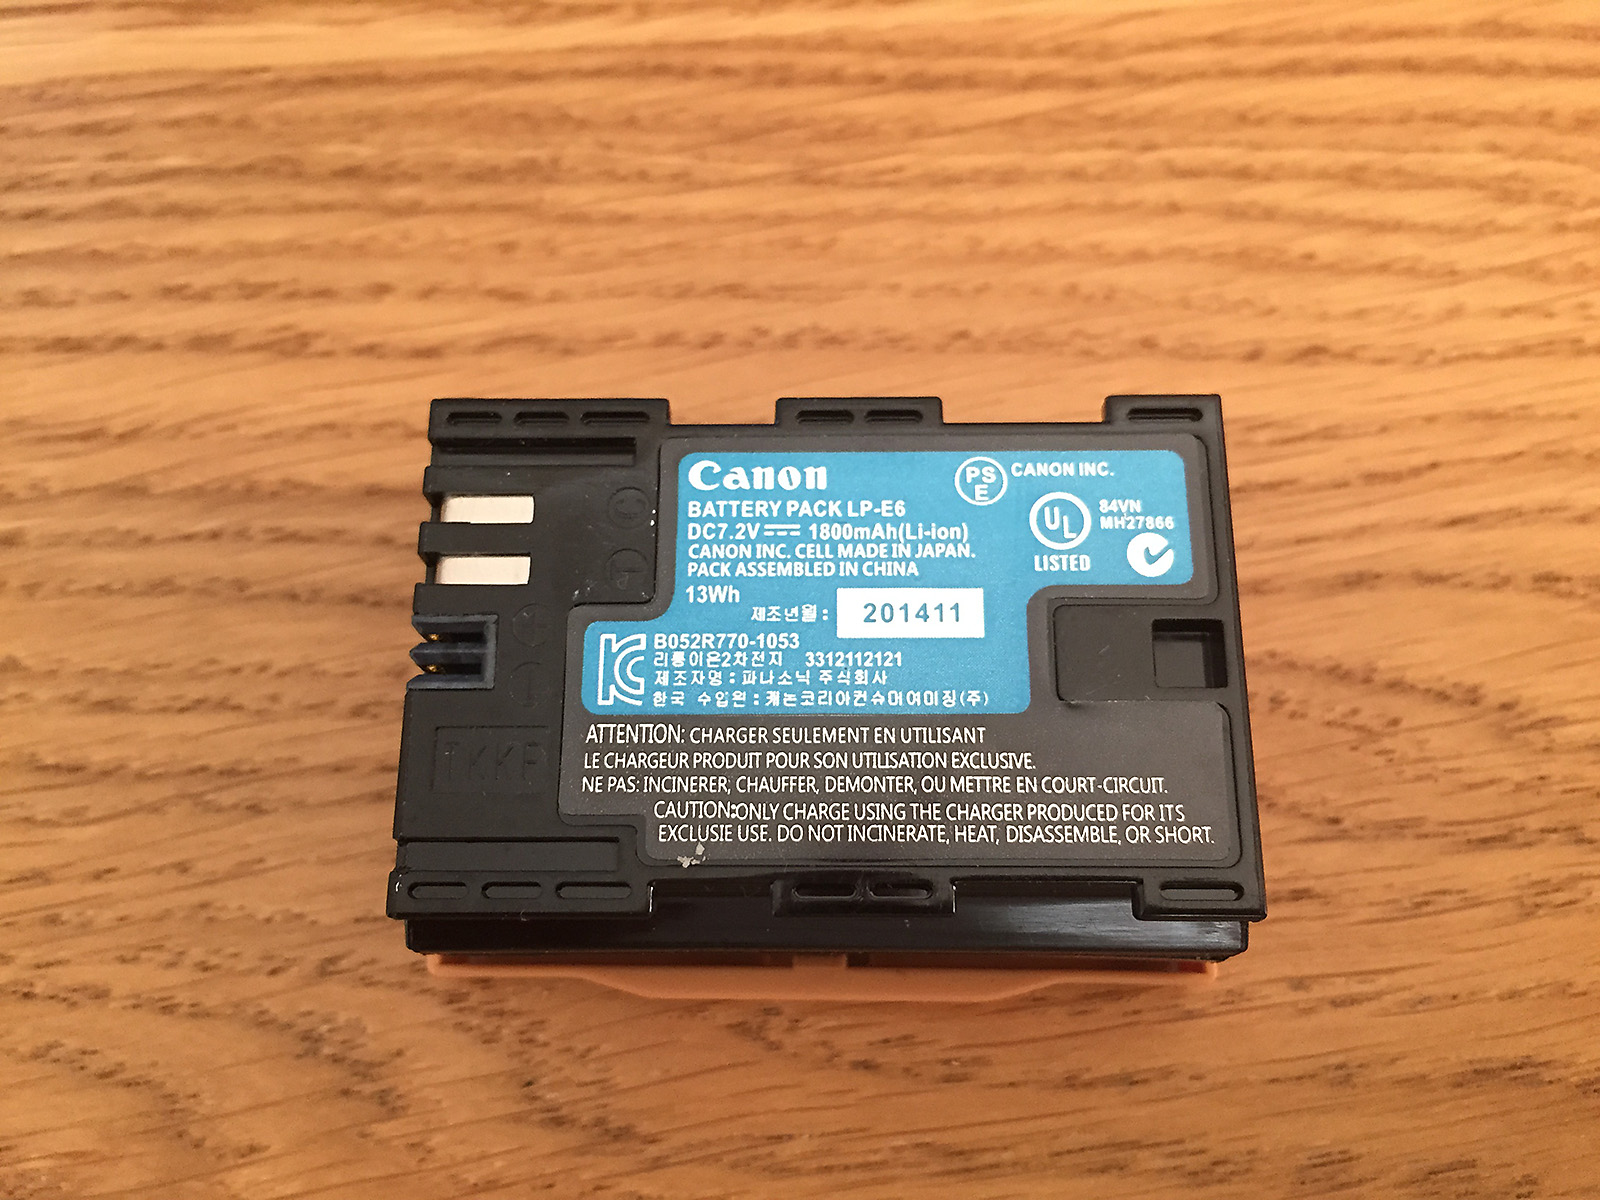
But it is definitely a fake. Can you spot why?

Can you spot why this Canon battery pack is not the real thing...?

Can you spot why this Canon battery pack is not the real thing…?

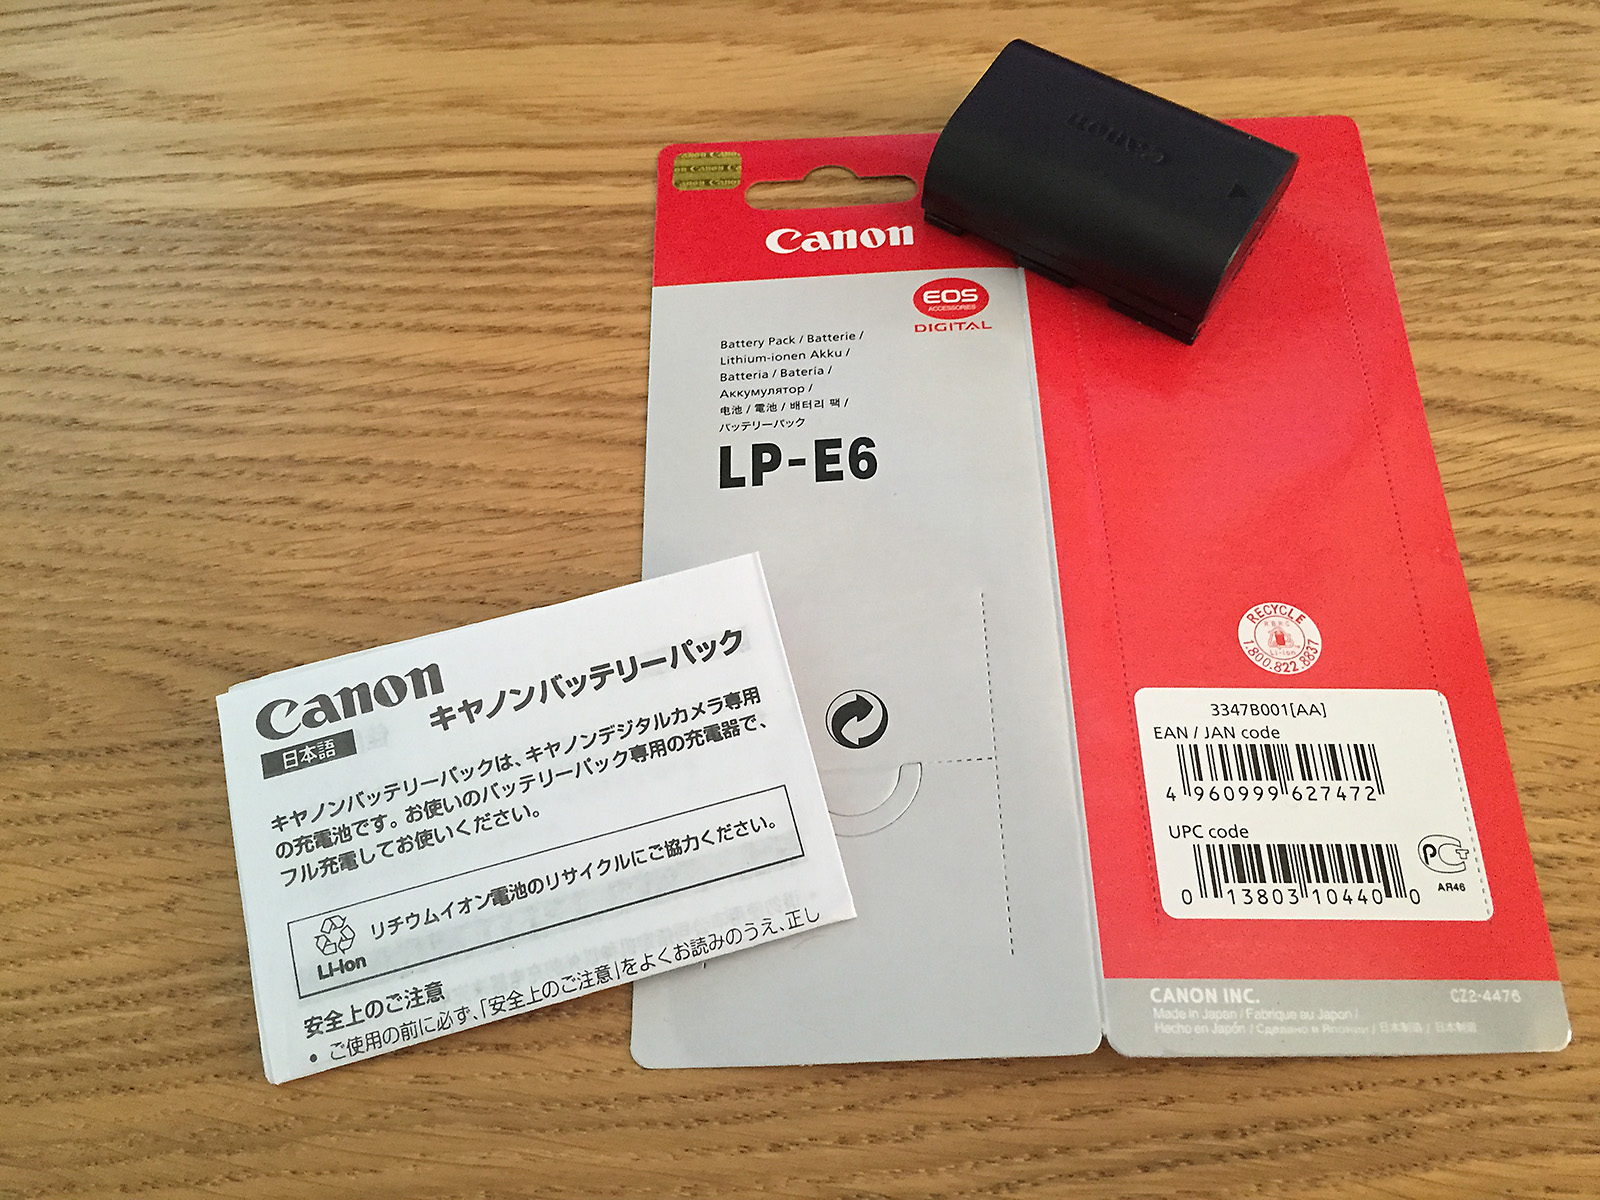
Here’s some more shots of the very detailed packaging.

Convincing, and high quality, packaging...

Convincing, and high quality, packaging…

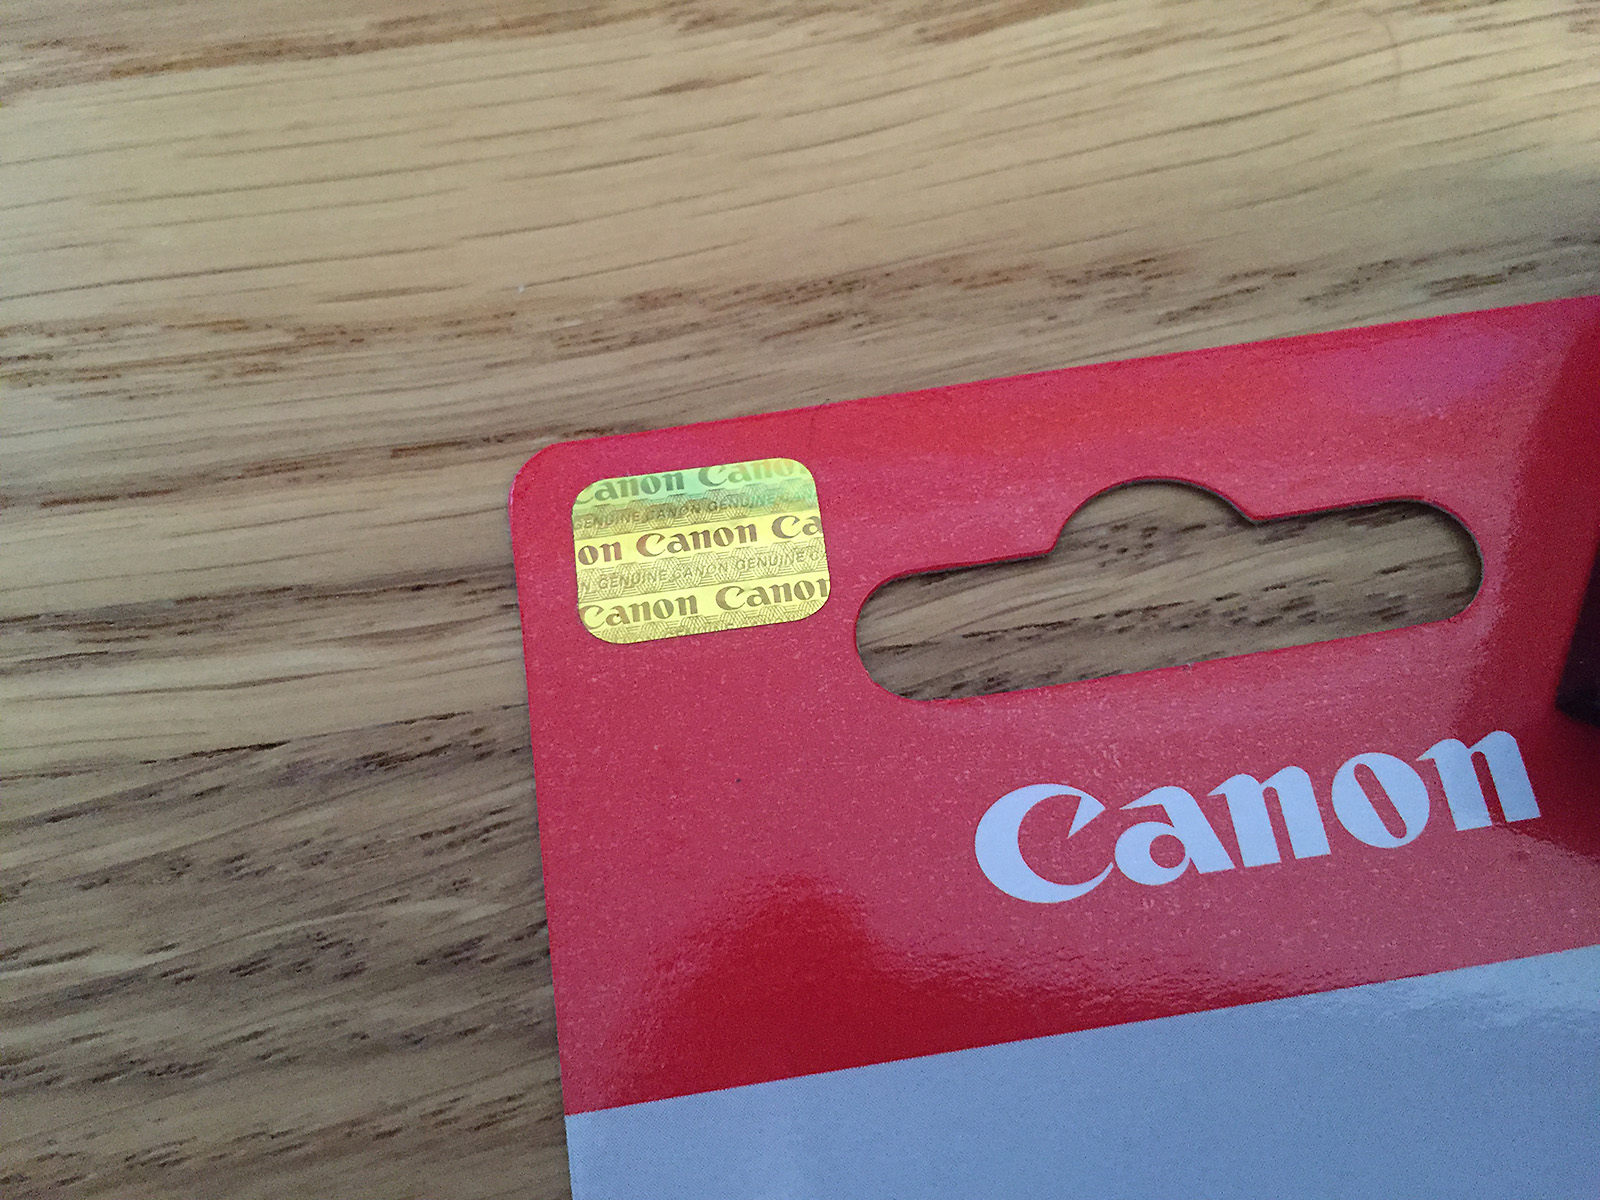
The hologram is a nice touch...

The hologram is a nice touch…

Needless to say that this was bought off eBay so it is very much caveat emptor, but this was being sold as “genuine and original” with a price high enough that made me think that it could well be precisely that. It could have been any number of legitimate sellers: unwanted present, Christmas cost more than expected unused items being sold off, someone no longer interested in photography to name but three.

But for someone to go to all this trouble to make a fake look and feel like the genuine battery pack does make me wonder just how much money there is in the fake market.

Now the point of this is not to suggest than battery packs from a source other than the original manufacturer are bad: there is a big difference between aftermarket batteries and fake ones. For many years I have been quite happy with aftermarket batteries (on my current 5D2, and 7D and well as my previous 40D) and before they went bust Diamondback batteries were my favoured option. I also own a Hahnel battery pack and they too are another well regarded manufacturer. Well made aftermarket battery packs from reputable manufacturers include all the require protection circuitry to stop overheating and potential fires. But if a seller is masquerading a battery pack as an original then it is going to be for profit. In that case you can probably forget the niceties such as protection circuits.

So, what are your options?

First, buy from a reputable source and official Canon resellers. If it appears to a ‘too good to be true’ deal, it probably is. That said, you still have to exercise caution. Amazon is a good example:


Don't blindly buy just because the order is 'fulfilled by Amazon'...

Don’t blindly buy just because the order is ‘fulfilled by Amazon’…

Amazon is a reputable company, but there is a big difference between ‘sold by’ and ‘fulfilled by’. The best option here is the £46.48 option as that is sold and fulfilled by Amazon, who incidently are an authorised Canon reseller.

Second, take some time to learn about some of the obvious signs of counterfeiting. Canon have a link off their US site (http://usa.canon.com/cusa/about_canon/standard_display/aboutcounterfeits) although Canon’s images are too small to be of use. A well written and clearly documented article for Canon LP-E6 counterfeits can be found at http://tazintosh.com/en/canon-batteries-watch-out-for-counterfeits/

Third, simply accept that, after spending £1500 on a camera body and sticking a lens costing in the region of £1000 on it, trying to save money by buying cheap batteries to power the whole thing isn’t going to be your greatest decision. Frankly, put in those terms, it really make no sense at all. Even at the full retail price, the Canon LP-E6 is less than 3% of the average camera/lens combination it powers.

But back to my story. The seller has refunded me and I’ve decided not to name-and-shame, primarily as there is no real point. There are too many counterfeits out there and highlighting a single seller will not achieve much. Better to cut the problem off at the source and accept that a reliable and good quality battery pack is going to cost.

Of course, I could go cheap and save £40 but given that my average trip these days costs at least one hundred times that, if the battery pack stopped charging on my next expedition and I missed the shots I was after I had better be near another lava lake – that would give me something to throw myself in…


Tagged |

The Waiting Game

The other day I was talking to someone just getting started in photography and later got thinking about what I have discovered over the past few years and if there was any advice that I could give other than the usual – and obvious – “know how your camera works” or “practice, practice, practice” advice. And there is: Good photographs rarely just happen.

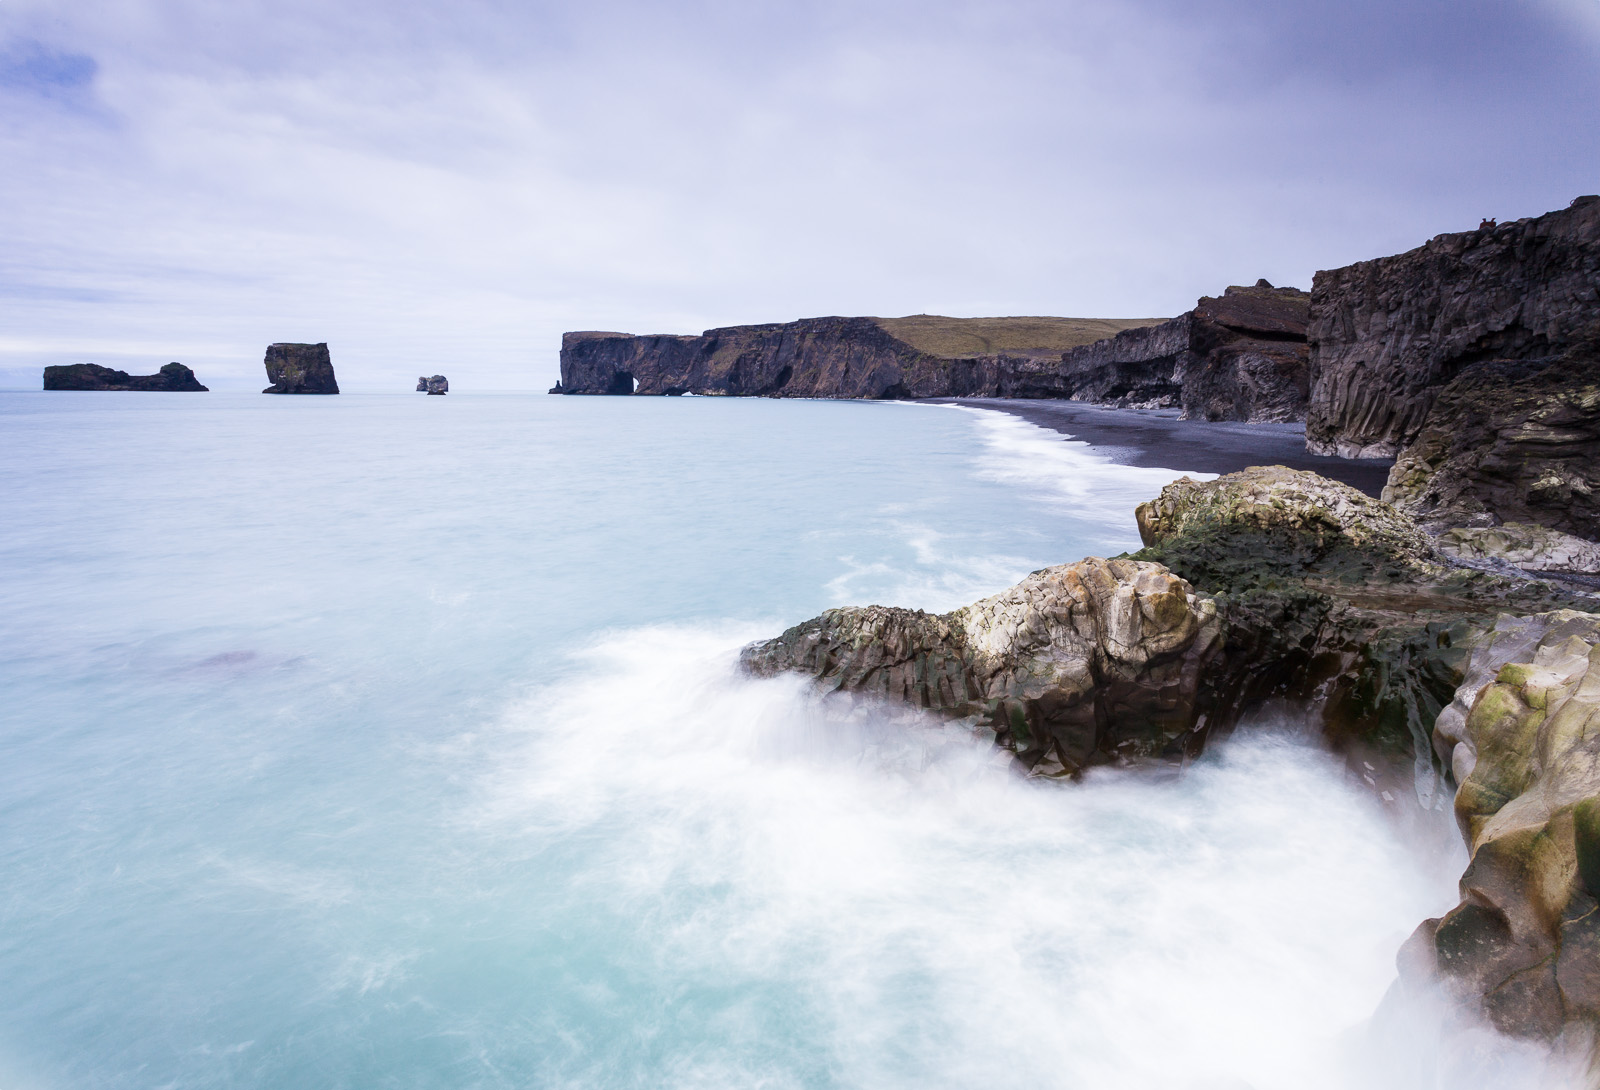
Part of the joy of solo travel is that I can afford to spend lots of time waiting. And waiting. Usually it is for inspiration, or thinking about how to shoot a scene, or the light. But often it waiting for people to get out of the way. Iceland is a great case in point. One of the popular tourist spots along the southern coast is Dyrholaey. It is especially popular with bird watchers as several species, including puffins choose it as their nesting grounds. So, leave it to me to visit during nesting season when, what felt like every bird watcher on the planet, was out on the cliffs keeping a lookout. If that were not enough there is a fantastic black volcanic sand beach there with a cave at the far end and I can understand why people were keen to walk along to the cave and back. I would, usually. But I had this image in my head and it did not include people on cliffs. Or beaches. Or even, as cute as they are, a passing puffin. It just had the landscape.

So I set up the tripod, framed the shot, ran a few test shots to check focus, exposure and the creative look and then waited. For a few hours. The cliff line would clear, but people were still on the beach, or vice versa. Or both were clear, but the clouds had moved in. There was always something not right. I waited so long that the tide came in, changing the images, luckily in a way I liked.

Then it happened: No people, no birds, no grim clouds and an, as if to reward me, an incoming wave. Lovely.

Don't tell her but my mother was right: Patience is a virtue. 4secs, f/13 ISO 100

Don’t tell her but my mother was right: Patience is a virtue.
4secs, f/13 ISO 100

Now yes, I could have cloned people out in post production, but I shoot to print at a metre plus in size and unless you’re really very good, Photoshopping can be spotted. Anyway, you really can’t remove clouds or add waves in Photoshop so getting it right in camera is usually the best course of action. So, my advice is simply that. Good shots don’t just happen – you make them happen.

By changing your viewpoint, or removing the waste bin sitting next to the rustic door, or by picking up rubbish seen in frame. Or simply by waiting.

Also posted in Landscape Tagged , , , , , |

ND Filter Example #2

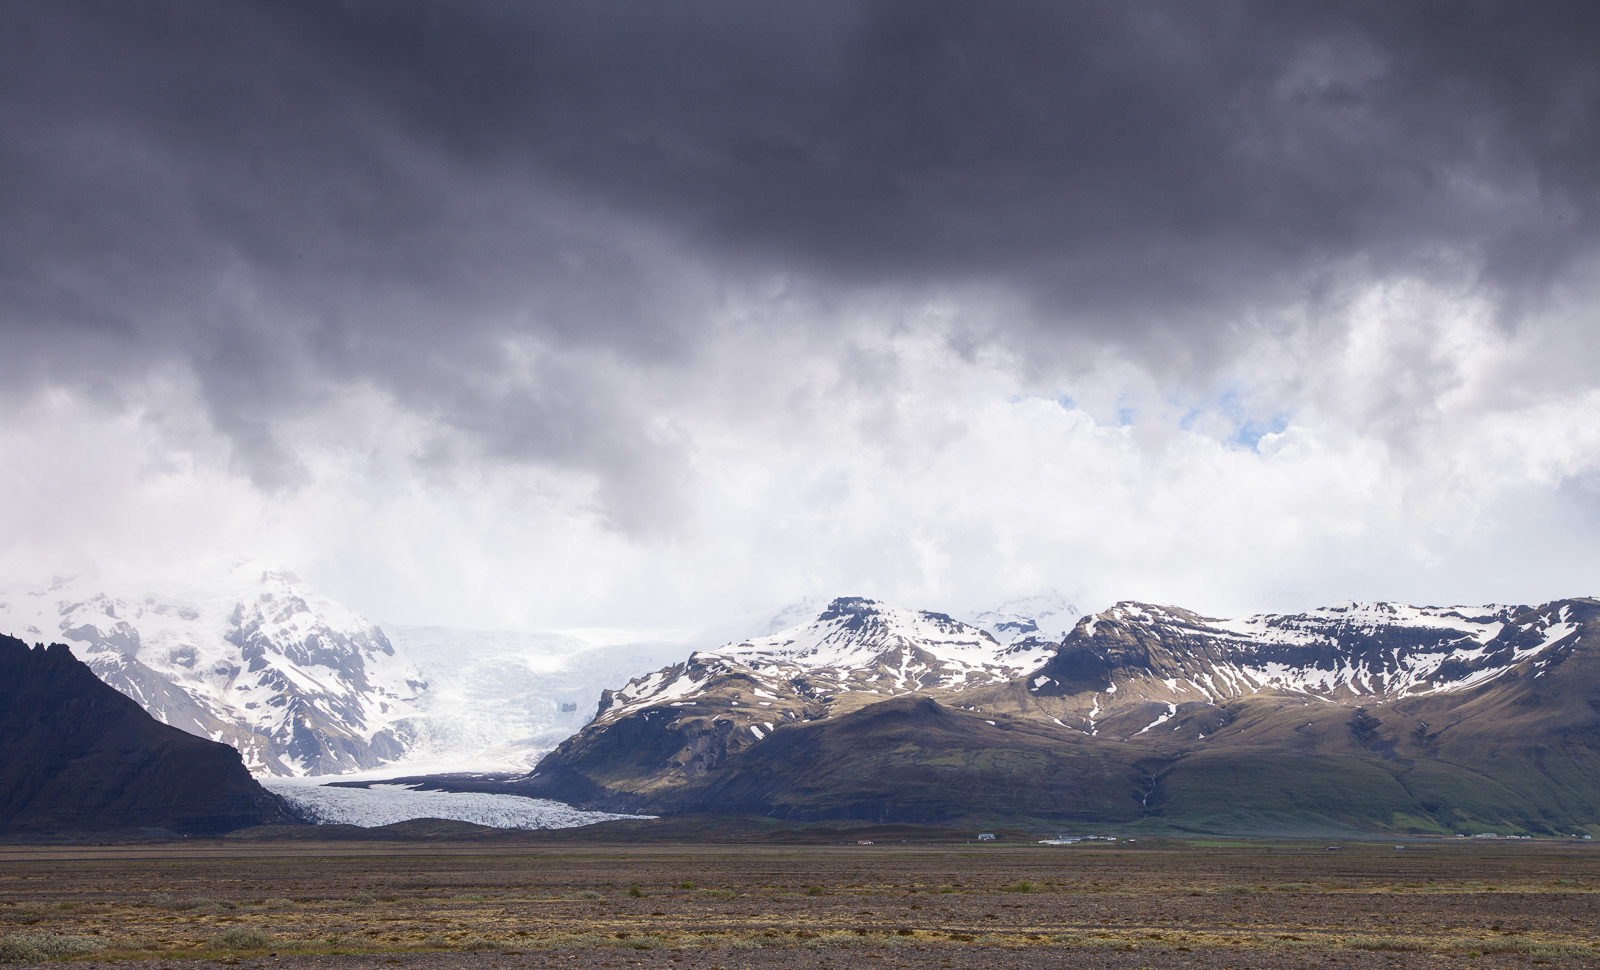
Here’s another use of filters in Iceland. But which filter, if any?

Skaftafellsjokull Glacial Tongue

Skaftafellsjokull Glacial Tongue

Also posted in Landscape Tagged , , , |

ND Filter Example #1

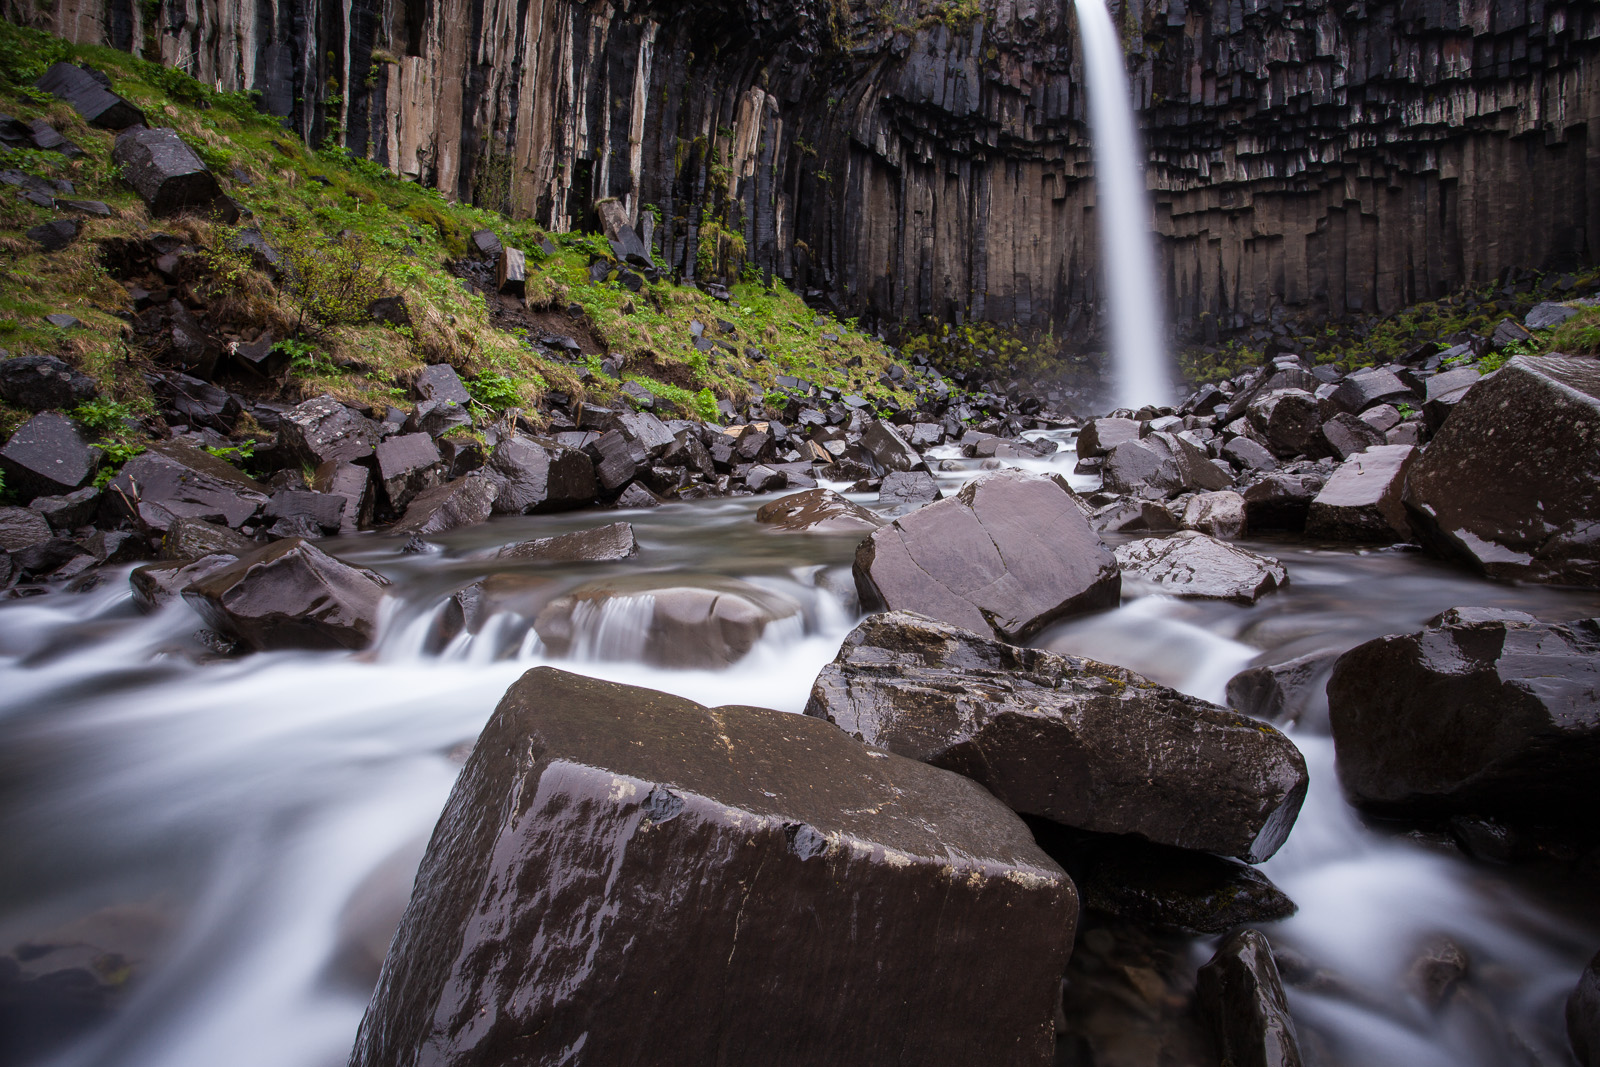
I mentioned in the last post that I’d give some examples of ND and ND grad filters in action. Here’s the first. If you’re new to this end of photography and are keen to try this with your own camera, see if you can work out which filter I used (ND or ND grad).

Svartifoss

Svartifoss – aka The Black Falls


Also posted in Landscape Tagged , |

Getting Creative With Plastic: ND Filters


Holiday season is upon us once again and it’s time to capture some of those memories for sharing with friends and family. But, as good as camera phones are becoming, there comes a point where you realise that, no matter how many editing features they offer, the images they take are not matching up to the ones in the advertising brochures that likely enticed you to the holiday destination in the first place. So, how do you take photographs like the pros?

(At this point in the original draft I wrote paragraphs about creative vision, experience and a whole bunch of other stuff that I arguably know nothing about. But then I realised that it wasn’t really necessary to the point I want to make, so let’s just assume that you’ve managed to find a scene that you want to shoot in a creative way.)

With photography, creativity usually crops up twice. The first time is when framing the shot – the decision as to what to include, what to remove, what depth-of-field and the like. The second time is in the creative control of the available light and even a pro relies on one thing: good light. Without good light, even the most experienced photographer will struggle to produce a good image.

So, to the point of this article: A couple of easy tricks to control light and make photographs a bit more interesting – and certainly a bit more like the ones in the brochure.

Filters

After travelling along the southern coast of Iceland for a couple of weeks in a variety of weather conditions shooting landscapes, I came to rely on one piece of equipment so much so that I would consider it an essential item. In many, many cases it turned a ‘reject’ into a ‘keeper’ and turned a ‘ho-hum’ into a ‘wow’. What is this magical piece of equipment? Why, it is the humble filter.

The clue as to the purpose of a filter is really in the name: To filter. In the case of photography there is only one commodity that can be filtered and that is the light entering through the lens and, perhaps obviously, a filter can only modify or remove light, never add. But, as light is the fundamental component in photography, why would we actively seek to reduce it?

The Light Bucket

If you’re new to photography a simple analogy is probably going to make the rest of this article easier. From the technical perspective, a good photograph usually starts with getting just the right amount of light into the camera and onto the camera sensor, a process resulting in what is usually (but perhaps not accurately) called “a correct exposure”. Too much light and the result is that ‘washed out’ look (over exposure) and too little light results in that ‘taken at night’ look (under exposure). It’s like filling a bucket with water; too much and it overflows, too little and there’s not enough to go around. You have to fill the bucket to the brim, no more and no less.

Plenty of web sites out there use the bucket analogy to discuss exposure in a far better way than I can here, so I’m not going reinvent the wheel. Suffice it to say that there are three, inter-dependent, settings that you can use to control how this bucket is filled and which one you use depends upon the creative look you are after – shutter speed, aperture and ISO (film) speed. Again many articles exist that discuss these, and I may one day write my own.

But sometimes, you need some additional help to realise your creative vision. For me, it was the neutral density filter.

Neutral Density Filters

One of the most useful filters – especially in landscape photography – is the neutral density, or ND filter. Its purpose is to limit the amount of light passing through it in equal amounts across the colour spectrum or, put another way, it limits the light passing through without changing the colour of that light. Using the bucket analogy above, the effect of an ND filter can be looked at in either of two ways:

  • It means that it takes longer to fill the bucket – a longer exposure time.
  • It reduces the amount of light in the bucket for a given exposure time.

Graduated ND Filters

An offshoot of the ND filter – and one far more frequently used – is the ND graduated filter, or ND Grad. It is basically an ND filter that only limits the light on part of the filter.

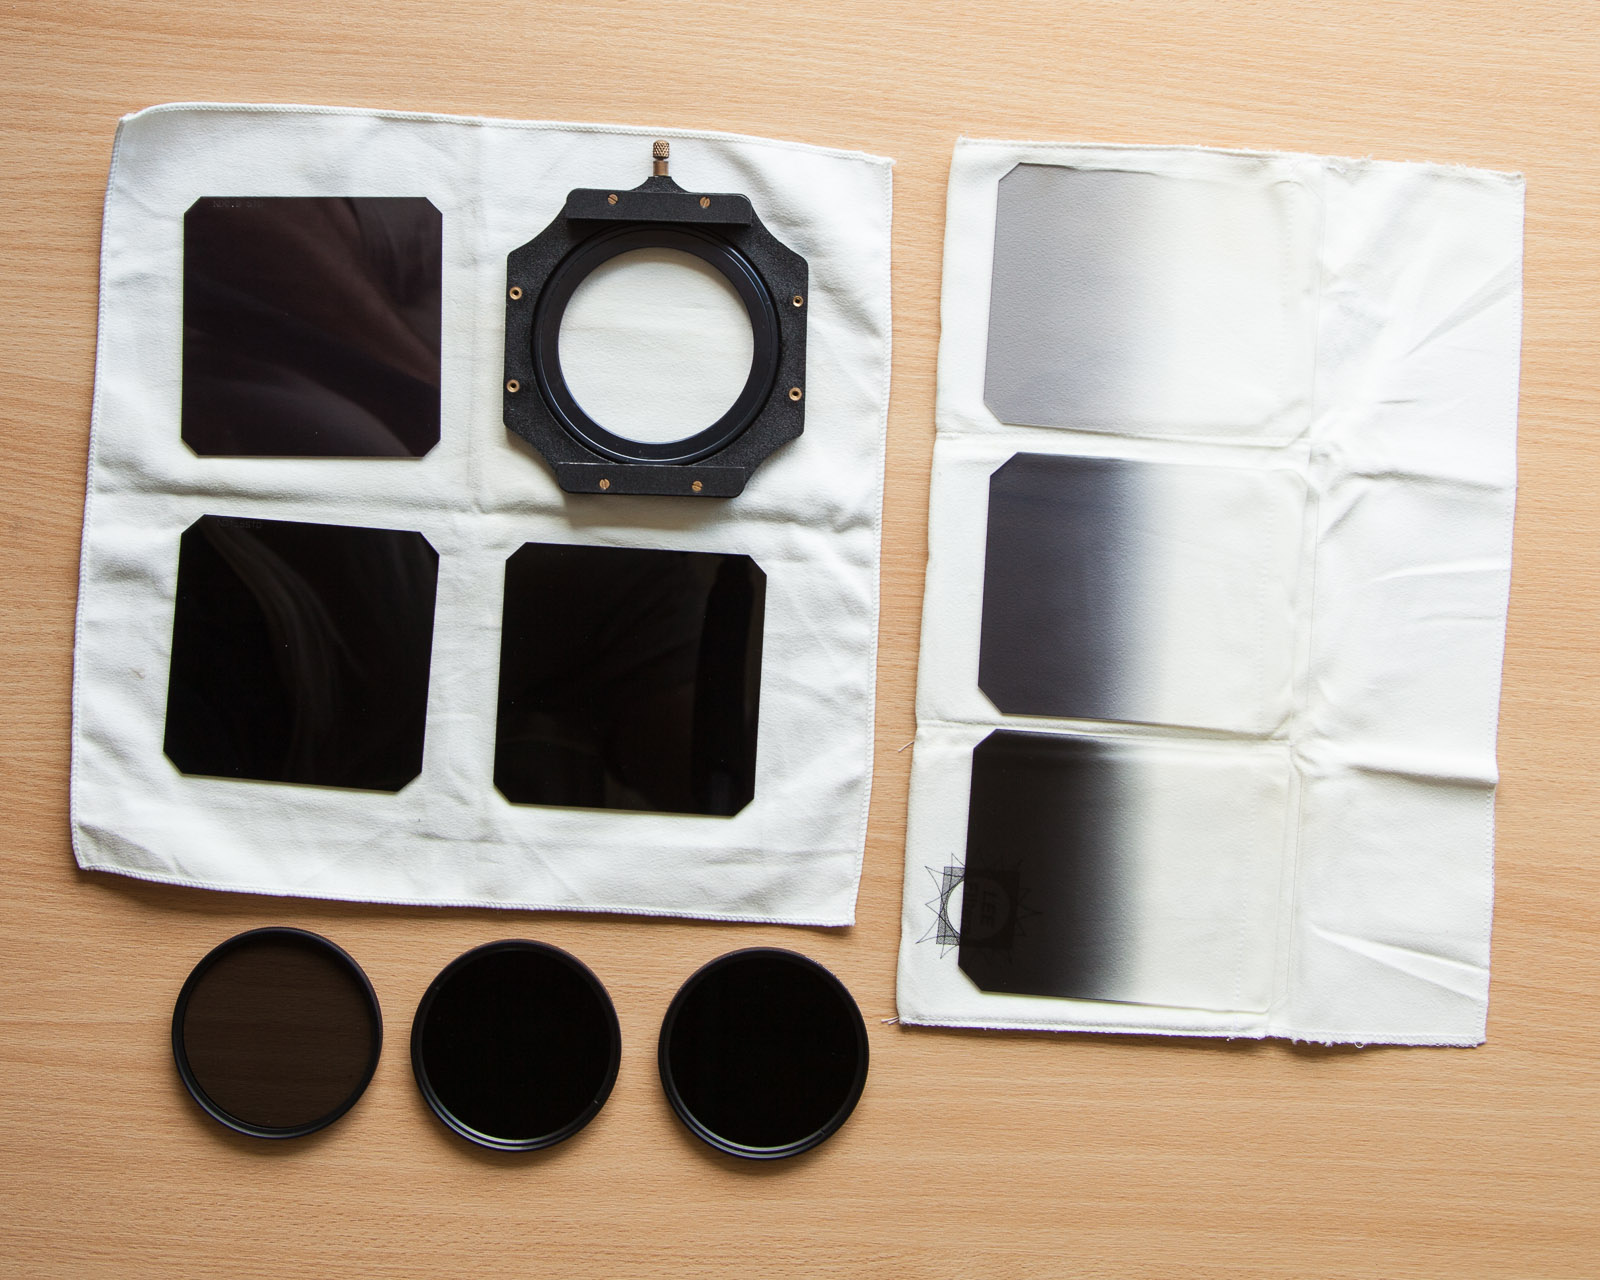
Little bits of plastic - here the ND and the ND Grad filters -  can make a world of difference to the 'look' of the photograph.

Little bits of plastic – here the ND and the ND Grad filters – can make a world of difference to the ‘look’ of the photograph.

On the left we have the ND filters. It may be difficult to tell but each of the three square and round ones are different levels of opaqueness – the more opaque, the longer the exposure time – the most extreme limited the light passing though to a one thousandth of the original light. On the right we have some rectangular ND Grads, again each limiting the amount of light arriving on the part of the camera sensor.

So yes, this magical device is basically a piece of plastic. Already I sense disappointment. But, some examples may help…


A Practical Example: ND Filters

Take a look at the following shot:

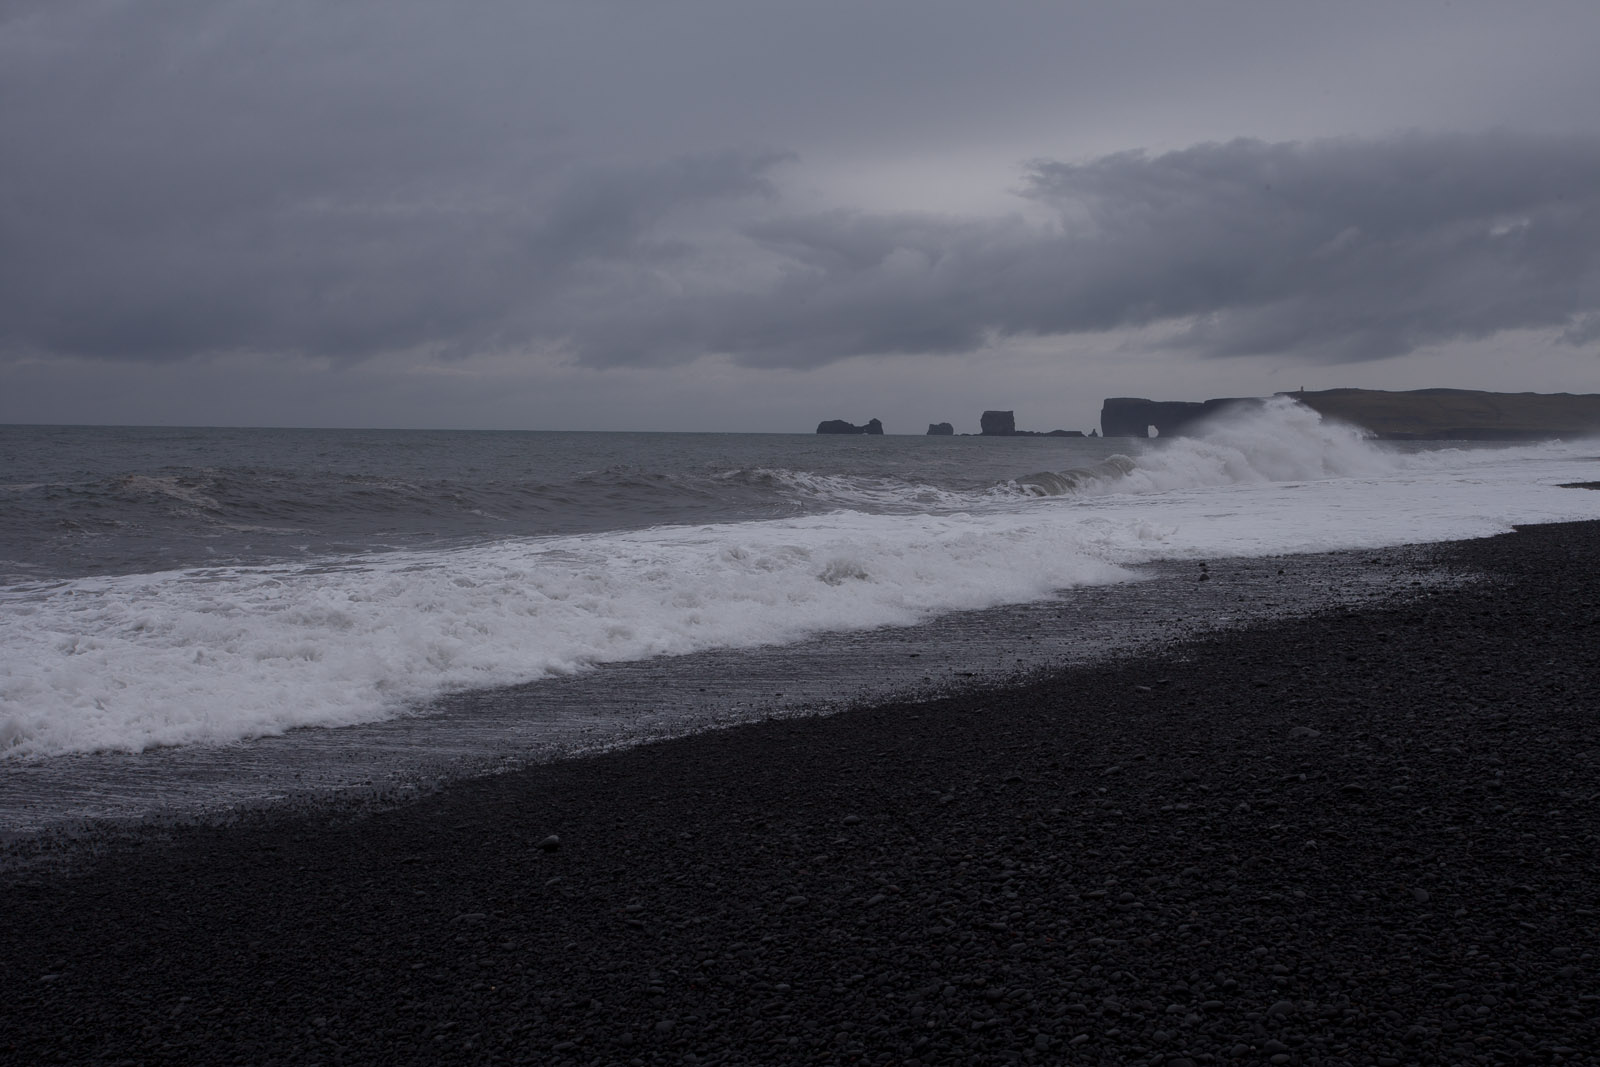
The unusual black volcanic beach of Reynisfjara

The unusual black volcanic beach of Reynisfjara; 1/45sec @ f/16, ISO 100

It’s a beach shot with a nice, black volcanic beach and the Atlantic Ocean. What I wanted to show was not the detail of the waves crashing against the shore, but the contrast of white sea against the black beach and, unfortunately, try as I might, I could not make the exposure time long enough to turn the sea into a white cotton wool coating. The slowest I could achieve was 1/45secs which, as you can see, kind of works, but there’s still too much details in the waves. If only I could limit the amount of light entering the camera so that I needed a longer exposure time to fill the bucket.

Here’s the same landscape with an ND filter attached:


Extending the exposure time turns the sea a milky white; 3secs @ f/16, ISO 100

Extending the exposure time turns the sea a milky white; 3secs @ f/16, ISO 100

This is much closer to the feel I was after, but notice that the exposure time is now a whole 3secs.


A Practical Example: ND Grad Filters

For the majority of the two weeks I spent travelling along the coast it was overcast or raining, usually both. It was that kind of light-grey overcast that photographers hate as it invariably ends up as a white featureless sky when exposing correctly for the subject. If you expose for the sky to get some detail back, then the foreground usually ends up as a silhouette, and trying to expose for both just ends up with a flat-looking images.

Here’s an example of the camera selecting the ‘correct’ exposure.

1/8sec @ f/16, ISO 100

1/8sec @ f/16, ISO 100

As you can see, the sky is a featureless grey-white and the tops of the snow-capped mountains disappear into that whiteness. In addition, the glacial tongues are a blob of white with no detail. The rest of the shot, however, is reasonably exposed – not too dark nor light. If only I could reduce the light in the sky part of the shot, but keep the landscape unchanged. This is precisely the job of the ND grad.

Here’s the same shot but with a two-stop ND grad filter, dark part over the sky and clear part over the foreground:

1/6s @ f/16, ISO 100

1/6s @ f/16, ISO 100

Already you can see the detail come back into the sky and the peaks of the mountains have become distinct from the sky. I’ve also been able to slow the shutter speed down a little bit, allowing more light into the exposure so the foreground is better illuminated.

Here’s the final image after a bit of careful positioning of the filter, and a spot of clarity and saturation adjustment in Adobe Lightroom. For me it has the right level of detail in the clouds, the glacial tongues, the ridges of rocks in the sides of the mountains and the lupins.

The final result...

The final result…

So, a bit of a long article but one I hope that shows that investing in a set of ND and ND grad filters can really make a difference to the creative feel of the shot. There are cheap ones and, of course, expensive ones. Cheap ones are more likely to alter the colour slightly as light passes though them, which isn’t great, but if you’re starting out and don’t want to invest too much then they can be a great place to start. Over the next few days I’ll post some more shots using my new plastic friends…


Also posted in Landscape Tagged , , , , |