Monthly Archives: April 2015

One Image, Two Looks

For a couple of reasons my mind has been thinking of Iceland lately and so it was only going to be a matter of time before I found myself looking at the photographs I took there last year. Rather than look at the ones I’ve already selected for the final gallery, or the ones that made it to first and second pick, I decided to go all the way back to the original ones, which is not an easy task considering that there are 3,500 of them. But I’ve often found it useful to look at images that didn’t make the cut in the hope that eventually I’ll learn to stop making those mistakes.

So I was happy to find this lurking in the pile of photographs that didn’t make even first pick.

Jokulsarlon is a popular destination for good reason.

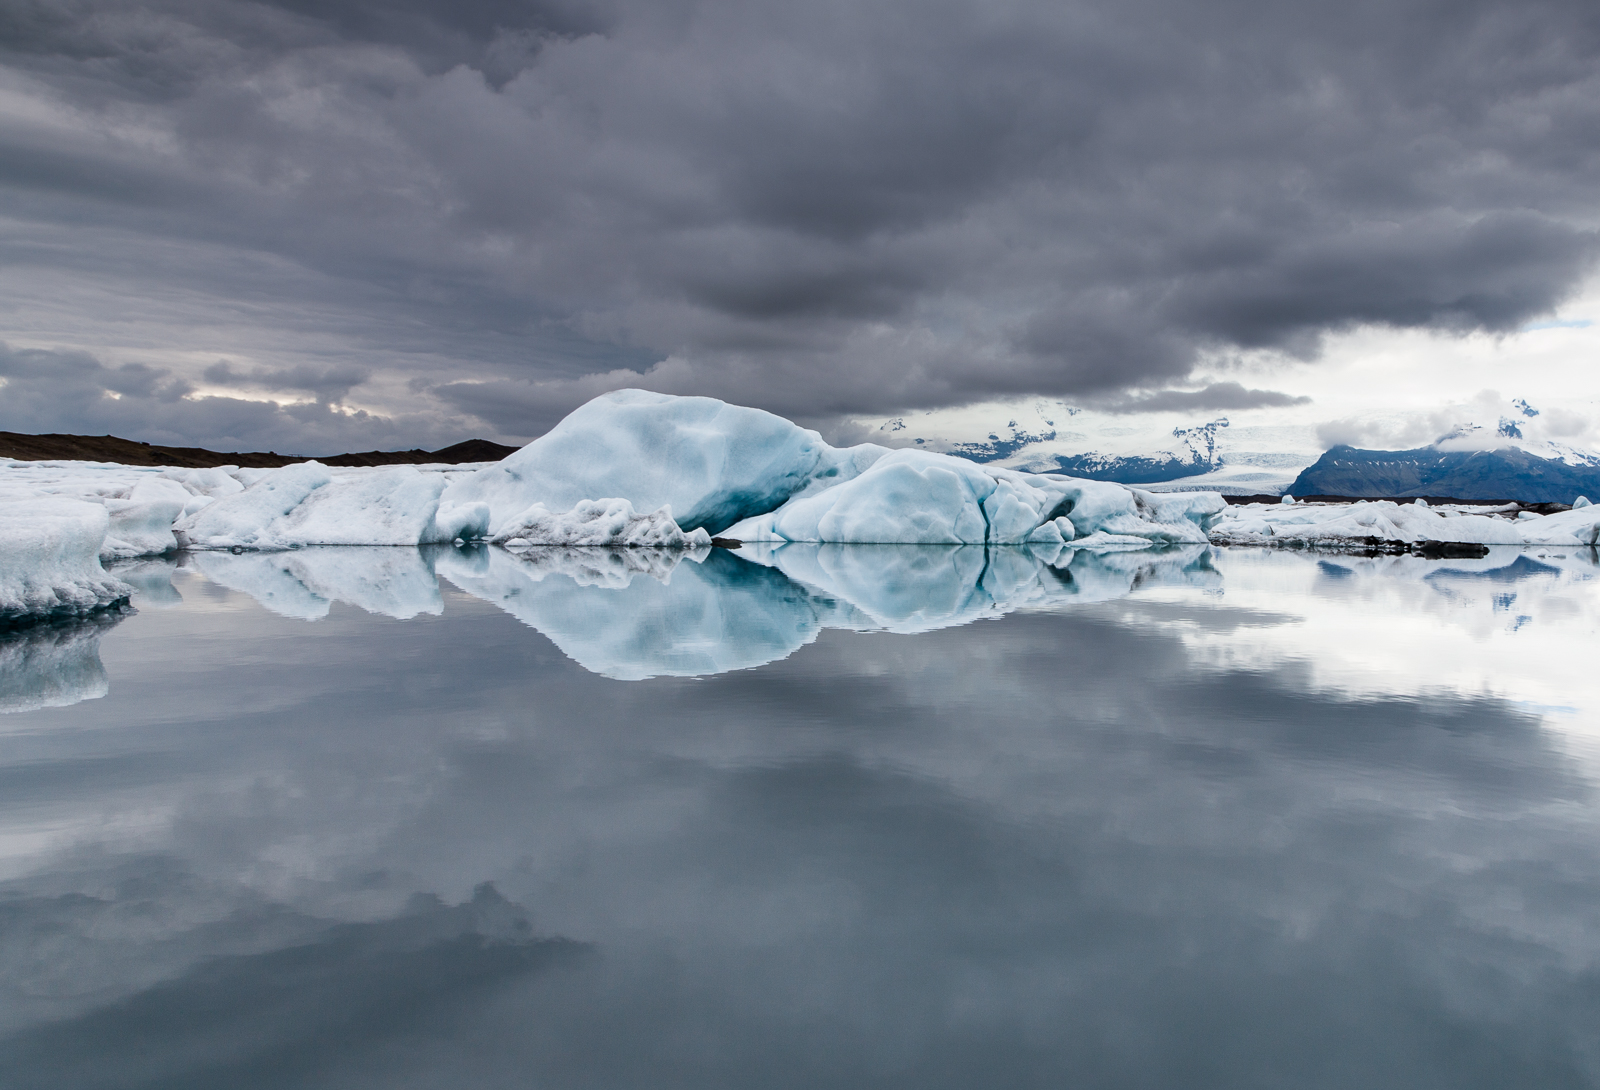
Jokulsarlon is a popular destination for good reason. [Click to enlarge!]

Ask around about what to see when in Iceland and I’ll guarantee that Jokulsarlon will be on the shortlist. Jokulsarlon is probably the most easily accessible glacial lake (Jokulsarlon translates as ‘glacial river lagoon’) that you can see and if you’re driving along the main road, route 1, then you cannot miss it as you literally have to drive over it, or at least the bridge that crosses its narrowest point. You can even take day trips from Reykjavik by coach, although it is a four hour journey.

One of the reasons that Jokulsarlon is so popular is that the lake is full of an ever-changing collection of icebergs calving off the Breidamerkurjokull outlet glacier which gather in the lake before the tide inexorably draws them out to sea. If you’ve never seen an iceberg up close before you’re in for a treat and the combination of ice and volcanic ash found in Iceland is especially striking. And, if you can, I do recommend that you find a quiet spot along the lake’s edge away from the crowds, close your eyes and listen to the sound of hundred- and thousand-ton lumps of ice melting, shifting and cracking.

But if you have been to a polar extremity – northern Canada, Alaska, the far south of South America, the southern tip of New Zealand – where icebergs easily compete with apartment buildings in terms of size – the icebergs of Jokulsarlon seem, well, tame by comparison. I think that that is why, in my first and second pick of the Iceland photographs, none of the ones I took of the glacial lake made the cut. I didn’t see the beauty of the image, I saw the comparison to something ‘better’.

So, I’m glad I took the time to revisit images that I had already discounted as “not quite there” and it is a good reminder for me to take my own advice of performing a six-month (or in this case an eleven-month) review of images taken on a trip once the passage of time has dampened the excitement of the experience. Then you can be more objective about the images in their own right.

And that would have been the end of the story had it not been for an unrelated task I have this weekend. One of the guys in the office had asked for a copy of one of my Ethiopia images to use as a wallpaper on his PC and so I’ve been looking at that. And at some point the “I wonder what this image would look like as a wallpaper?” question popped into my head.

Modern computer monitors tend to favour the 16 by 9 format – the same format as used by HDTV televisions – which means that the crop of the image is totally different to that required by standard print paper. See for yourself:

Same image, but a different feel. [Click to enlarge!]

At 1920 by 1080, it is the same image, but a different feel. [Click to enlarge!]

Whilst the majority of interest lies from the left of the image to the centre the wider crop allows for the right hand side to be included and a lone floating lump of ice. In the ‘print’ crop I’ve excluded it as I wanted to strengthen the mirror effect of the water’s surface, but in the ‘wallpaper’ crop I’ve included it as a bit of foreground interest and I like the fact that it is aligned along the diagonal line in the water formed by the cloud’s reflection. It’s an important diagonal line too, leading from the edge of the frame right to the focal point of the image. In the print crop, the diagonal is still there, but shorter and with less impact – less visual weight.

So, where am I going with this?

I guess there are two points I’m making, perhaps more to myself than anyone else. First, I shouldn’t dismiss an image simply as I have seen something more impressive – each image should be judged on its own merits. Second, the final crop has a big effect upon overall feel of the image and when pressing the shutter I need to ask myself “What is this image for?” Print? PC display? Instagram? After all, it’s easier to recompose, move if necessary, and take another shot whilst on location than it is to spend time in post production trying to get all the elements in a different crop.
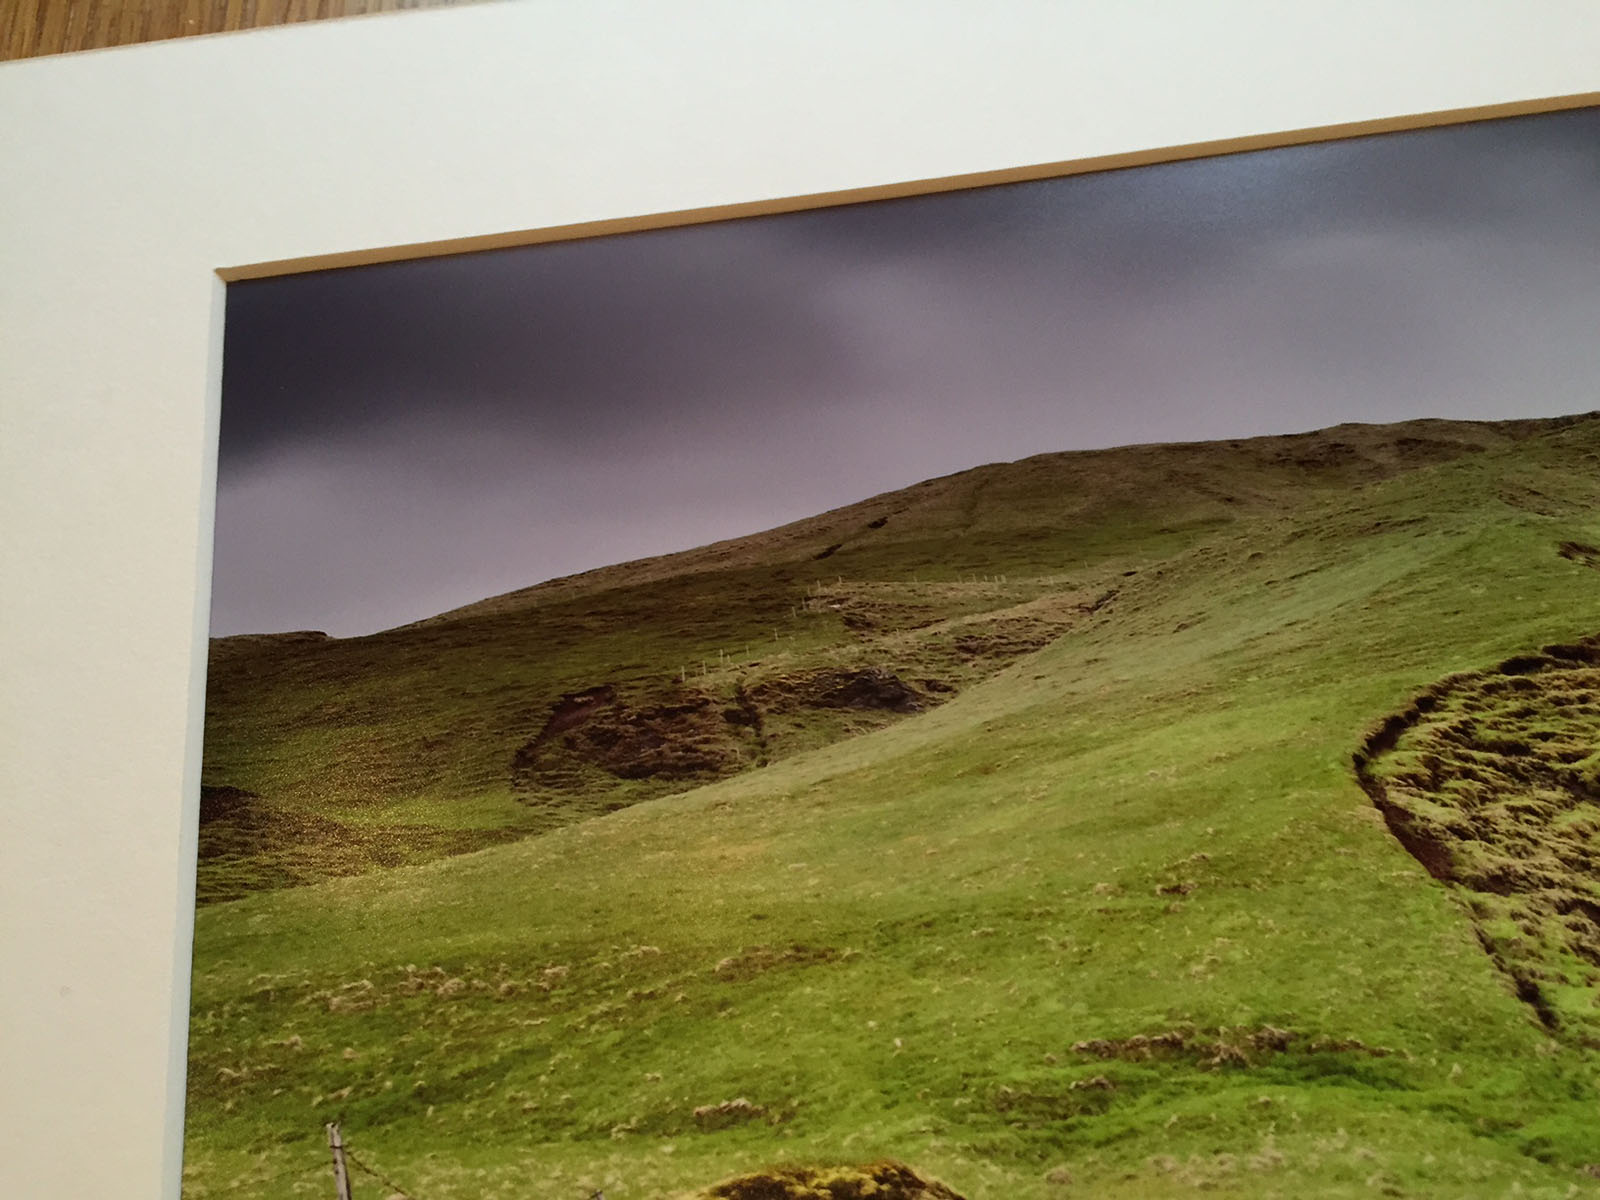


Posted in Process Tagged , , , , |

Thinking Big

In the last post I started a mini-series of articles about home printing hoping to prove that whether you make your living from photography, have a passion for it, or simply want to capture life’s important moments, it needn’t cost the Earth to display your work. For most of us the photographs we will print will not be large – the average home usually has few big walls and they usually have windows in them – and so most people will be looking at anything up to A2 in size. But there is no denying that, if you do “go large” then the impact can be dramatic.

This fact hit me, almost literally, earlier this week when I walked into the office and the walls – which were up until recently just plain painted surfaces – had been transformed.

There's no denying that a large image or graphic make a striking statement, but you have to choose carefully. The image should be timeless and detailed enough to reward people for repeated viewing with details they've missed in the past. [Click to enlarge]

There’s no denying that a large image or graphic makes a striking statement, but you have to choose carefully. The image should be timeless and detailed enough to reward people for repeated viewing with details they’ve missed in the past. [Click to enlarge]

At a whopping 3.8 metres this is the feature piece along the longest wall and, given the size, a multi-shot panoramic image was going to be the only thing that would have enough resolution to be printed at this size.  When I was told how big the canvas would be, I did have reservations as to the final quality however I needn’t have worried – the 11,500 by 3,800 pixel panorama scales very well.

The smaller meeting rooms are basic affairs; we spend most of our time out with customers and so having lavishly appointed meeting rooms would be a bit of a waste when the rooms do not need to impress, but merely need to be functional. Still having a large canvas on the wall adds a splash of colour and interest to an otherwise cold-looking room. The 21 megapixel  Canon 5D Mk2 provided more than enough resolution for the 150cm by 100cm canvases.


Meeting rooms can be clinical places often decorated as an afterthought, if at all. Add a feature image (and maybe a potted plant or two) and even small rooms can feel more welcoming. [Click to enlarge]

Meeting rooms can be clinical places often decorated as an afterthought, if at all. Add a feature image (and maybe a potted plant or two) and even small rooms can feel more welcoming. [Click to enlarge]

It is a great way to encourage employees to take pride in the appearance of their place of work - by making it personal. [Click to enlarge]

It is a great way to encourage employees to take pride in the appearance of their place of work – by making it personal. [Click to enlarge]

People often get hung up on the number of megapixels and I’ve often seen this is a driving reason to upgrade the camera; after all, surely 20MP is better than 10MP? Whilst a larger pixel count, if implemented correctly, can mean higher definition images, that should not mean that that old 10.1MP camera is ready for the scrap heap. Here’s an image from the 10.1MP Canon 40D on the same 150cm by 100cm canvas. It is almost tempting to suggest that, if you’re thinking of heading out on a one-time trip of a lifetime and want to have a backup camera without a large investment, pick up one of these older camera bodies on eBay for a shadow of their original cost.

Even a 10.1MP camera like the Canon 40D can produce respectable sized images like this 150cm by 100cm canvas. [Click to enlarge]

Even a 10.1MP camera like the Canon 40D can produce respectable sized images like this 150cm by 100cm canvas. [Click to enlarge]

In my professional life I spend my time visiting clients across the UK and spend much of that time in their offices. Over the years I’ve been in upwards of six hundred different offices ranging from modern energy-efficient open plan spaces to warehouses to old national heritage buildings. I also spend a lot of time in hotels. So I think I am reasonably qualified to make the following statement: Impersonal spaces, such as offices and hotels, benefit from having artwork for the walls, even if it is an abstract of some form. They ‘feel’ lived-in and more, well, welcoming. And if you’re trying to get the best out of people, making them feel welcome is a pretty important first step…


Posted in Process Tagged , , , |

The Frame Game: A New Project

The last post had me enthusing about printing photographs, be they from a DSLR or a smart phone. The post was less about photography and more about keeping memories alive. It was also aimed at those people who are not particularly interested in photography – the most “at risk” group I believe – as photographers already understand the need to print, although perhaps for other reasons.

But interested in photography or not, whether amateur or professional, one thing is certain when we decide to print one of our photographs to hang on the wall: The cost of professional framing will take your breath away.

In the past I have simply taken my photographs to the picture framers at the craft centre at the end of my road – Neil was not the quickest, but the work was exactly as requested with a price that was nowhere near as high as other firms in the area. But Neil is no longer in business and so I have had to look around at my options.

My first choice was to use Loxley Colour, a very reputable firm here in the UK. But, whilst the price is, if not cheap, at least palatable, the frame was delivered with one of the mitre joints poorly joined and a small crease in the photograph. They have been very good and had a courier pick it up so they could make up a new one but that’s been an additional two weeks delay. In any case, the one thing that bugs me about their framing is that they insist on using acrylic instead of glass.

Of course, this is perhaps my fault. When I first started having my work framed a few years ago the initial frames came with normal picture glass which, aside from giving a subtle green tinge to images, is horribly reflective in the presence of spot light sources such as the sun, a table lamp or overhead lighting. I spoke to Neil and he recommended Schott Mirogard Waterwhite anti-reflective glass. It is not cheap but the results are fantastic and I have been a convert ever since. So looking at the acrylic used by Loxley Colour really leaves me, at best, underwhelmed.

So I was left with two equally unattractive options: Live with a finished product that, although reasonably priced, I wouldn’t be truly happy with or find a framer that could work with Mirogard and I’d swallow the cost. And, just to give an idea of the costs involved, a 13” by 19” (32.9cm by 48.3cm) image with a 2” (5cm) border would cost approximately £60 from Loxley Colour (with acrylic) or approximately £141 from another recommended framer, albeit with Mirogard. Ouch! But as with most things in life, there is always another option. Learn to do it myself…

I started with the question: How hard can it be to take a photograph and put it in a frame? I’d need a frame obviously. And glass. Perhaps a nice border around the photograph. I’d also need something to keep the photograph flat and rigid. Finally some bits to attach it to a wall. But other than that I really couldn’t think what else was needed. As it turns out, that is pretty much it.

It was an encouraging start but I have to be realistic. I am not known for my hand-eye coordination and anything that involves cutting, drilling or precision measurement in general leaves me in a cold sweat. Given that most ready-made frames are horrid things – and probably wouldn’t be available in the sizes I would need – I would have to make my own. Mirogard glass is specialist and usually sold by the sheet so would need cutting too. And those professional looking card surrounds with the lovely angled edges as in the image below will also require careful cutting. In other words, despite the concept of framing being quite straightforward, the actual process was going to be very tricky.

A border – often called an over mat or top mat – lends an air of professionalism to a framed image. And, as bad as my hand-eye co-ordination is, this was my first attempt… [Click to enlarge!]

But, undaunted I did some more research – including watching lots of useful videos on YouTube – and there are several options available to people like me that make home framing a realistic possibility. In fact I am so confident that it can be done at home that I have taken the plunge and invested in my first piece of kit.

Over the next couple of months I’ll be discussing everything needed to turn a raw photograph printed on an inkjet printer at home into a complete, framed product ready to hang on a wall. This is not going to be a series of “how to” articles – as a beginner myself I am simply not qualified to write them and, honestly, YouTube really has some good stuff – but what I hope to convey is that home framing is not merely a fantasy but instead is very possible. After all if, like me, the old adage of “measure thrice, cut once” simply means you end up with three different measurements, then seeing the results produced by someone with no previous experience may be just the encouragement you need.

Posted in Uncategorized Tagged , , , |

The Dark Side Of Modern Photography

I’ve long held the view that one of the worst aspects of modern photography is that it has made it very easy to never actually produce anything – anything physical that is. In the ‘good old days’ of film cameras you had no choice and,  whether you has access to a darkroom or you relied on a high street store to develop your photographs, at some point you would end up with a physical item. You really felt that you had created something.

The digital (r)evolution has changed everything. Images can be born, live and die without ever once seeing the light of day. Not that this is a wholly bad thing; for certain aspects of modern life such as social media, the speed and ease of an all-digital workflow is fantastic and not only allows us to keep our friends and loved ones up-to-date, but allows for individuals in oppressive regimes to get their story heard quickly and with less risk of censorship. So no, I’m not suggesting that ‘all-digital’ is necessarily a bad thing, but I do think that it is one that we will regret and here’s a case in point.

I was speaking to my parents recently who are in their eighties and in the process of clearing up a house full of a lifetime of gathered possessions, including thousands of photographs. Many, by their own admission, are not worth keeping, but the process of having to go through boxes of images has sent them down memory lane in a kind of retrospective of their own lives; things they had forgotten about have been remembered once again. And that’s the real power of a photograph: Photographs don’t have to be professionally taken, framed properly with the right light and capture a “wow” moment to be important photographs. They just have to move you. And everyone can take photographs that move them!

The problem I foresee is that, unlike paper which hasn’t fundamentally changed as a medium for a few hundred years, digital storage has. I remember using punched cards on computers, and floppy disks (remember them?) and my first hard disk used the ST506 interface. If you’re wondering what a ST506 interface is, then that has already proved them point I am trying to make as most technically adept friends of mine won’t have heard of it. Even if I still had the hard disk, and magnetic degradation had not rendered it unreadable, the chances of me finding anything that could read the data are close to zero. Twenty years from now we’re going to be saying the same thing about the current storage medium of choice, SSD. And the new kid on the block – cloud storage – is not a solution either. Even if the cloud service provider is still in business in 40 years time, will the digital format that the images are stored in be readable? What if the images are not yours, but a parent or relative unable to access the account? I’m not a betting man, but I can guarantee that paper will still be around. 

Photographers, whether they make their living from the art or pursue it as a passion, already know the importance of print. So today’s post is really for the two groups most “at risk”:

If you have no interest in photography, but just use your smart phone to capture your mates on holiday, your other half when they’re not looking or your kids at the zoo, buy a cheap printer (they’re only £30), print those images and 40 years from now they will bring those distant memories back in an instant. Will they be perfect photos? No. Will they be priceless? Absolutely!

If you have an interest in photography and are just starting out go buy a moderate inkjet and print your work. Holding your image in your hands will show more about composition – and the value of photography – than a screen ever can.


Posted in Hints and Tips Tagged |
Buy trazodone from Raleigh Generic caverta from Alberta What is xtandi Madison diflucan shipping Buy alphagan online from Frankfort Where to buy caverta online in Delaware Nebraska shipping keflex 250mg Singulair heavy heartbeat Vancouver allopurinol shipping