Category Archives: Landscape

The Iceland Gallery

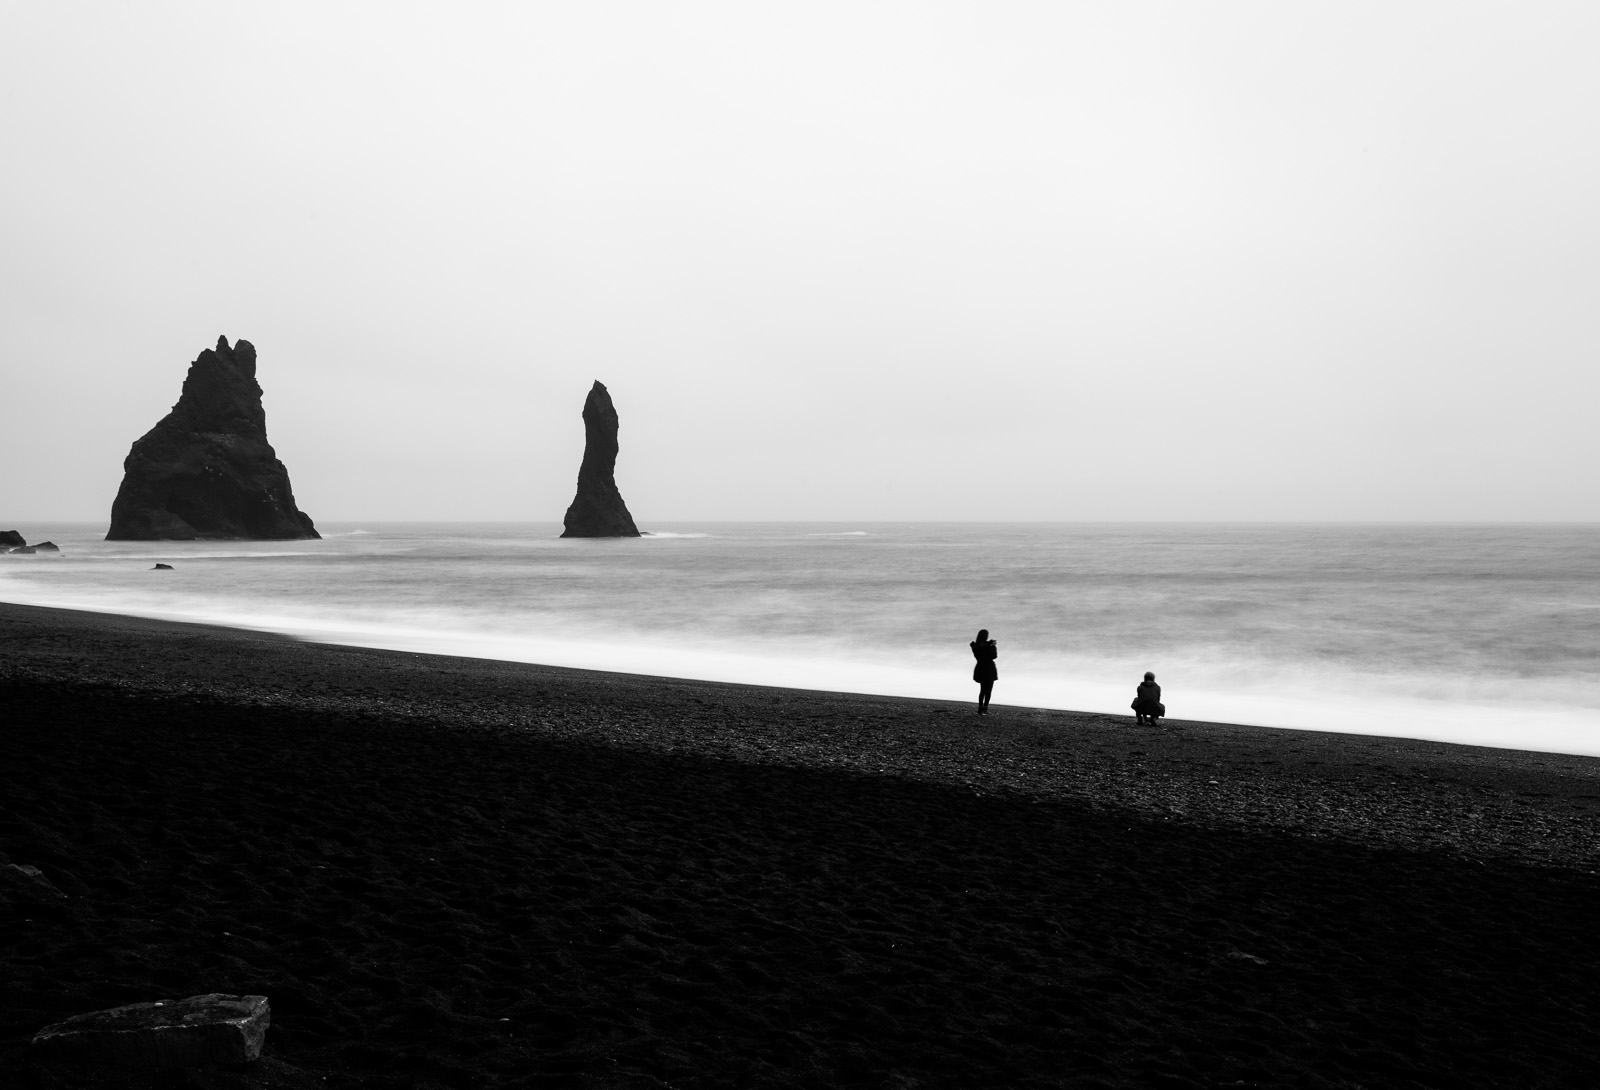
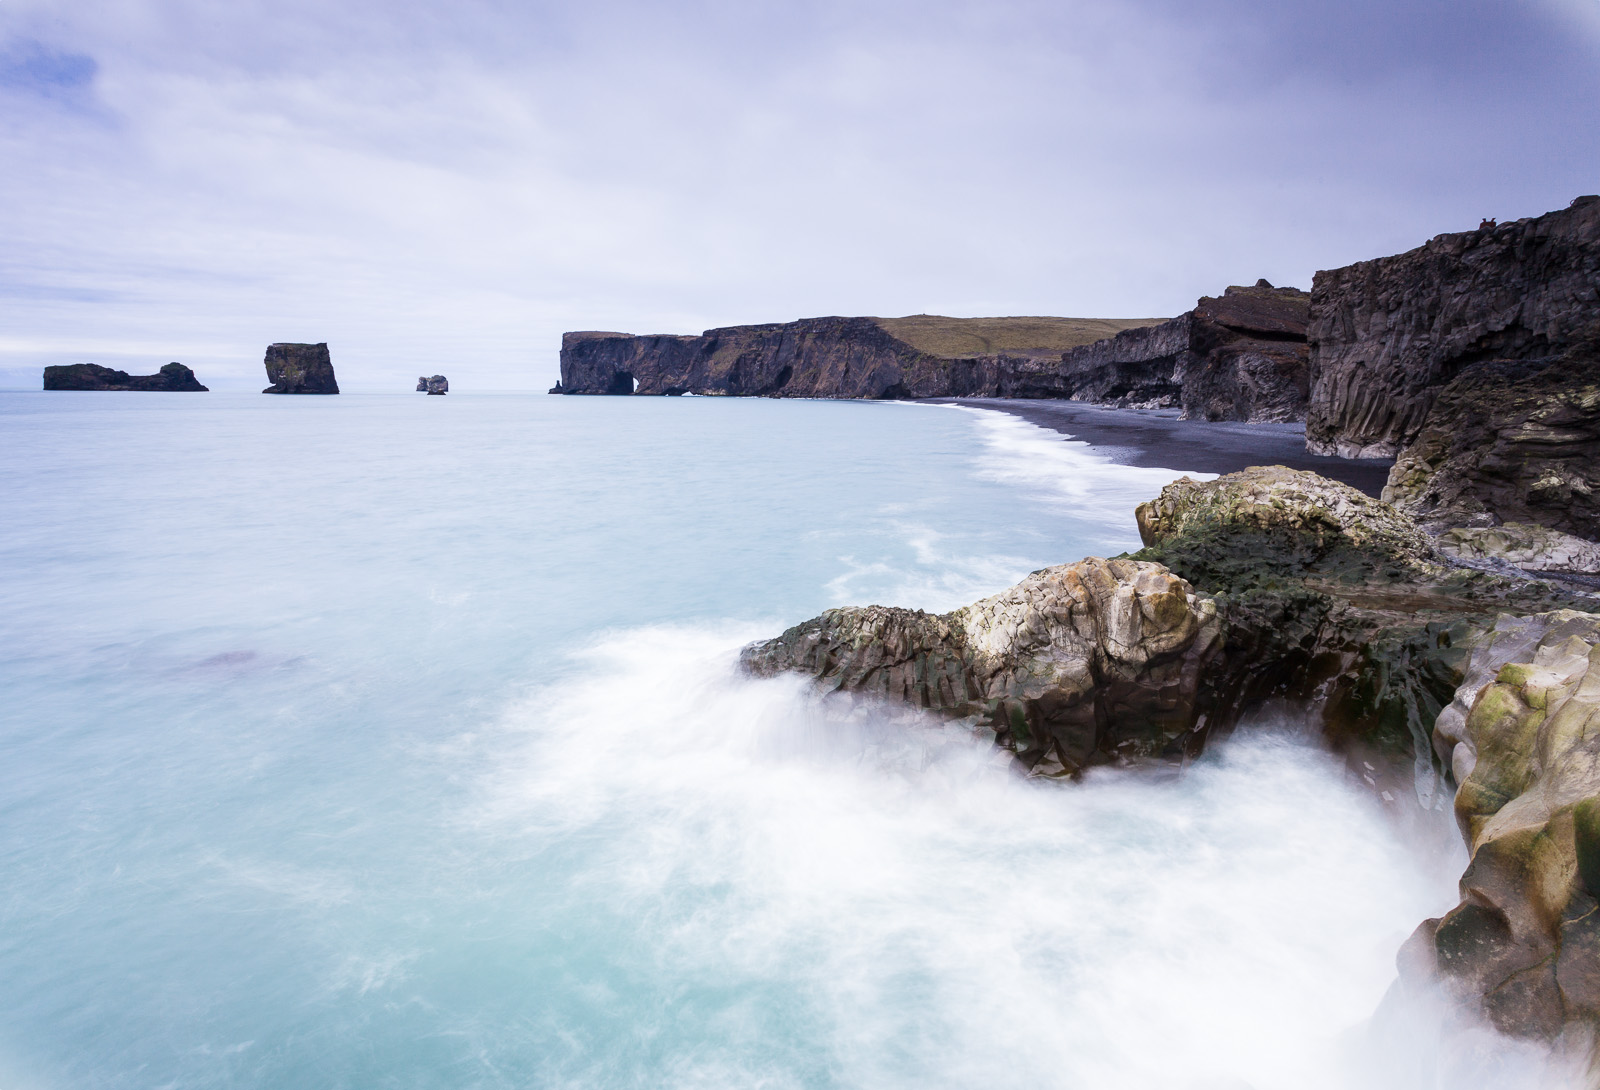
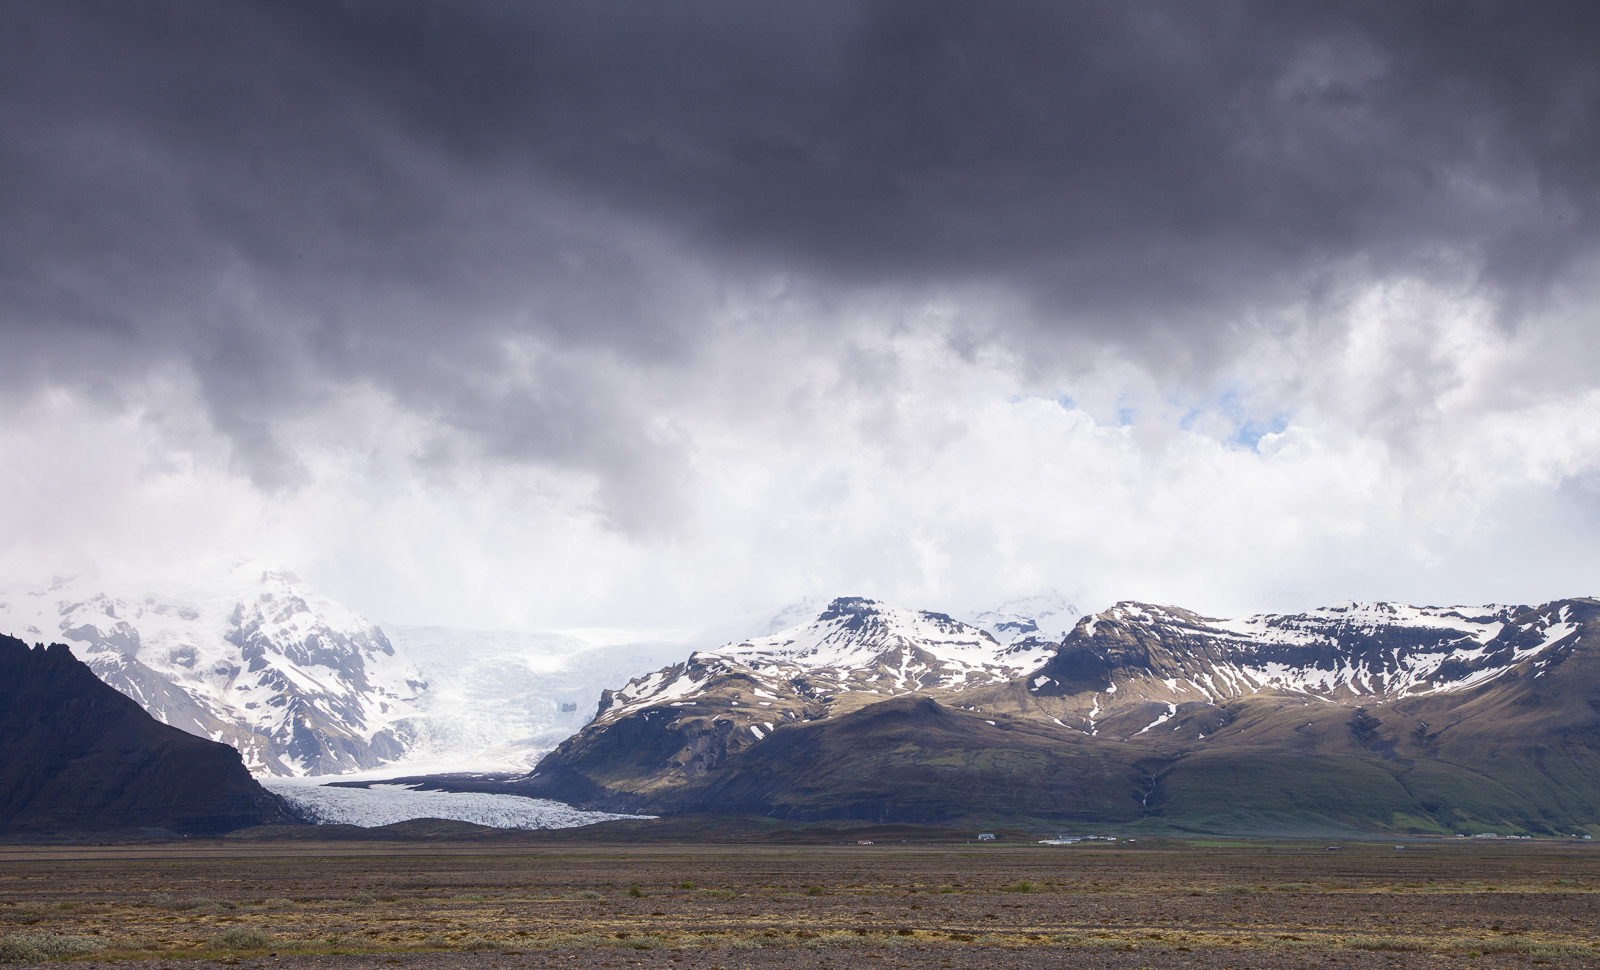
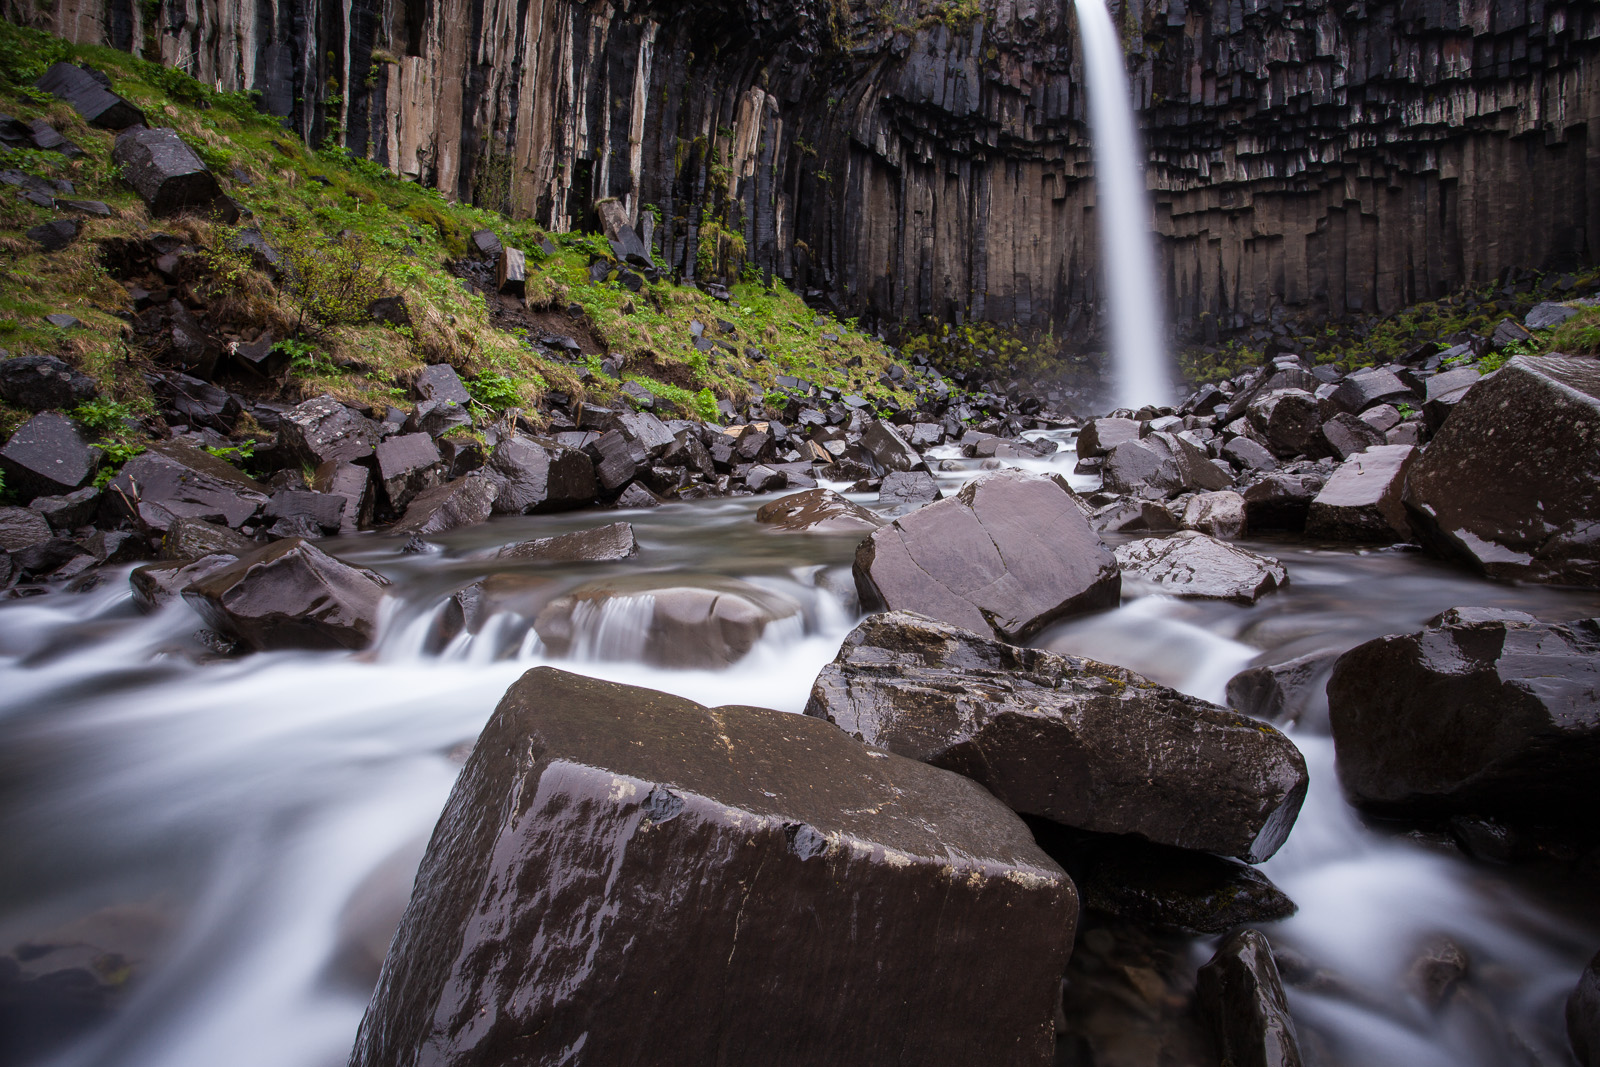
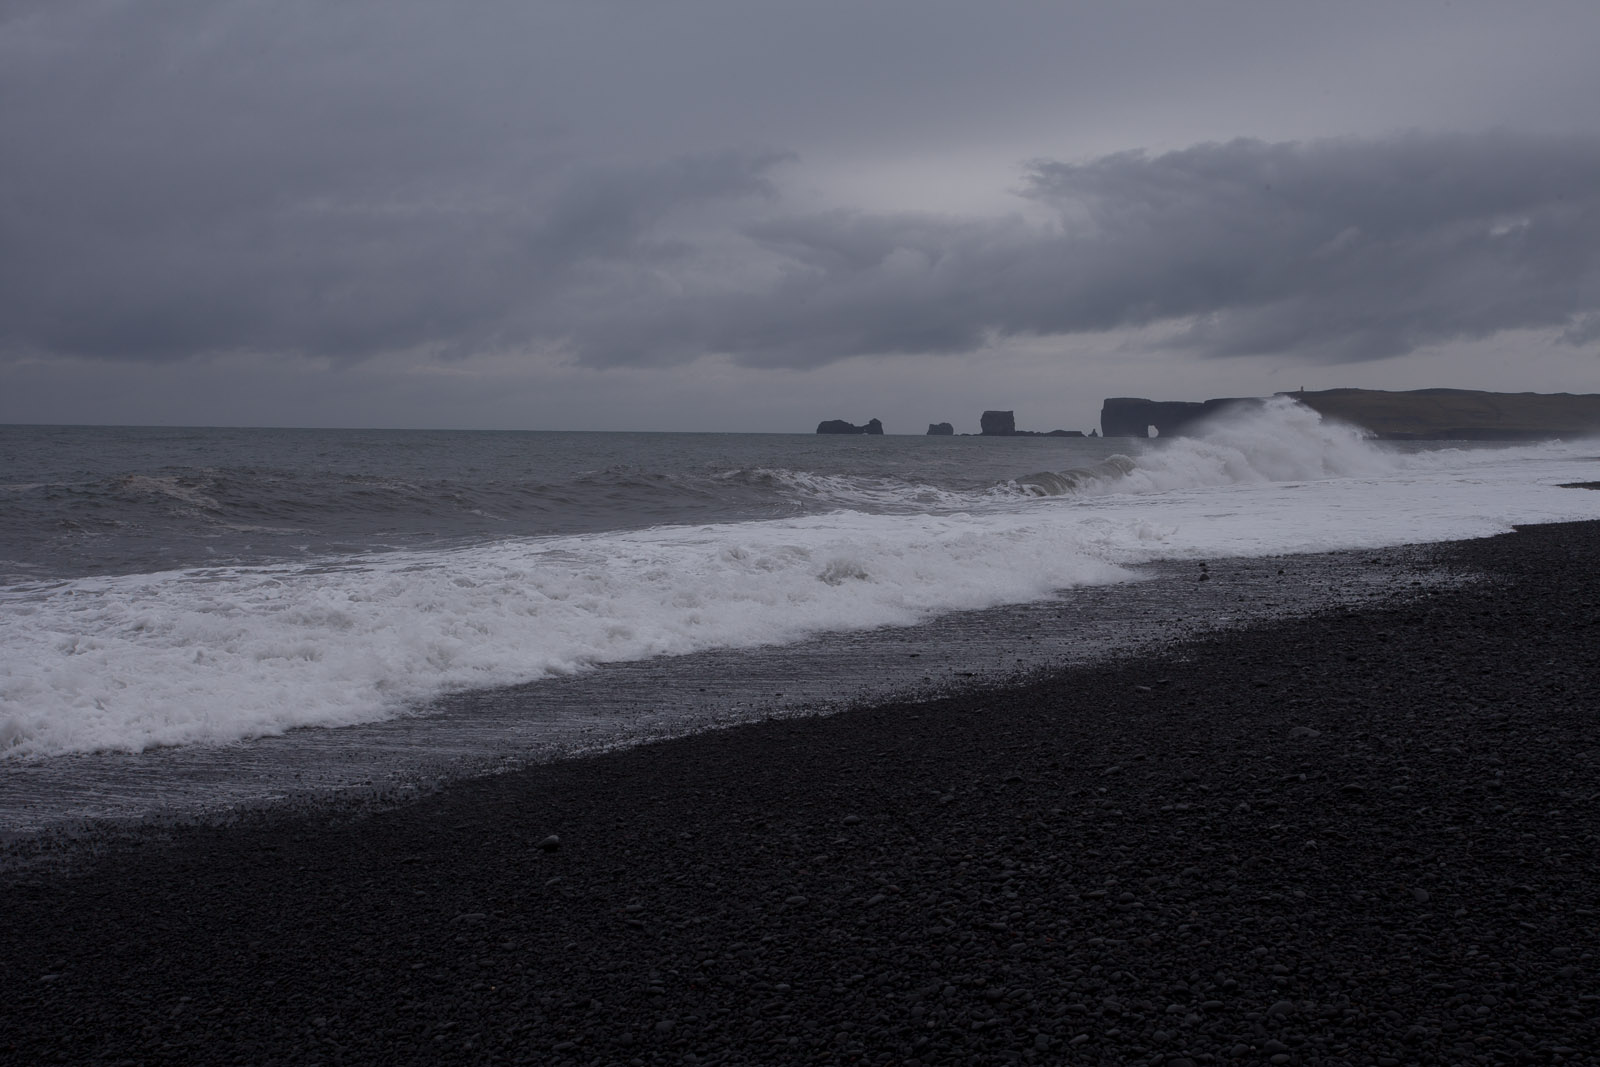
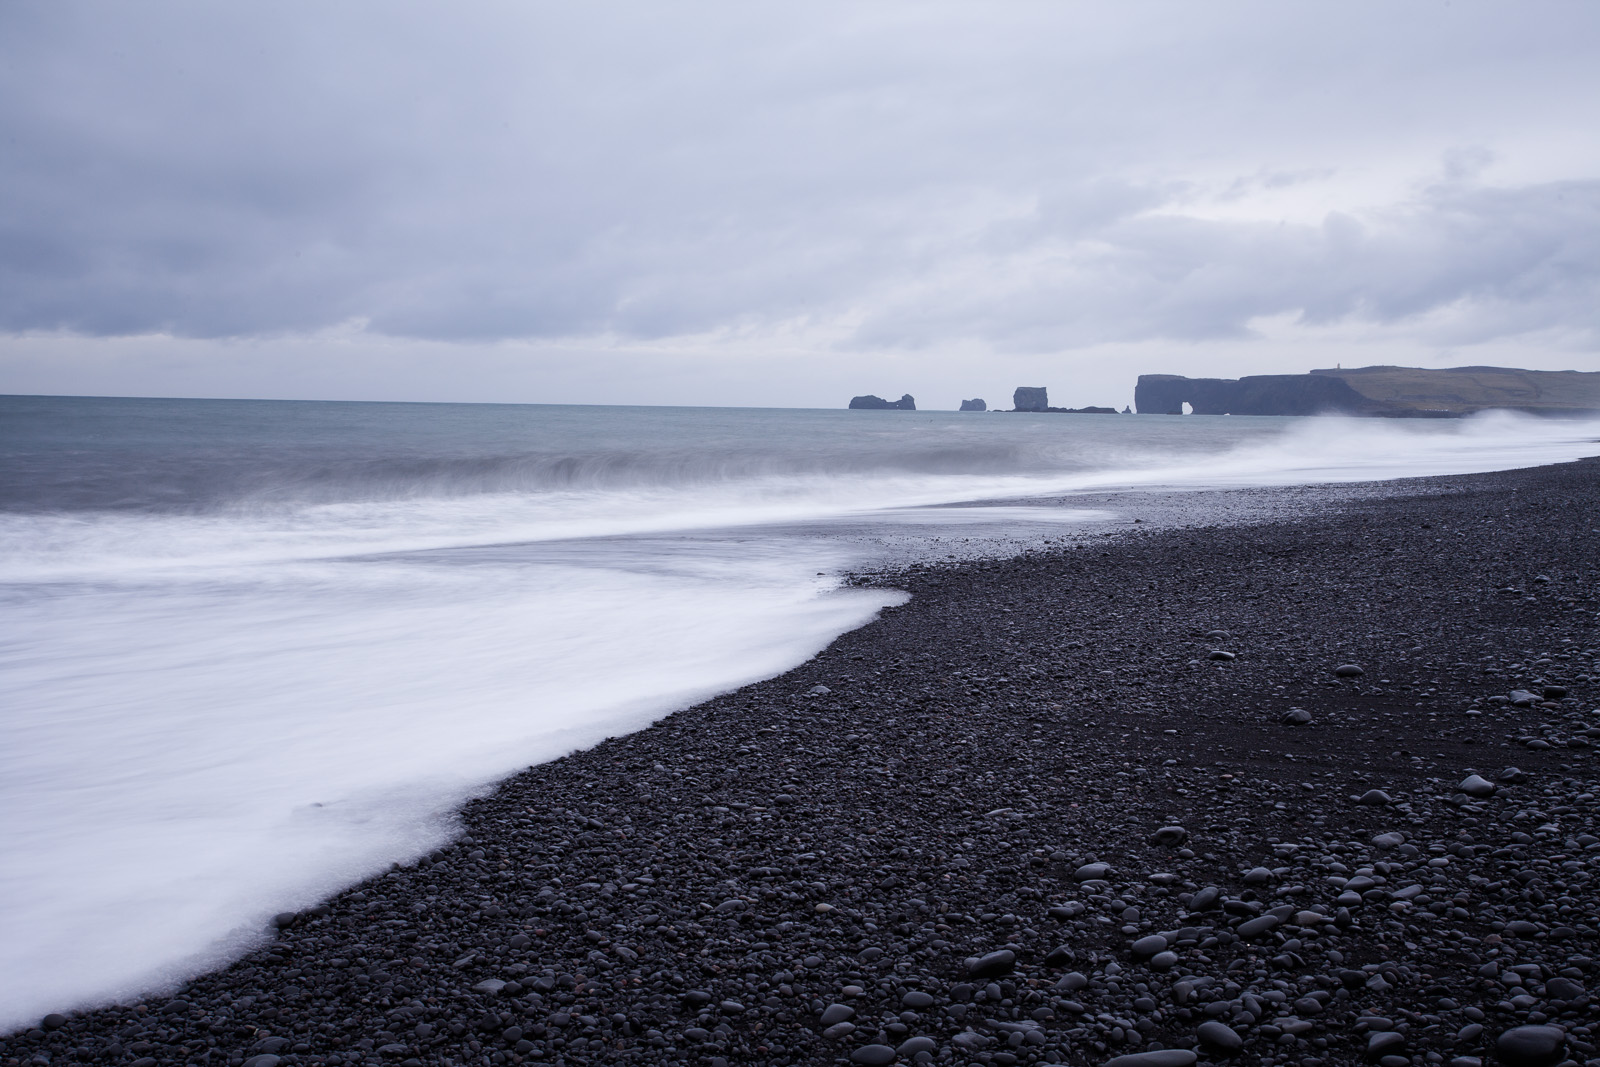
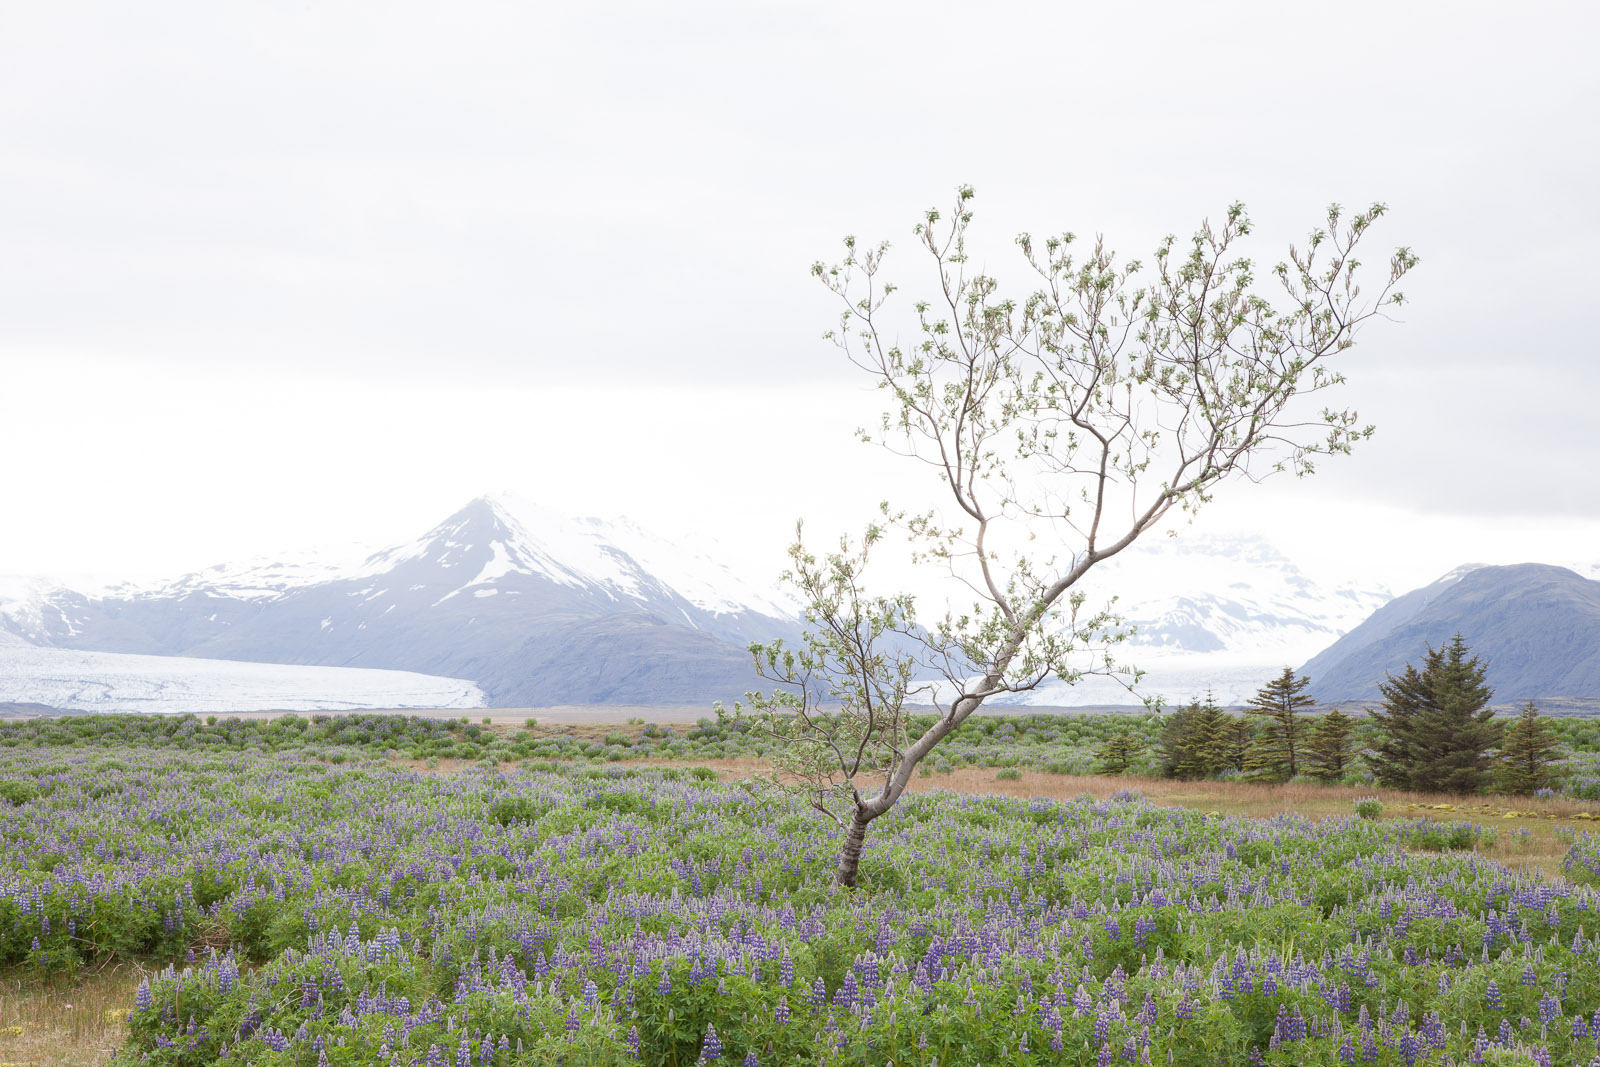
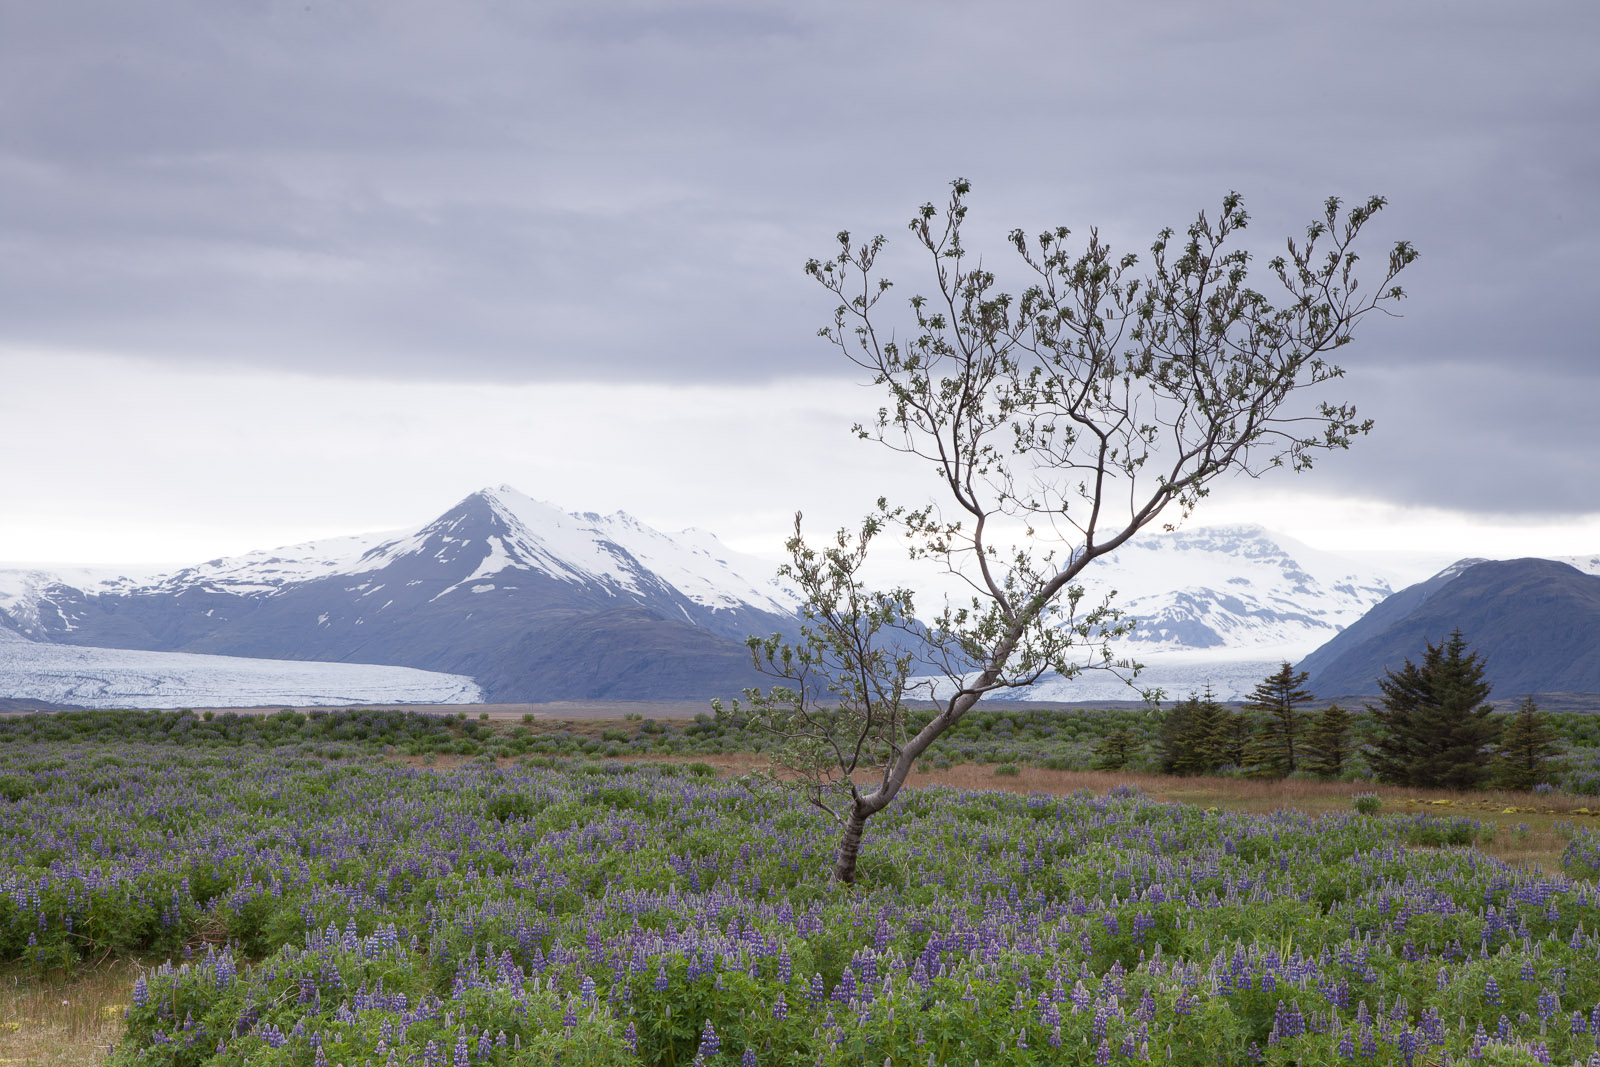
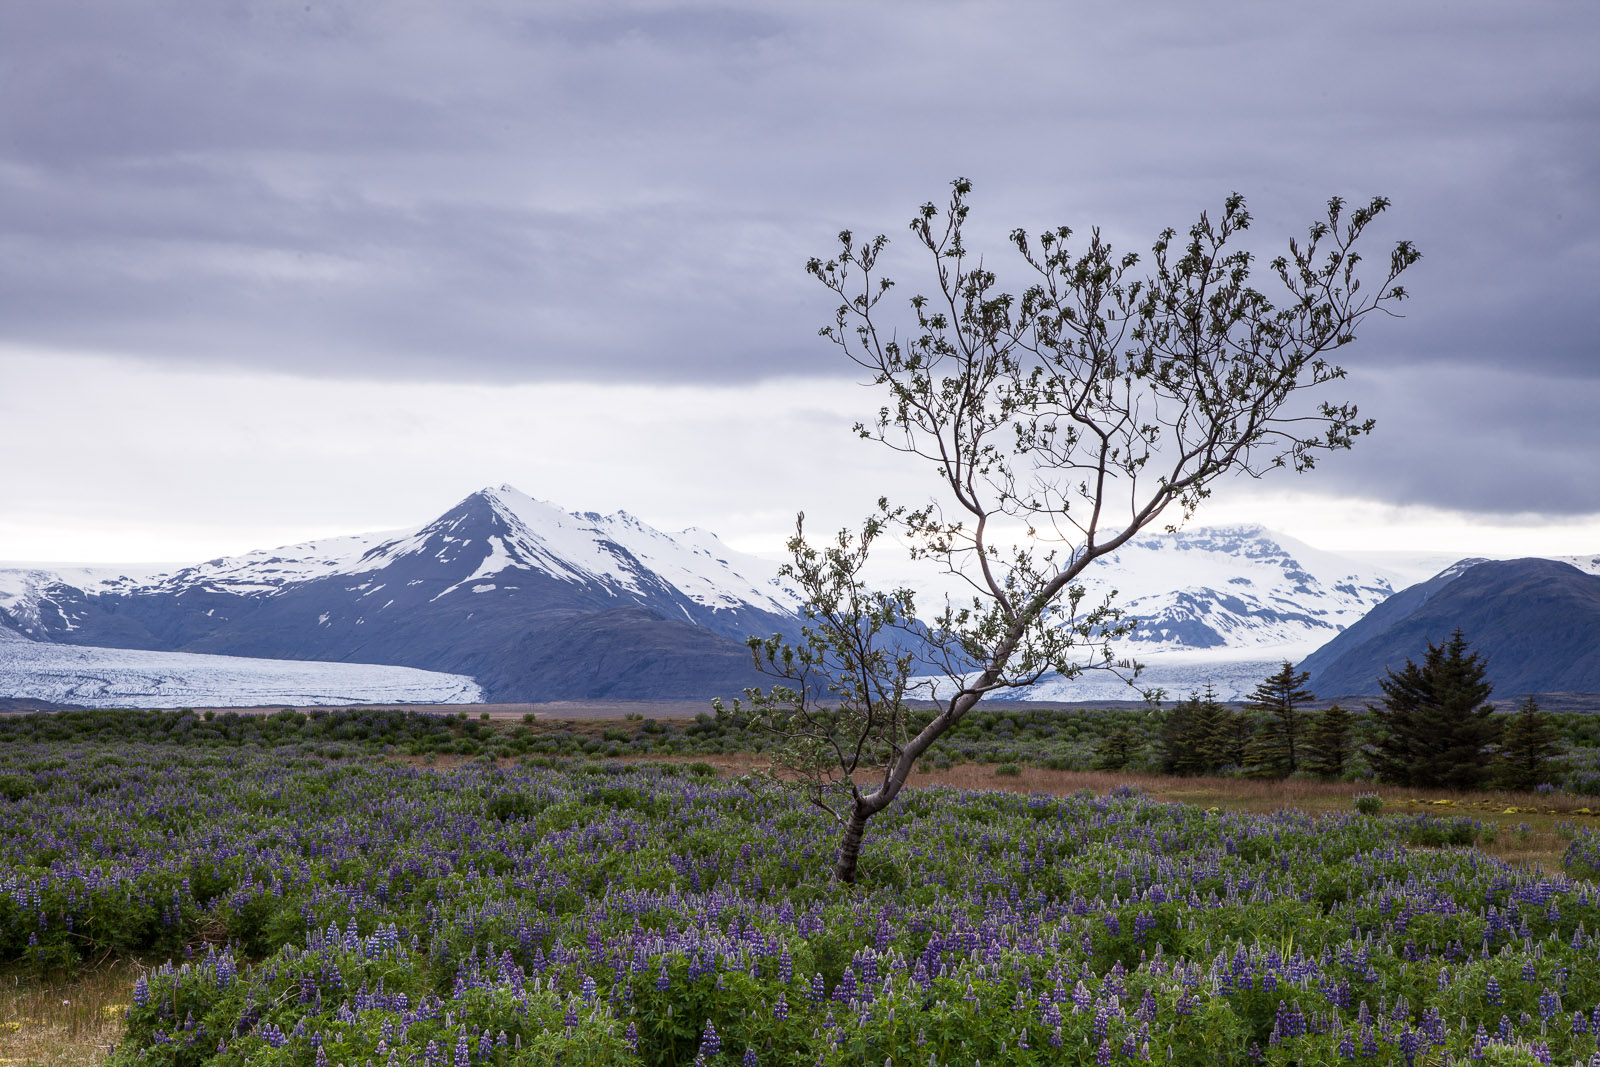
Finally, I have uploaded the Iceland gallery. The images chosen reflect the broad range of landscape I experienced as I drove along the south coast and back.

Each image follows the 90 second rule: if more than 90 seconds of post processing is needed, it probably is not worth the effort. Consequently each image only has clarity (a more gentle form of contrast), vibrance and sharpening added. No colours were boosted – they are all natural. I feel the need to state this as a the volcanic minerals make for some otherworldly colours. The only images where more time was taken was when dust spots were just too distracting.

I loved Iceland and it is definitely on the short list of places to return to. I hope the photographs put Iceland on your list too.

Iceland Gallery


Also posted in Destinations Tagged , , |

Reynisfjara Beach, Iceland.

This is one of my favourite photographs from Iceland.

I had based myself just outside the village of Vik for six days – which is a convenient stopping point as many areas of interest are within easy driving distance – and so had the opportunity to visit most of the places on my list a couple of times. One place I revisited a number of times was Reynisfjara beach with its view of the striking rock spires of Reynisdrangar.

Reynisfjara doesn’t crop up on many ‘Top Beaches of the World’ lists, although I suspect that is because most lists focus on beaches with golden sands, warm breezes and azure seas gently kissing the sands. There are some absolutely stunning beaches out there that fit these criteria, but in no shape or form can Reynisfjara be considered one of them. The sandy beach is jet black volcanic sand. The breeze is the relentless gust of cold North Atlantic air and the ocean doesn’t so much kiss the beach as beat it.

My goal for the beach was to capture the white surf on the black sands and the spires of Reynisdrangar were going to form an interesting backdrop. As a shot it looks good too but once I had captured the image in my head it felt a little, well, incomplete.

Being close it is to route 1 and having an accessible car park right next to it makes it a popular beach. Coach parties make regular stops here and so, as was to be my rhythm whilst in Iceland, I had to shoot in the gaps between one coach party leaving and the next arriving. Of course, independent travellers were there too and this couple caught my eye. Most people were turning up, walking along the beach long enough for the chill wind to suck the heat out of them and then beat a hasty retreat to their cars. But not this couple. They, well, stayed.

Somehow the moment I saw them I had an idea for a shot; silhouettes of them against the milky white of the sea. But there were problems. First the shot would only work if it were just the two of them, so the shot had to be taken between coach parties and other visitors who would get in the frame. Second, the silhouette would only work if they were contrasted against the sea – a dark silhouette on a black ash beach doesn’t really work, after all. And third, for the water to be a milky white, I had to take a long exposure, during which they couldn’t move.

It took 20 or 30 shots and well over an hour to finally get the image I was happy with and, unsurprisingly, in that hour they realised that they were being, err, photo-stalked. So we got talking and I discovered that they were a young couple from Singapore who were travelling around Iceland. I apologised but explained that they had just helped make the photograph I was after and luckily when I showed them the shot they liked it too.

Persistence pays off...

Persistence pays off…


For me this image has a couple of attractions. The first is the simplicity. As I have developed I have begun to discover my ‘style’ of photography. I favour the images where there is a bare minimum of distraction – the kind of photograph where, if just one more thing were to be removed, then the whole image would lose meaning. I think the artistic turn of phrase would be “the use of negative space to draw the viewer’s attention to the subject”. Some people don’t like negative space , some do, but I find that the photographs that I keep coming back to – that I continue to enjoy looking at, follow this minimalist approach.

The second thing I like is the silhouette of the couple. As mentioned in a previous post (http://davehoggan.com/finding-tel-avivs-heart/) when you can’t distinguish people’s features, they become less an individual and more a representation of people in general; they could even be you. I also liked the fact that, when they stood still long enough for the six second exposure, it was pretty much exactly where I wanted them to be – on the right of the frame.

Tagged , , , |

Iceland: The Selfie

I defy you to find anyone who travels who hasn’t once taken a selfie. For years I resisted, but in Iceland I finally cracked.

This is Skogafoss, one of the more impressive waterfalls in a county known for impressive waterfalls. It is also typical of many of Iceland’s sights – when the coach parties disappear, you have it pretty much to yourself.

And yes, it was very, very wet…

My first, and hopefully my last, selfie...

My first, and hopefully my last, selfie…

Tagged , , |

The Waiting Game

The other day I was talking to someone just getting started in photography and later got thinking about what I have discovered over the past few years and if there was any advice that I could give other than the usual – and obvious – “know how your camera works” or “practice, practice, practice” advice. And there is: Good photographs rarely just happen.

Part of the joy of solo travel is that I can afford to spend lots of time waiting. And waiting. Usually it is for inspiration, or thinking about how to shoot a scene, or the light. But often it waiting for people to get out of the way. Iceland is a great case in point. One of the popular tourist spots along the southern coast is Dyrholaey. It is especially popular with bird watchers as several species, including puffins choose it as their nesting grounds. So, leave it to me to visit during nesting season when, what felt like every bird watcher on the planet, was out on the cliffs keeping a lookout. If that were not enough there is a fantastic black volcanic sand beach there with a cave at the far end and I can understand why people were keen to walk along to the cave and back. I would, usually. But I had this image in my head and it did not include people on cliffs. Or beaches. Or even, as cute as they are, a passing puffin. It just had the landscape.

So I set up the tripod, framed the shot, ran a few test shots to check focus, exposure and the creative look and then waited. For a few hours. The cliff line would clear, but people were still on the beach, or vice versa. Or both were clear, but the clouds had moved in. There was always something not right. I waited so long that the tide came in, changing the images, luckily in a way I liked.

Then it happened: No people, no birds, no grim clouds and an, as if to reward me, an incoming wave. Lovely.

Don't tell her but my mother was right: Patience is a virtue. 4secs, f/13 ISO 100

Don’t tell her but my mother was right: Patience is a virtue.
4secs, f/13 ISO 100

Now yes, I could have cloned people out in post production, but I shoot to print at a metre plus in size and unless you’re really very good, Photoshopping can be spotted. Anyway, you really can’t remove clouds or add waves in Photoshop so getting it right in camera is usually the best course of action. So, my advice is simply that. Good shots don’t just happen – you make them happen.

By changing your viewpoint, or removing the waste bin sitting next to the rustic door, or by picking up rubbish seen in frame. Or simply by waiting.

Also posted in Hints and Tips Tagged , , , , , |

ND Filter Example #2

Here’s another use of filters in Iceland. But which filter, if any?

Skaftafellsjokull Glacial Tongue

Skaftafellsjokull Glacial Tongue

Also posted in Hints and Tips Tagged , , , |

ND Filter Example #1

I mentioned in the last post that I’d give some examples of ND and ND grad filters in action. Here’s the first. If you’re new to this end of photography and are keen to try this with your own camera, see if you can work out which filter I used (ND or ND grad).

Svartifoss

Svartifoss – aka The Black Falls


Also posted in Hints and Tips Tagged , |

Getting Creative With Plastic: ND Filters


Holiday season is upon us once again and it’s time to capture some of those memories for sharing with friends and family. But, as good as camera phones are becoming, there comes a point where you realise that, no matter how many editing features they offer, the images they take are not matching up to the ones in the advertising brochures that likely enticed you to the holiday destination in the first place. So, how do you take photographs like the pros?

(At this point in the original draft I wrote paragraphs about creative vision, experience and a whole bunch of other stuff that I arguably know nothing about. But then I realised that it wasn’t really necessary to the point I want to make, so let’s just assume that you’ve managed to find a scene that you want to shoot in a creative way.)

With photography, creativity usually crops up twice. The first time is when framing the shot – the decision as to what to include, what to remove, what depth-of-field and the like. The second time is in the creative control of the available light and even a pro relies on one thing: good light. Without good light, even the most experienced photographer will struggle to produce a good image.

So, to the point of this article: A couple of easy tricks to control light and make photographs a bit more interesting – and certainly a bit more like the ones in the brochure.

Filters

After travelling along the southern coast of Iceland for a couple of weeks in a variety of weather conditions shooting landscapes, I came to rely on one piece of equipment so much so that I would consider it an essential item. In many, many cases it turned a ‘reject’ into a ‘keeper’ and turned a ‘ho-hum’ into a ‘wow’. What is this magical piece of equipment? Why, it is the humble filter.

The clue as to the purpose of a filter is really in the name: To filter. In the case of photography there is only one commodity that can be filtered and that is the light entering through the lens and, perhaps obviously, a filter can only modify or remove light, never add. But, as light is the fundamental component in photography, why would we actively seek to reduce it?

The Light Bucket

If you’re new to photography a simple analogy is probably going to make the rest of this article easier. From the technical perspective, a good photograph usually starts with getting just the right amount of light into the camera and onto the camera sensor, a process resulting in what is usually (but perhaps not accurately) called “a correct exposure”. Too much light and the result is that ‘washed out’ look (over exposure) and too little light results in that ‘taken at night’ look (under exposure). It’s like filling a bucket with water; too much and it overflows, too little and there’s not enough to go around. You have to fill the bucket to the brim, no more and no less.

Plenty of web sites out there use the bucket analogy to discuss exposure in a far better way than I can here, so I’m not going reinvent the wheel. Suffice it to say that there are three, inter-dependent, settings that you can use to control how this bucket is filled and which one you use depends upon the creative look you are after – shutter speed, aperture and ISO (film) speed. Again many articles exist that discuss these, and I may one day write my own.

But sometimes, you need some additional help to realise your creative vision. For me, it was the neutral density filter.

Neutral Density Filters

One of the most useful filters – especially in landscape photography – is the neutral density, or ND filter. Its purpose is to limit the amount of light passing through it in equal amounts across the colour spectrum or, put another way, it limits the light passing through without changing the colour of that light. Using the bucket analogy above, the effect of an ND filter can be looked at in either of two ways:

  • It means that it takes longer to fill the bucket – a longer exposure time.
  • It reduces the amount of light in the bucket for a given exposure time.

Graduated ND Filters

An offshoot of the ND filter – and one far more frequently used – is the ND graduated filter, or ND Grad. It is basically an ND filter that only limits the light on part of the filter.

Little bits of plastic - here the ND and the ND Grad filters -  can make a world of difference to the 'look' of the photograph.

Little bits of plastic – here the ND and the ND Grad filters – can make a world of difference to the ‘look’ of the photograph.

On the left we have the ND filters. It may be difficult to tell but each of the three square and round ones are different levels of opaqueness – the more opaque, the longer the exposure time – the most extreme limited the light passing though to a one thousandth of the original light. On the right we have some rectangular ND Grads, again each limiting the amount of light arriving on the part of the camera sensor.

So yes, this magical device is basically a piece of plastic. Already I sense disappointment. But, some examples may help…


A Practical Example: ND Filters

Take a look at the following shot:

The unusual black volcanic beach of Reynisfjara

The unusual black volcanic beach of Reynisfjara; 1/45sec @ f/16, ISO 100

It’s a beach shot with a nice, black volcanic beach and the Atlantic Ocean. What I wanted to show was not the detail of the waves crashing against the shore, but the contrast of white sea against the black beach and, unfortunately, try as I might, I could not make the exposure time long enough to turn the sea into a white cotton wool coating. The slowest I could achieve was 1/45secs which, as you can see, kind of works, but there’s still too much details in the waves. If only I could limit the amount of light entering the camera so that I needed a longer exposure time to fill the bucket.

Here’s the same landscape with an ND filter attached:


Extending the exposure time turns the sea a milky white; 3secs @ f/16, ISO 100

Extending the exposure time turns the sea a milky white; 3secs @ f/16, ISO 100

This is much closer to the feel I was after, but notice that the exposure time is now a whole 3secs.


A Practical Example: ND Grad Filters

For the majority of the two weeks I spent travelling along the coast it was overcast or raining, usually both. It was that kind of light-grey overcast that photographers hate as it invariably ends up as a white featureless sky when exposing correctly for the subject. If you expose for the sky to get some detail back, then the foreground usually ends up as a silhouette, and trying to expose for both just ends up with a flat-looking images.

Here’s an example of the camera selecting the ‘correct’ exposure.

1/8sec @ f/16, ISO 100

1/8sec @ f/16, ISO 100

As you can see, the sky is a featureless grey-white and the tops of the snow-capped mountains disappear into that whiteness. In addition, the glacial tongues are a blob of white with no detail. The rest of the shot, however, is reasonably exposed – not too dark nor light. If only I could reduce the light in the sky part of the shot, but keep the landscape unchanged. This is precisely the job of the ND grad.

Here’s the same shot but with a two-stop ND grad filter, dark part over the sky and clear part over the foreground:

1/6s @ f/16, ISO 100

1/6s @ f/16, ISO 100

Already you can see the detail come back into the sky and the peaks of the mountains have become distinct from the sky. I’ve also been able to slow the shutter speed down a little bit, allowing more light into the exposure so the foreground is better illuminated.

Here’s the final image after a bit of careful positioning of the filter, and a spot of clarity and saturation adjustment in Adobe Lightroom. For me it has the right level of detail in the clouds, the glacial tongues, the ridges of rocks in the sides of the mountains and the lupins.

The final result...

The final result…

So, a bit of a long article but one I hope that shows that investing in a set of ND and ND grad filters can really make a difference to the creative feel of the shot. There are cheap ones and, of course, expensive ones. Cheap ones are more likely to alter the colour slightly as light passes though them, which isn’t great, but if you’re starting out and don’t want to invest too much then they can be a great place to start. Over the next few days I’ll post some more shots using my new plastic friends…


Also posted in Hints and Tips Tagged , , , , |

Micheldever Woods

After spending the whole weekend either doing a test pack of my suitcase and camera backpack or assembling the final notes for the fast approaching trip, I had to get away from the computer and out of the house. So I found myself in Micheldever Woods, a mere twelve miles from my home.

I decided on the woods as it is regarded as one of the best bluebell woodlands in Europe and after missing the season completely last year I promised myself to come back this year. I still missed it by a couple of weeks – mainly due to work pressures – but it was still certainly impressive.

Deeper into the woods the bluebell carpet is still impressive...

Deeper into the woods the bluebell carpet is still impressive…

I was also traveling light and was using my 100mm macro lens, mainly as I was still in the middle of test-packing my camera gear and the 100mm macro was one lens I was not taking to Iceland so conveniently to hand. I say ‘was not taking’ as it really is a fun lens and, in all my research on Iceland, I haven’t seen many macro shots.

The 100mm macro lens is always a fun lens to use...

The 100mm macro lens is always a fun lens to use…

One of the benefits of being there by myself – and at 6PM on a Sunday evening there really was virtually no-one else there – meant that, aside from being alone with my thoughts, I was making very little noise. As a result the local wildlife didn’t hear me until I much closer than I’d usually be able to get.

I may have missed the height of the bluebell season, but I did get to meet the locals...

I may have missed the height of the bluebell season, but I did get to meet the locals…

I’m usually so focussed upon travelling abroad that I often don’t take time to enjoy the things on my doorstep. The hour and a half in Micheldever Woods has reminded me that I should pay a bit more attention to the wonderful surroundings much closer to home.

Tagged , , , , , |