Tag Archives: trip planning

Vik: Five Days in the Shadow of Iceland’s Sleeping Giant

My job has me on the road and currently in Grimsby, a port-town in the northeast of England, before heading over to Liverpool, a port town in the northwest. Since I’m spending five out of seven evenings this week in hotels, its time to make good use of the solitude and catch up on planning the trip!

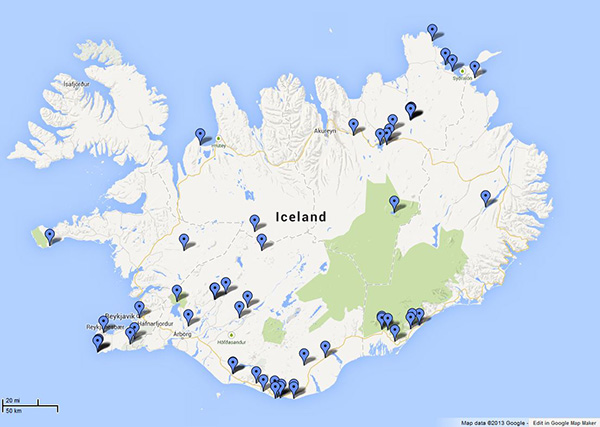
As mentioned in the last post, the itinerary framework is now complete in that periods of time have been allocated to each of the four base camps: Reykjanesbaer, the town of Vik, Skaftafell National Park and Jokulsarlon and then Reykjavik itself. But with five days in Vik alone and four in the Jokulsarlon area this really is the bare bones of a framework and there is still plenty to do to turn it into a trip that makes the best use of the time. Some people like to just turn up and go where providence takes them. It’s a great way to travel and you’re much more likely to experience something unexpected, but for better or worse, I’m not someone who travels that way.

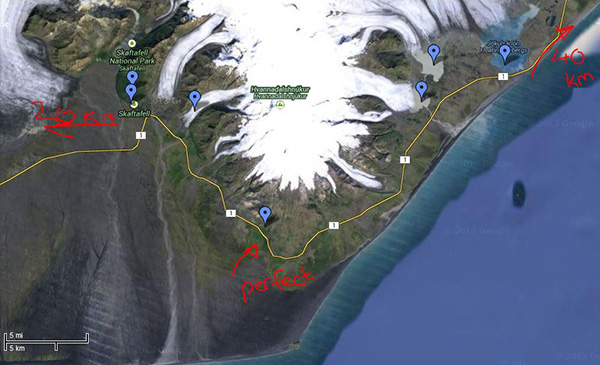
Of the two main base camps Vik offers the biggest challenge simply as there is so much that can be seen within 100km of the town. Nestled at the base of the Kafta volcano, one of Iceland’s largest and most active, and within easy driving distance of Eyjafjallajokull, the volcano that pretty much stopped western and northern European air travel for a week back in 2010, it presents a great base for seeing almost all of the variations in Iceland’s varied landscape.

For a start it’s a costal town that sits on the Reynisfjara beach, a fantastically pitch black volcanic expanse with mouth-wateringly photographic coastline in each direction. If you’re after landscape that’ll show even the largest tour group, let alone a solo traveller, just how massive Iceland’s geologic upheaval has been, then Fjaðrárgljúfur to the east is a safe bet. To the west along route 1 there are the waterfalls Skogafoss, Seljalandsfoss and Glufrafoss, about 60km distant. Not that you have to travel anywhere near that distance to see a waterfall in Iceland – there are simply so many that I defy anyone to find a reliably accurate figure –  but as the original itinerary saw me travelling counter-clockwise along route 1 I had many more planned for the east and north of the country and so I was careful not to overdo it in the west and south. Then there’s the curio of the 1973 US Navy plane wreck at Sólheimasandur that no-one can be bothered to remove.

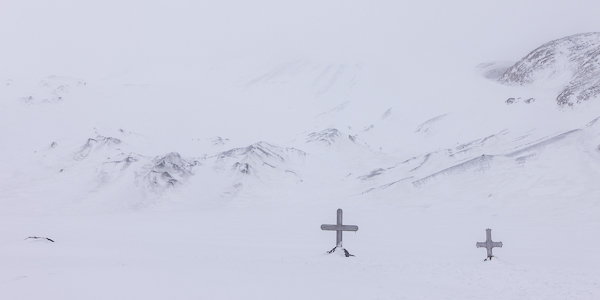
A personal must-see for me is Kötlutangi where, if you look directly south, there is no land mass until Antarctica. There may be nothing to photograph there, but that’s in some ways nicer; I’ll be there just for the experience of looking out to the bottom of the World and a place I miss.

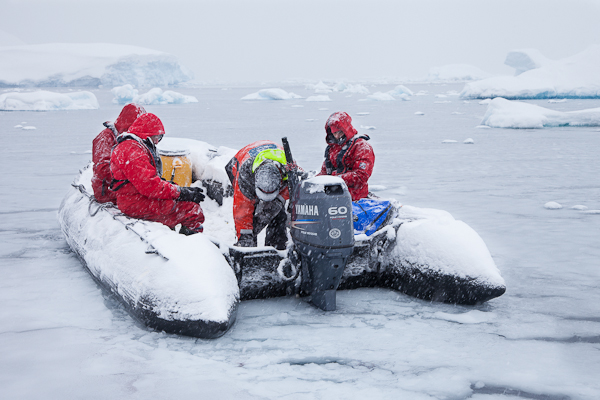
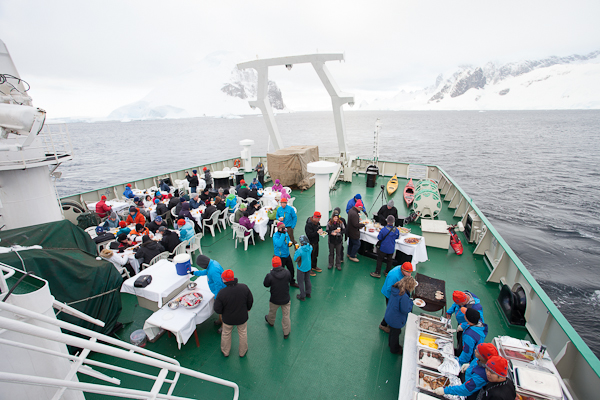
Now it is likely that you’d be able to comfortably see all of these in a couple of days, but I’m not in a great rush and part of the plan for this trip is to operate at the other end of the spectrum to Antarctica. There, we missed a couple of excursions to land due to poor weather and with no slack time in the schedule we simply had to move on. My Iceland schedule was designed from the outset to allow for poor weather and so should the weather mean I can’t get a particular shot, well at least I’ll have another chance. I’m also aware that, when looking at the coastline on Google Maps, it all looks, well, flat. I’m constantly reminding myself that, just because I’ll have a 4WD, that doesn’t mean that I won’t be walking. A lot. Now, walking I’m used to, and hill walking is no real issue, but this will be with a 12Kg camera backpack and on often less-than stable ground. As I’d rather not sprain an ankle, or worse, allowing more time to get from A to B seems a prudent choice.

As it stands, at Vik I feel that I’ve selected enough sites to provide a broad view of Iceland’s diverse landscape, but with some time left to just go exploring to see what I find. Time will tell…


Posted in Travel, Trip Planning Also tagged , , |

The Iceland Itinerary Is Finalised. Again.

Hot on the heels of the last update plans for the trip have moved forward. I’ve decided on the itinerary, booked flights, the 4WD rental and even finalised all the accommodation. Which yes, does mean that I’ve come to a decision on the dates.

One of the things I was unsure of was simply the mechanics of travelling the 380km from Jokulsarlon to Keflavik in time for the flight, all on the same day. Knowing my luck, the 4WD would suffer some kind of terminal failure, I’d miss the flight and be stranded. The flip side was that, whilst the first version of the itinerary allowed a couple of extra days on the Reykjanesbaer peninsula – where the airport is located – it also spanned three weekends. That was three weekends of potential overtime at work, which ultimately pay for these trips. It was such a quandary.

I was also beginning to make the same mistake as the 2013 trip: Trying to fit in more and more locations. I had already began looking into the possibility of travelling north of Reykjavik based on a number of wonderful landscape shots I’d seen. It was only when I added up the days and cost that I realised I was attempting to do too much.

So, with a few changes, here is the itinerary:

  • THR 22 MAY
    Early afternoon flight to Keflavik International, pick up 4WD rental and check in to a local hotel on the Reykjanesbaer peninsula.
  • FRI 23 – SAT 24 MAY
    Go exploring on the Reykjanesbaer peninsula. In the afternoon, drive the 190km to Vik, undoubtably stopping along the way.
  • SUN 25 – THR 29 MAY
    Based in Vik, spend five days exploring the surrounding area, up to 100km or so.
  • FRI 30 MAY
    Drive over to the next base camp near Skaftafell national park. This is only 190km so again, I’m sure I’ll be stopping a few times.
  • SAT 31 – SUN 01 JUN
    A close base camp to Skaftafell National Park means spending time around, and on, Vatnajokull, Europe’s largest glacier.
  • MON 02 – TUE 03 JUN
    Move to a base 40km east of Jokulsarlon and continue exploring. The move is more out of necessity as the hotel I’m in at Skaftafell is booked after after June 1st.
  • WED 04 JUN
    Drive to Reykjavik, return the 4WD and be out for some evening photography along the harbour.
  • THR 05 JUN
    A day relaxing in Reykjavik satisfying my needs for some architectural photography.
  • FRI 06 JUN
    Tying up last minute shots in the morning and fly out in the late afternoon.

For me, there’s a good balance of time here. In Antarctica I often found there wasn’t much time to compose shots – everything was moving and you were kept on a tight itinerary which, although understandable for certain destinations, is the one thing I dislike about organised trips. Here, there is no clock to watch and with five days in Vik alone, I’ve allowed plenty of time to slow down and work each location. Maybe too much time, but I’ll only know that in a few months.

The surprise is Reykjavik being included at all. I was quite keen to avoid it altogether and simply concentrate on the landscape aspect but, well, I can’t resist good architecture and I’ve wanted Hallgrimskirkja as a subject for a while. Plus, with just over two weeks of near solitude, being in a populated area will make a nice change.

So, the holiday is signed off at work, flights were purchased yesterday, as was the rental of the 4WD. Five sets of accommodation are all booked too and I’ve a good idea of where I want to be and see.

In short, Iceland 2014 is born. All I’ve got to do now is not mess it all up by changing things!

Posted in Travel, Trip Planning Also tagged , , |

The logistical nightmare…

Now that the two, primary base camps have been chosen and dates selected – largely based on the availability of accommodation, I’m now beginning to consider the side trips. Of course, in my world nothing is ever quite as easy as it would appear, so this week has been set aside to deciding whether I should land at Keflavik, hop in the 4WD and head straight over to Vik – the original plan – or if I should hang around on the peninsula, spend a couple of days there and then heading over to Vik. Unsurprisingly, it’s a surprisingly big decision.

Ordinarily it wouldn’t really matter: I want to see both areas and given the few days difference the weather isn’t really going to change significantly – at least none more so than Iceland’s weather does anyway. The issue is not so much with what happens at the beginning of the trip but more to do with what happens at the end.

The last big base for photography is Jokulsarlon, located roughly halfway along the southern coast and approximately 420km from Keflavik. In the original plan, I drive back from Jokulsarlon to a guesthouse near the airport and then spend a couple of days driving around the peninsula. Doing it in this order has the rather handy advantage that, should something happen – such as the 4WD breaking down or absolutely perfect light descends over the glacier and lagoon – then I have the slack time to stay without worrying about missed flights etc. Visiting the peninsula first means either no slack time or additional days and cost.

Reading this far you’re likely still wondering why this is an issue, after all I’ve already mentioned that the weather is not really going to change. The problem is to do with the days I’ve picked: As it stands the trip falls over three weekends. As I use the overtime earned by working weekends to pay for these trips, it would be really handy to travel midweek and only be away for two weekends.

I’m tempted to throw all caution to the wind and finish up at Jokulsarlon and drive directly to the airport – after all, there’s nothing like living life on the edge…

Posted in Travel, Trip Planning Also tagged , , |

Planning Iceland 2014 from the Inside Out: Jokulsarlon

It’s a cold, wet and generally unpleasant day outside here in my part of the UK and so I’ve been making good use of time in front of the computer: Planning Iceland 2014!

To recap the previous itinerary, I was attempting a circumnavigation of the island along the (roughly) circular route 1. It was to take 19 days and cost in excess of £3000 which, whilst expensive, is cheaper than some other destinations. The problem was not so much the cost but the imbalanced itinerary: approximately two-thirds of the time and cost was being spent along the south and south-east coast with a mad dash around the remaining part of the island, resulting in a lot of driving, not much stopping and no ‘slack’ time at locations to allow me to return should bad weather hamper the photography. Also, some of the accommodation I had booked was based on what was available at the time and not necessarily convenient for a key location meaning long, early morning drives, again not necessarily knowing what the weather would be like upon arrival. So, I cancelled the trip, lost about £300 in non-returnable deposits and had a sulk.

Not one to feel sorry for myself (for long, at least) I decided I should return to the plan allowing a bit more time before the departure date and focus the itinerary. As it is, work has been busy with various projects and, as it is the overtime that pays for my trips, evenings and weekends have been scarce. It is only today that I have had a chance to sit down and dedicate some time to the new itinerary free from distractions. And, progress has been made. Eventually.

The first mistake I made was to do the obvious: Decide how long I want to travel for, when I want to go and then begin dividing up the time between the key locations. This would be a brilliant approach if I were the only person thinking of visiting Iceland at the time, but of course I’m not and Jokulsarlon – one of two key locations for me – is a generally popular spot resulting in very limited accommodation options at the best of times. Given the dates this approach gave me I could either spend in excess of £700 for five nights in a conveniently located hotel, spend a more palatable £450 for one 40km east of the glacial lagoon and 80km east of the Skaftafell National Park, or I could camp.  What I really wanted was a convenient, and cheap, place to stay for both the lagoon and the national park. Which surprisingly does exist as I discovered when I planned the 2013 accommodation.

'Cheap' accommodation can be found 20km west of Skaftafell and 40Km east of Jokulsarlon. But I wanted the perfect base for photography...

‘Cheap’ accommodation can be found 20km west of Skaftafell and 40Km east of Jokulsarlon. But I wanted the perfect base for photography…


To be fair, the convenient-and-cheap hotel doesn’t exactly get rave reviews, but after an eye-opening stay on a Chinese farm a few years ago I’ve have a generally liberal view on these things. After all, I’m not moving in.

So began the game of entering dates into the booking web site and seeing if the hotel had vacancies and after few iterations – during which I gave up on working out proposed flight and car rental dates – I had some dates for when the hotel was available.

Of course it wasn’t as simple as that: One of the reasons I want to go to Skaftafell is that there is a full-day glacial walk tour that heads out from there, but the season starts on June 1st – the last day the hotel is available –  meaning I would have to check out, go on a seven hour hike and then drive back to Thingvellir National Park. A long day and a plan leaving no time for contingencies (such as tour being delayed due to weather etc.).

In the end, I’ve adopted a split approach – check into the cheap-and-cheerful hotel, use it as a base for Skaftafell National Park and, maybe, Jokulsarlon. Then check out on the 1st, go on the glacier walking excursion and then drive over to the guesthouse 40km east of the glacial lake. Whilst it sounds like a bit of an aggravation, the new guesthouse is only three kilometres further from Jokulsarlon than the cheap-and-cheerful place is and offers a different vantage point from which to explore the landscape. Also, should the glacial walk be delayed a couple of days, at least I’m still in the area.

So, eight hours of work later and I have a hook to hang the new itinerary upon. Not a bad way spend the first day of 2014!


Posted in Travel, Trip Planning Also tagged , , , |

Iceland 2014

Well, as many will know, the trip to Iceland was postponed. I’ve been having a bit of a sulk about it for a couple of weeks (hence no posts), but as it was entirely my decision to postpone it I shouldn’t be too moody about it. However, whilst I feel like I let myself down a bit, it does appear that it may have been a good decision to wait.

There were a couple of reasons for postponing the trip. First: The cost. It was going to come in at just over £3000 for what amounted to 19 days, including international travel. Whilst Antarctica was well over double that for a mere 13 days Iceland doesn’t fall into the ‘once in a lifetime’ category. Not that it isn’t a stunning place to visit, but rather it is a place I could go several times.

I knew from the start that Iceland is on the expensive side, and I’m not one to shy away from spending money, but when I spend it I have to feel that I’m not wasting it and it was this feeling I was having trouble shaking. I eventually traced my concerns down to the itinerary and my plans to drive around the whole country.  I use Google Maps a lot when planning trips and you can probably understand my concern  when you see where I’ve tagged key points of interest.


Despite planning a circumnavigation of the country, my wish list pretty much involved the southern coast...

Despite planning a circumnavigation of the country, my wish list pretty much involved the southern coast…


As can be seen the majority of points are down along the southern coast. There’s an important cluster up toward the northwest – important as it includes Dettifoss and Myvatn –  but other than that I would be travelling large distances for only single locations. It just wasn’t a good split of ‘expensive’ time and it was too late to change hotel bookings.

The second point that kept niggling at the back of my mind was it’s a lot to take on by oneself. I’m certainly no stranger to solo travel and often prefer it as it allows me to spend time setting up shots and exploring angles. But, Iceland is very capricious and should something happen and you’re out of cell coverage then you’ve got a problem. I had been taking steps to mitigate risks, of course, but one thing my day job has taught me is that you cannot project plan every eventuality. Coupled with this is the fact that a lot of the sense of wonder in landscape photography comes from a sense of scale. This is something Iceland’s vistas have an abundance of and so much of showing the vastness of its landscapes come from including a convenient reference point – and what is more convenient than a handy human?

So,  with the above in mind and despite the kill date being passed, I cancelled the bookings. In the end I lost around £200, but compared to  £3000+ I would have spent, I could accept that and the rescheduled trip in 2014 would be more focussed, less grandiose, and more productive. And, of course, I can always go back if I miss anything.

Now, as with many things in life, good things can come out of grim situations. In this case, an unexpected message on Facebook from someone I’ve known for many years.  He’s a keen rock climber with a love for the outdoors and he’s very interested in going to Iceland. Now this has several benefits, not least the cost drops significantly. It’s also safer travelling with someone should the worst arise. The other benefit here is that I know nothing of rock climbing and so to have a subject that not only lends a sense of scale, but does it in an adventurous way -and in a way I never could –  is a real benefit.

There’s lot of planning to do. My schedule is largely out the window as with two people to consider it’s all about accommodating both wish lists but, given that the reason he wants to visit is going to make for some great photography, I really see this as a benefit – certainly more entertaining than my original, somewhat stuffy, plans. As I said it is early days, but I do hope we can come to an arrangement.

Posted in Travel, Trip Planning Also tagged , , |

Iceland Kill Date and Knowing When to Quit

Today marks the kill date for the Iceland trip; the date after which cancelling would incur significant financial losses. So, have I pulled the plug, or am I now financially committed? Of course I haven’t, but that just means a lot more work to do.

With less than two weeks until I fly out to Iceland, there is still a fair bit of planning to take care of, and the task of getting everything in order before then is made more challenging by the fact that I’m away on business this week and working next weekend. On the plus side, being stuck in a hotel for the next few evenings should minimise the distractions and the wonder of cloud storage providers such as Evernote and Dropbox means that, after spending weeks on my multi-monitor behemoth of a computer at home collecting information and distilling it into a Word document, as I opened my laptop at the Premier Inn hotel here in Grimsby, UK, a few moments ago all my work seamlessly appeared. When it works, technology is great.

Having my notes magically appear, however, doesn’t detract from the fact that I’m short for time. For week-long city breaks, it really would not be an issue as you can easily make last-minute changes on the fly – you can even just make the whole thing up as you go along and make a success of the trip. On the other hand, when travelling across a country, and you have a purpose – say photography – then at the very least you need a framework.

I set out a rough framework in a blog entry a couple of weeks ago largely based upon the fact that I had booked accommodation in various places around Iceland. Since then, I have continued to scour the Internet for interesting, and potentially photogenic, sights and it has been no surprise that I’ve found more things I would like to see.  This has brought about the inevitable checking to see if I can change accommodation so I can spend time in the new place, which has had the knock-on effect of having to decide which of the original planned sights would be culled in order to free up time. In short, I was dangerously close to undoing a lot of basic, but critical, planning I had completed. But, that would likely be disastrous this close to the start date and so I must simply accept that the accommodation – and hence the sights – are largely fixed.

Well, not quite.  The framework thankfully does allow for some modification, especially when using Reykjavik as a base camp.

As mentioned in a previous post I have three days for Reykjavik, one without a 4WD rental and two with. The plan is spend the first day investigating the city on foot and getting back into the right mood for seeing things photographically – a step I have to pass though on every trip. The following two days were, up until this weekend, rather vague. Now they have shape and meaning.

On one of these days I plan to investigate the Reykjanes peninsula, which for many visiting Iceland is famous as the home of the Blue Lagoon – and the international airport. However, I may very likely completely bypass the tourist magnet altogether in favour of some seriously photogenic coastlines, complete with menacing rocky spires and crashing waves. Throw in some monster storm clouds and I’ll positively grin like the Cheshire cat. Aside from the coastline, there are a couple of lighthouses, some nice mountains and some lakes. But what has really captured my eye is the geothermal power station which, whilst I perhaps haven’t sold it very well, I can see some real photographic promise in. Whilst the day is relatively local to Reykjavik, I’ll be getting used to driving the 4WD and, as some of the roads out on the peninsula are gravel, not paved, it’ll be an adventure nonetheless.

The second day is going to be a bit of a marathon, involving some 400 kilometres and seven hours of driving. The plan is to drive up to the geysers Stokkur and Geysir, from there head up to Gulfoss waterfall and then, and this is the time consuming part, up to Gygjarfoss waterfall. I say time consuming as the road ends after Gulfoss and becomes a highland, or F road. In other words, it’s a dirt track. Even in the 4WD I’m not going to be traveling very fast on that. My hope is to spend a couple of hours at Gygjarfoss  and head back at about 3-4PM so I can arrive at Thingvellir National Park for dusk.

So, another two days now have shape and slowly I’m beginning to have some faith that I will see the things that I would like to see. There will be much that I have to miss, but that’s where organising a photography expedition is like life: It’s all about knowing when to quit and just be happy.

Posted in Travel, Trip Planning Also tagged , , |

Prometheus’ Engineer, Moby Dick and I.

With a long weekend here in the UK there’s been some time to look into some of the specifics for the Iceland road trip. Over the past few weeks I’ve spent a lot of time reading blogs on the Internet, seeing what people recommend, what problems they encountered and what hidden gems they found that might not be in the usual travel guides. Many hours of reading and note taking with Evernote has resulted in a lot of information that now has to be sorted into some kind of plan.

One of the nice things about urban photography is the your options are necessarily limited. Opening times dictate when you can get interior shots, built up areas dictate the angles you can shoot from and in metropolitan areas the times that see the highest population movements – rush hour – dictate at what times you can shoot if you want to capture a specific interaction between people and architecture. Another nice thing about urban photography is that things are usually quite close together.

Not so on a road trip. Of course it shouldn’t have come as a surprise to me – after all I’m circumnavigating a country – but it’s the little things that soon add up.

One of the places I’m off to is Dettifoss, a waterfall in the north-eastern part of Iceland. If you’ve seen the film Prometheus, its the one at the beginning of the film. Many sources state that it’s Europe’s largest waterfall (in volume of water, not height or width) and so for those who venture out of the capital Reykjavik it’s usually high up on the ‘Top 10’ list. Researching this apparently simple destination started out as straightforward, soon became confusing and finally ended up as my own personal Moby Dick. And here’s why.

Using Google very quickly showed that Dettifoss sits, roughly equidistant, between the self-drive tourist’s dream road, route 1 and the north-eastern spur, route 85. I already have plans to stay for a couple of nights just off route 85 and so it is a simple decision: wake up, check out head east of route 85 until the turning for Dettifoss. As it turns out, there are two roads leading to Dettifoss and that is where it all started to get complex.

Iceland has a three-tier road structure. In Reykjavik and other population centres they’re tarmac surfaces. This is also true of arterial roads such as route 1. The second tier are gravel roads – usually less frequently travelled roads although parts of route 1 are still gravel. Then there’s the F, or mountain roads. Perhaps less ‘road’ and more ‘track’ these are impassable during the winter months and suitable only for 4×4 vehicles the rest of the time. Many of the wonders of Iceland’s interior are only accessible via F roads.

So, going back to Dettifoss. The two roads take you to the east and west banks and the bank you are standing on radically changes the view and the feel you will get. My first thought was “Duh! Just shoot from both banks” but this then highlighted the other issue when travelling through Iceland: There’s never a convenient bridge when you need one. With Dettifoss, to get from one bank to the other – a linear distance of approximately 120 metres, involves a 65km detour.


Dettifoss has two banks, each with a different photographic feel.

It may be only 120 metres from the east bank to the west, but it takes a 65km journey to get there…

Things became confusing when I started to look at the roads themselves, something you need to do if you’re not in a 4×4. Originally the road leading to the west bank was classified as the F862 denoting it as unsuitable for non 4×4 vehicles. As a result the east road – the 864 – became the road of choice. It was still a track, but in much better shape than the F862. Then in 2010 the F862 was replaced with a paved route and it became simply the 862, instantly making it the better route to travel. As I read around on the Internet and at people’s experiences it was frequently not clear as to which version of the 864 they were referring as dates were missing, or they were writing after 2010 about a ‘previous’ trip etc.

After a few hours of searching around on the Internet in frustration I dropped an email over to Peter of the Iceland blog site Iceland24 (iceland24.blogspot.co.uk) asking him if he could clarify the current status of roads (F)862 and 864. I was impressed when, shortly over an hour later, a reply came back. I was seriously impressed when the reply was that there would be an article on the website dedicated to visiting Dettifoss – within the hour! Which there was. Looking around Iceland24 reveals a good amount of information for the visitor and Peter seems to be very approachable.

As mentioned above the other factor is the type of shot you want to get. If you are after the ‘Prometheus shot’ where the falls recess away into the frame, then you want the east bank. As the film shows, the east bank is a barren, rocky expanse and you get a clear view of the falls and, unobscured by mist, of the west bank, a green carpet of moss and plant life  But, from the west bank, you have a completely different experience; the falls are face on to you dominating the frame with a wall of water. There’s plenty of mist in the air too and you’ll likely need lens wipes if you want a clear shot of the barren east bank.

If that were not enough to be contending with I also want to hike the kilometre or so up to Selfoss, a wide waterfall upstream of Dettifoss. But again, which bank would give the best shots?

And, of course, which bank is best for a dawn or dusk shot?

At some point over the past two days, it has become a mission and, much like Ahab’s quest of revenge on Moby Dick, I must work out the perfect combination of which bank at which time for which shot. I think I’m almost there…

Posted in Travel, Trip Planning Also tagged , , , |

Iceland 2013 Custom Itinerary

The itinerary for the forthcoming trip to Iceland is now pretty much decided, in as far as I now know where I’ll be staying and for how long. During the early stages of planning for the trip I accepted that it was going to be expensive and so made a mental note to not under allocate time. Of course, I don’t know yet if I have erred the other way and over allocated time at each spot, but I suspect not.  I have also taken the step of allowing a full day for travel between each base camp. In some cases the actual travel time between each camp is only a couple of hours, but I’ve read that there is always something along the way to see and anyway, it’s a holiday – I’m meant to be taking it easy!

I know many of you will have Iceland on your agenda too and so I thought I’d share my itinerary and why I picked the stops and durations. Of course, the important bit will be the post-trip report but, right now, the itinerary looks like this:

Day 1

Arrive in Reykjavik. Check in and then a leisurely evening looking around the city.

Days 2-4

Reykjavik. There’s some wonderful architecture and sculpture in the city. It’s also a convenient starting point for the Blue Lagoon as well as the popular ‘Golden Circle’ daytrip that covers the tourist magnets of Geysir, Pingvellir and the waterfall Gullfoss.

Day 5

Travel to Vik. It’s a 185Km journey that should take between two and three hours, but there’s plenty to see along the way. It will also be the first day of driving in Iceland and the 4×4 so it seems a good chance to take it easy and get to know the roads and car.

Days 6-8

Based in Vik. From here, there’s easy access to the waterfalls of Skogafoss, Seljalandfoss, Glufrafoss, and the Southern Fjallaback Nature Reserve, as well as being right on the doorstep for a very photogenic black ash beach. There’s also a downed aircraft not too far away that could prove an interesting subject.

Day 9

Travel to Jokulsarlon. Much as the first travel day, Vik to Jokulsarlon is a 185Km journey so should provide ample stopping and exploring time.

Days 10-12

Based in Jokulsarlon. Jokulsarlon is an enormously popular stop as it is famous for the glacial lake where icebergs calve off Vatnajokull, Europe’s largest glacier and drift off into the Atlantic Ocean. But it is also conveniently located for the less well-known Fjallsarlon and Svartifoss.

Day 13

Travel to Thorshofn. This is a more substantial 415Km journey and likely to take six to seven hours. So, still some time to explore, but I’ll have to watch the clock.

Day 14

Around Thorshofn. I actually picked this destination based on a single photograph I have seen, but there are some great costal shots as well as more general landscapes.

Day 15

Travel to Akureyri. A 250Km, three hour journey. I’ll be passing by Dettifoss, Europe’s largest waterfall and Myvatn, a very picturesque lake area.

Day 16 – 17

Around Akureyri and Myvatn. I’m not so interested in Iceland’s second  ‘city’ but more so in some of the surrounding landscapes. I’ll have time to head back to Myvatn, but also head west of the town along the northern coast.

Day 18

Return to Reykjavik. 384Km and five hours of driving again means that I’m not going to have too much time for detours before returning the rental 4×4 at 4PM.

Day 19

AM relaxing in Reykjavik then PM flight home. It will be my birthday and so I may treat myself to a nice soak in the Blue Lagoon.

Posted in Travel, Trip Planning Also tagged , , |

Keeping Warm in Antarctica: What and How Much to Take…

With the start of August comes the point of no return for those lucky enough to be heading for Antarctica this season. Most expedition operators require the final balance to be paid three months before the expedition and as the season opens in November, those who haven’t already paid the remaining balance will be making plans to do so now.

Once you’ve committed all that money at some point you’ll need to turn your mind to some of the other logistics such as how to travel between the international and domestic airports in Buenos Aires, differences in baggage allowances between different airlines and so on. However, at some point the same question is likely to crop up: Just what does a fashionable Antarctic-bound traveller wear this season?

Zodiac propellers break several times a season due to ice. When they do and you're on-board, being warm can be quite nice...

Zodiac propellers break several times a season due to ice. When they do and you’re on-board, being warm can be quite nice…

Keeping warm and dry is such an obvious requirement that I don’t see many people talking about it which can be a bit frustrating if you’ve just spent upwards of GBP £5000 on a trip and are not sure what or how much to prepare. Mention Antarctica and most people will reasonably imagine blizzards, breath that freezes as you exhale and the kind of cold that results in frostbite if skin is left exposed more than a few seconds. Which is all true, of course – just not when and where you’ll be going. First of all, expeditions only run from late Spring to late Summer when the sea ice surrounding the continent has melted sufficiently for an approach to be made. Second, even on the ‘Below the Antarctic Circle’ trips, you’re not really venturing that far onto the continent itself. In fact, look on a map of Antarctica and you may be forgiven for feeling a little let down. Don’t be – it’s stunning. In fact, were you to venture inland, without very specialist equipment and a lot of physical and mental expertise you really would end up a permanent resident. But, up on the Antarctic Peninsula, expect daily temperatures in the range of about -5C to +2C. This might be an inconvenient fact that you want to omit when telling friends of your Ranulph Fiennes-like exploration of Terra Incognita, but it does at least lend some reassurance as to not having to spend another vast sum of money on specialist clothing.

OK, your expedition leader is trained to ensure you don't join these unfortunate souls on Deception Island, but being cold can really ruin your experience...

Your expedition leader is trained to ensure you don’t join these unfortunate souls on Deception Island, but being cold can really ruin your experience…

That’s not to say that you shouldn’t prepare. I didn’t want to be so cold that I hated the thought of venturing off the ship. Indeed, one of the other travellers on the trip I made was so visibly cold on one Zodiac cruise that we had to return to the ship to let him off. That would have both annoyed and depressed me had I been him as for me, like many others travelling to Antarctica, it is a one-time journey and missing out on any of it would be awful.

I spent ages reading blogs and travel sites looking for clues on the ideal wardrobe to take. It was all a bit frustrating really as many sites talked about following the layered approach to clothing, but none really got specific. For example, using base layers rich in merino wool seemed a consistently popular suggestion, but with prices ranging from GBP £35 to GBP £150 per garment, it didn’t narrow down the options much. I could go ‘cheap’ and risk the garments being not warm enough, or I could go expensive’ at the risk of needing a second mortgage. What I needed was a nice summary of items that someone on a budget had used when in Antarctic, how they had used them and what they thought of their effectiveness. That would have helped me a lot.

With the benefit of hindsight, you don’t have to go mad; many people wear ski clothing – which is fundamentally designed for a cold weather climate – and they do just fine. Others, like myself, checked out reviews on Amazon on clothing and asked friends who have an outdoorsy life if they could recommend items based on experience. So, here is the type of article that would have helped me this time last year when beginning to look for clothing.

The Outer Layers

These are designed with one purpose; to keep the rain and wind off you. They will not keep you warm. That is important as most expedition operators will offer (sometimes free) a hire of a outer jacket and trousers. Take the offer, but remember you’ll still need the mid- and base layers.

  • Berghaus Gortex Jacket – I’ve had this jacket for almost twenty years and it’s been everywhere with me. It, and the equivalents from North Face and the like will be perfectly fine, but if you do not have one do not worry as the one offered by the expedition operator was perfectly fine and no one had any complaints of them.
  • Thinsulate Beanie Hat – invaluable for warmth when under the jacket hood, especially on the Zodiac journeys.
  • Outdoor Research Meteor Mitts – wonderful photographer gloves. In essence these are an outer layer and a mid layer in a set. As the name suggests, these are mitts as opposed to gloves which has the benefit of allowing your fingers to stay together for warmth. In situations where wind or rain could be an issue, such as the Zodiac journeys to and from landing sites, I’d keep the outer water- and windproof layer on. Other than this I’d take the outer layer off. The beauty of these mitts for photographers is that the finger and thumb sections of the fleece mid layer fold back revealing the top half of your digits and allowing you to operate fiddly camera settings. I also wore merino wool glove liners so my fingers were never totally exposed. This combination allowed me to keep shooting for hours with no discomfort. There’s even a pouch on the mitt for a chemical heat sachet such as the Little Hotties brand. I love these gloves, but had to buy them on eBay as, at the time, there were no UK distributors.
  • Insulated Gum Boots – provided by the expedition operator. Others had their own boots, and for those who went skiing , ski boots were an option. I just took the standard, free offering was toasty warm when combined with my mid and base layers.
  • Waterproof Salopettes – provided by the expedition operator. I did actually purchase a pair of waterproof trousers prior to the trip, but the provided ones were really quite good and so my pair never got used.

I would just re-iterate the need keeping your head warm as much as everything else. Woollen ski hats were worn by many and they were just fine. Again, the weather conditions will be similar to the average ski resort, just you’ll be travelling on the sea several times a day.


The Mid Layers

These add additional warmth control to the base layers and usually come with a zip to allow control over how much heat escapes. Mid layers are (usually) worn as a single item on each part of the body. If you’re worried about keeping warm, just double up on the base layers in the next section.

  • Berghaus Polartec 100 Fleece – Most fleeces you’ll find in this category are pretty much similar and so I bought one could zip into my outer layer effectively creating a dual-layer item. I never used it this way as I’d keep the fleece on when on-board. So, any decent fleece will do, just not one designed more for fashion than function.
  • Jeans – Yep, normal jeans. To be honest, so good were the base layers and the provided waterproof outer layer that when out-and-about off the ship I didn’t bother with these on excursions and simply wore two base layers and the salopettes and changed out of the salopettes into jeans upon my return to the ship.


The Base Layers

These are designed to provide basic warmth and to quickly wick sweat away from the body before it can cool down and cause problems. In truth I doubt you’ll be sweating much in Antarctica – aside from the coolness of the climate, you don’t really exert yourself too much.

  • 2 Endura BaaBaa Merino Base Layer – recommended by an mountain biking fanatic at work with the added attraction the these merino wool tops come in on the lower end of the price scale (around GBP £40 at the time). They did a fine job of keeping my upper body warm. In fairness I usually wore one of these Endura base layers, with the Tog 24 zipped top as an additional base layer. How may you wear will depend on how easily you feel the cold.
  • 2 Tog 24 Arctic Zip Neck Base Layer – Costing about GBP £10 each on Amazon and quite well rated I purchased these to wear when the merino wool tops needed to be washed. In the end I wore them on top just to add warmth. This way I was able to lie motionless for thirty minute or so on ice and snow with no discomfort. So that has to be a recommendation!
  • 2 Trekmates Merino Long Johns – Wore both pairs at once and never felt cold – sometimes cool maybe – but not cold.
  • 2 EDZ Merino Liner Gloves – These are thin gloves that work really well under bigger, bulkier gloves. For me they were bought to keep the chill off my fingers when photographing and coupled with the fold-back OR Meteor Mitts above they did a really good job.
  • 4 Sealskinz Thermal Liner Socks – I wore these merino wool socks under the walking socks below and did they keep the provided gumboots fitting comfortably, they kept me toasty.
  • 4 Kirkland Merino Wool Blend Walking Socks – At GBP £20 for four pairs these border on sounding too cheap to be any good – certainly compared to the prices I’ve seen in outdoor sporting goods stores. Obviously, a two week trip is not going to test their build quality, but from the warmth perspective, they did just fine.
  • Sub Zero Meraklon Thermal Neck Tube – This was much appreciated on some of the Zodiac cruises as it allowed me to my neck warm and added another layer below my beanie. I could have lived without this, but it wasn’t expensive and certainly didn’t make me uncomfortable.

The other issue I had was just how much clothing to take. The average Antarctic voyage is between 10 and 14 days and so I started with the notion of a change of clothes for each day. This idea very quickly disappeared when I adding up the cost. Luckily all the ships have an on-board laundry and so you can quite easily get items washed with a good turnaround time – on the Akademik Ioffe it was under a day, but larger vessels may take slightly longer.

The idea of taking less clothing will appear even more when you look into the practicalities of travelling down to Ushuaia – namely that the domestic airlines that carry you between Buenos Aires and Ushuaia (where you board the ship) officially has a 15Kg per person baggage allowance. They often waive that, but be prepared to have to pay extra.

Don't worry, you don't eat outside every night, but you simply cannot go to Antarctica and not have a BBQ...

Don’t worry, you don’t eat outside every night, but you simply cannot go to Antarctica and not have a BBQ…

At this point, it’s worth mentioning that one of the benefits of natural fibres such as merino wool is that they’re very good at avoiding odours and this, coupled with the fact that I didn’t sweat when out and about meant that I could wear the same layers two or three times with no issue whatsoever. With a typical voyage to Antarctica of 12 days, this option, coupled with the on-board laundry, means that you can get away with three outfits. If you are in the same situation that I was and have no suitable clothing, the thought of only having to buy three outfits really is appealing.

I do hope that the above helps someone looking to travel to Antarctica, or maybe the Arctic, and who is trying to work out what and how much clothing they need to take. If you have ski clothing already then that’ll be fine, but if you do not, the above is field-tested by me 🙂

PS: If you are going, when you are given the chance to send postcards home, send one to yourself. You’ll regret it if you don’t!

Posted in Hints and Tips, Travel, Trip Planning Also tagged , , , |

Gearing Up for Iceland #2

One of the plans for the Iceland trip is to spend more time at the extremes of the day – dawn and dusk. I’m used to dusk photography and ‘blue hour’ photography – so-called due to the colour of the sky between full daylight and the total black of night – has been something that I have captured on every trip I’ve made.  But, to be honest, I’m no fan of early starts.

However, I’m going to make an effort on the trip and that leads me to a new consideration: In order to get to a location to take photographs at dawn, I have to leave wherever I am staying pre-dawn. Aside from the unholy thought of that, it’s going to be dark. Very dark. I’m going to be away from population centres and much of Iceland’s beauty stems from the almost total lack of invasive civilisation and so any pre-dawn activity is going to require some kind of illumination.

After an experience in the Falkland Islands in 2010 getting a torch was a must. I was out on Cape Pembroke – a peninsula on East Falkland – at the long since retired lighthouse. The lighthouse is not too far outside of the capital Stanley – around five kilometres – but it is uneven, boggy ground with no roads or paths and so I had a local 4×4 taxi drop me off with specific instructions on how to head back; “Head for the radio antenna and when you get there head right until you find the path.” Simple.  Anyway, it began to get dark and so I started to head back whilst I could still see the antenna. Then I got totally side-tracked by a stunning sunset. For half an hour. By which time it was dark – the kind of stormy night, cloud covered with no lighting for miles, dark. So there I was on a peninsula in the middle of winter on one of the southern most points of land in the World in the dark. The only thing separating me from the warm comfort of the hotel was several kilometres of boggy, uneven, ankle-twisting ground. In the dark. And it was at that point that I decided it would have been really nice to have a torch.


Getting distracted by an amazing sunset is easy. It's what happens next than can be a problem....

Getting distracted by an amazing sunset is easy. It’s what happens next that can be a problem….


Since then most of my travels have been urban and so the need for a decent torch has not come up, but Iceland now requires me to address that.

Well, it’s probably no surprise that there are literally thousands of choices. However, I did have some requirements:

  • Weight. It had to be lightweight as (1) it has to get to Iceland and back in a 23Kg allowance and (2) I have to carry it all day.
  • Battery Lifetime. I may need to depend on the torch for a variety of reasons, not least of which would be to see where I am going.
  •  Bright. Whilst the main purpose of the torch is to be able to see well enough to avoid the perils of an uneven ground, I may need to use it go get the attention of a passing car. In Iceland, that passing car may be a long way off.

Google ‘lightweight torch’ and one brand pretty much dominates the search result: Lenser. Now, I’m not going to declare Lenser to be the best, or the only brand, but I really did not want to spend days researching torches and the reviews I did read were all very positive so they seemed to be a good bet. One of the things I like about them is the use of LEDs as the light source which tend to be far more resilient to drops and knocks. They also tend to be far more battery friendly. Reading around  there appears to be a couple of different ranges on offer; the L series being lightweight polycarbonate, the H series being head torches and the P series being a professional, or police, range. There were other ranges too, but at that point price started increasing quite dramatically and so I discounted them.  In the end I decided on the Lenser P7 which provides 200 lumens of illumination or, in terms I can understand, about a 200 metre range. I also like the ability to go from narrow beam, handy for attracting the attention of distant cars, to wide beam which will be a great asset in seeing where I’m going. I’ve used four lightweight but long-lasting Energizer lithium AAA batteries and the total weight comes in at 174g. Very nice.

So, the second of the new purchases has been made. Next, keeping warm…

Posted in Travel, Trip Planning Also tagged , , , |