There are certain sounds – blood curdling sounds – that should only ever be heard on the soundtrack of a horror movie. Certainly never from a tripod. But, after two weeks in the majestic sand dunes of the Namib desert, I’ve managed to turn the silky smooth, whisper-quiet operation of the leg locks on my Gitzo into an unholy grinding noise that make me wince every time I even think about using the tripod.
Now, I am a firm believer in the “Don’t buy it if you’re afraid to use it” philosophy. A tripod is a tool and if the means it gets soaked in the salty waters of the Greenland Sea, covered in Pele’s Hair from a volcano or sand from the Namib desert, well so be it. But there is a price to pay and, as any photographer will tell you, a good tripod is not a casual purchase. So, faced with the choice of ruining an excellent tripod, or not using it at all, it’s time to clean the tripod!
Now ordinarily I wouldn’t have bothered writing an article about this but a recent conversation on Facebook suggested that some may be apprehensive about pulling apart their beloved and costly tripod for fear of breaking it. As not maintaining a tripod will have worse consequences my hope is that this article will provide some reassurance that it is a fairly simple process. Of course, if you have any doubts then it would be best to seek a professional: Or, in other words, I’m not responsible it you break it.
Disassembly
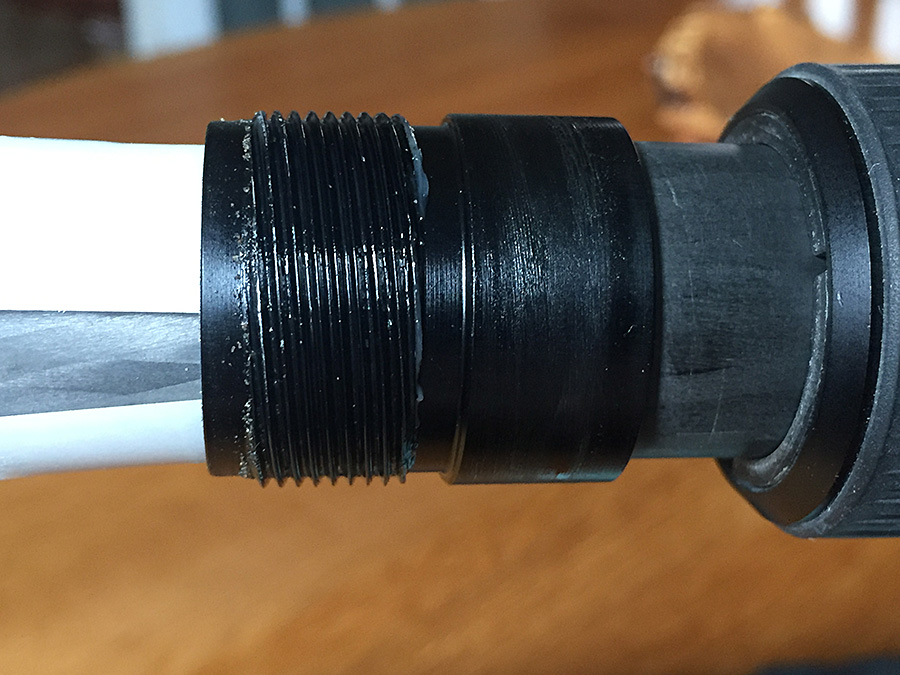
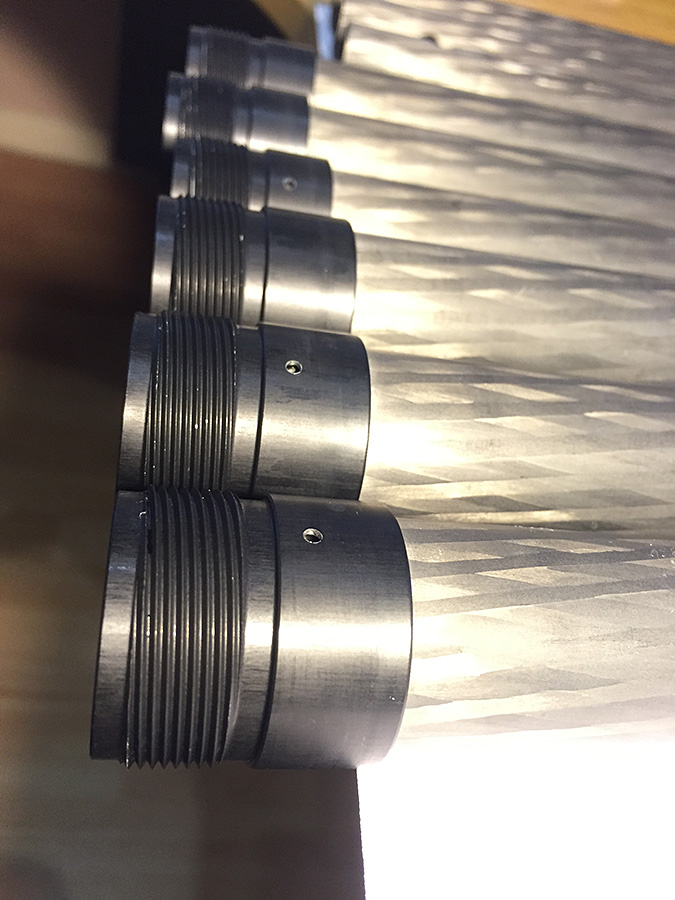
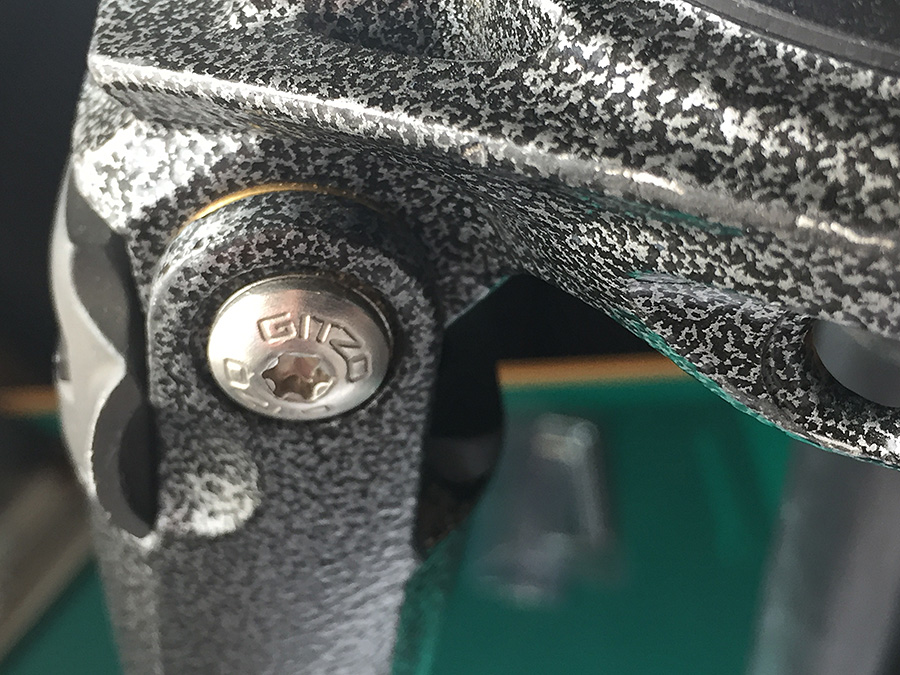
Upon unscrewing the first leg lock things don’t look too bad. There is some sand in the grease but no damage to the thread, which is the real concern:
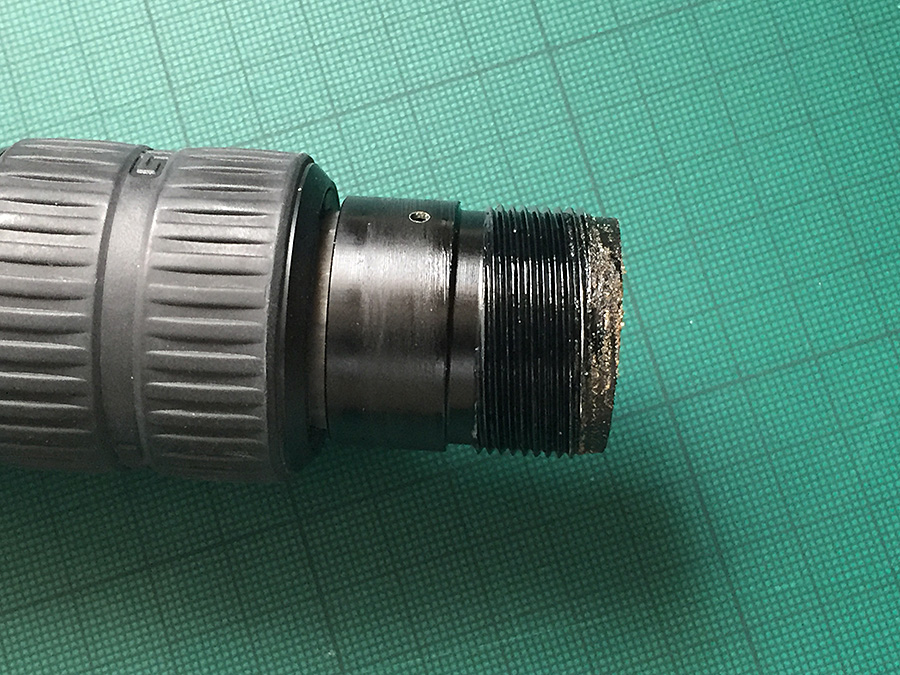
But as I work my way through each leg lock, things do get worse. Here sand is in the threads themselves and has already started grinding the black anodised coating away:
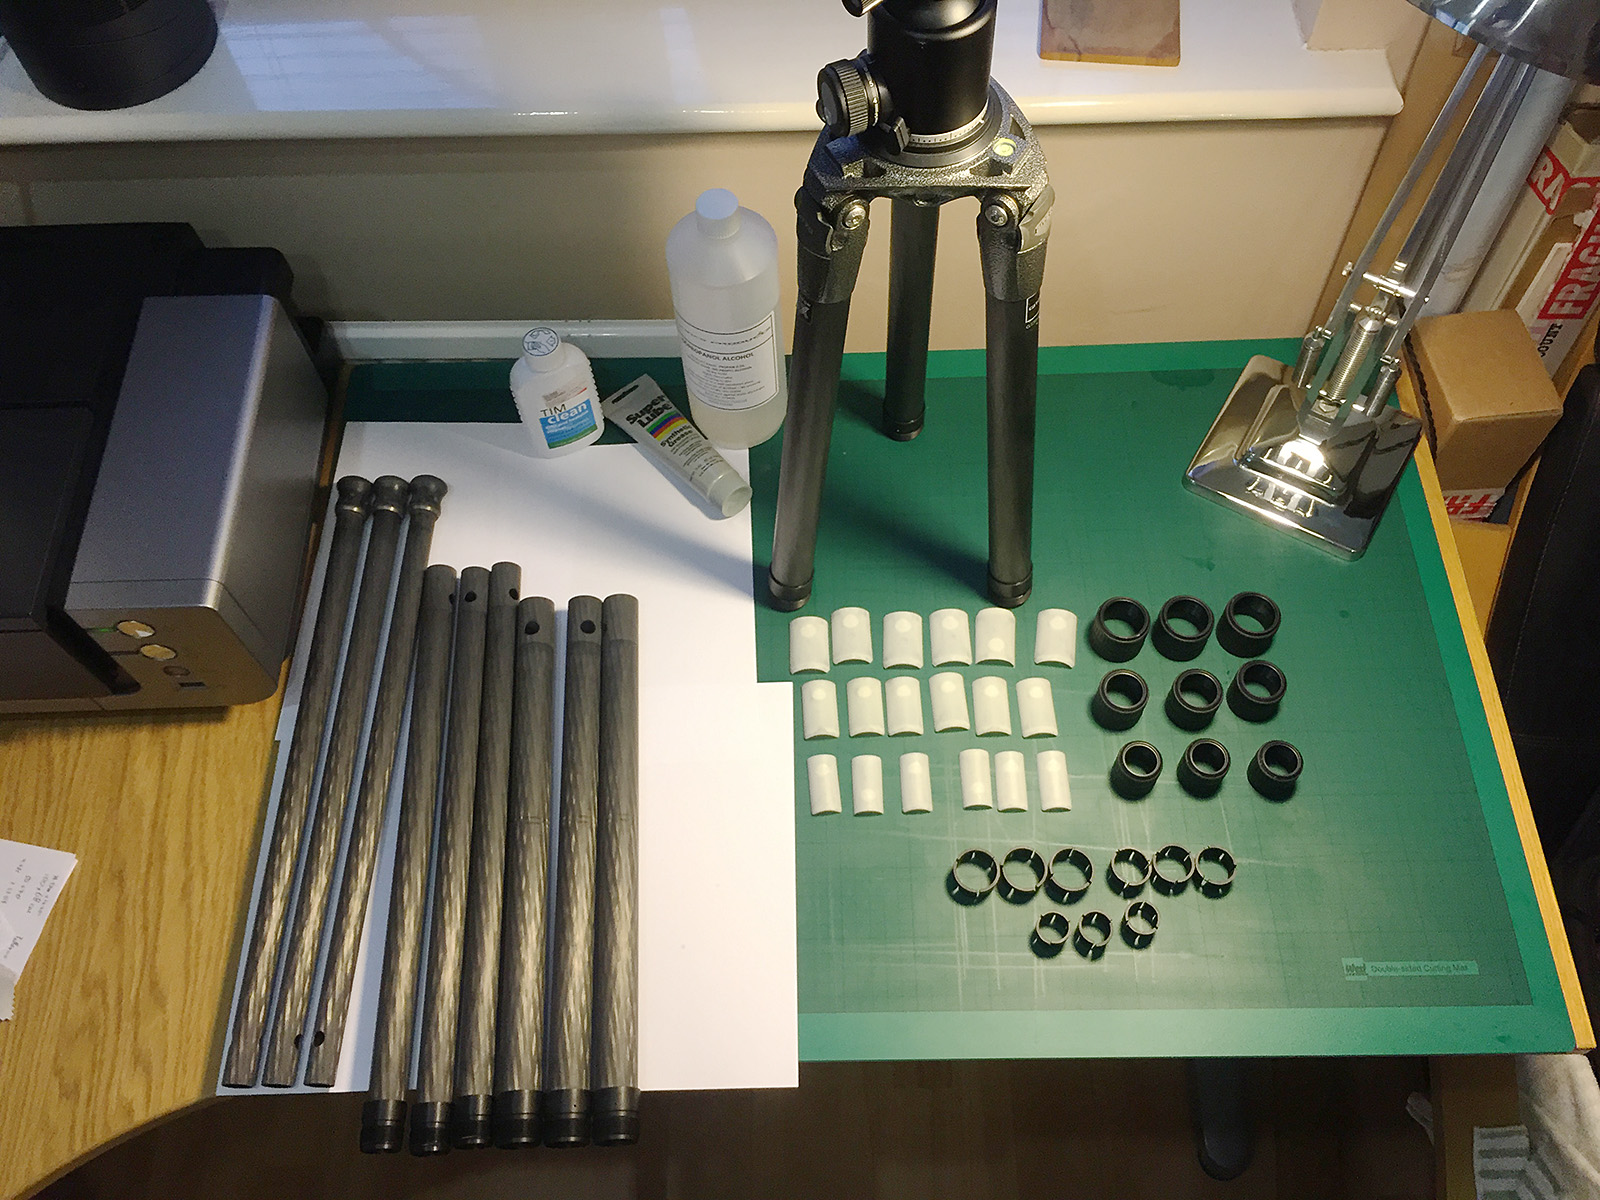
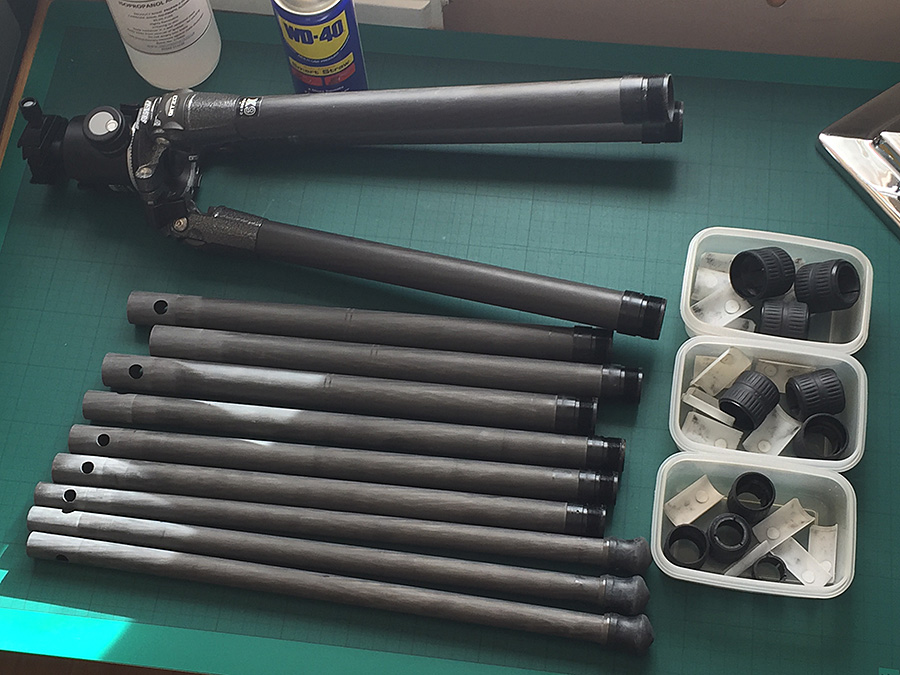
Luckily Gitzo tripods are pretty easy to disassemble. The first thing is to make a note of which bits go where (and this is where a smartphone camera is really useful):

[Top Left] You can see that each leg is topped by two white, half circular, plastic shims – the anti-twist sleeves – that fit in the gap between the leg sections and which form a snug, but not overly tight fit. [Top Right] Once you take the leg section out completely you’ll see that the plastic shims are not physically attached to the leg at all but simply rest on it and the only thing that stops them from ending up rattling around inside the parent leg section is a raised circular node on the inside of each one. This raised node fits inside a cut-out on the top of the leg and it is this combination of node, hole and snug fit that keeps the shims in place. [Bottom Left] The shims don’t extend all the way around the circumference of the leg and leave a small gap on each side. [Bottom Right] The raised channel that fits in the gap left between the shims of the lower leg section. It is this that stops the leg blindly rotating – it is the anti-twist mechanism. It is a snug fit, but nothing more;
Whilst this seems like a basic way to secure the leg section, I presume that is also its benefit; it is very easy to replace parts when needed, and very easy to do this on location.
The final part of disassembly that you’ll need to do is to remove the plastic clips from within the locking nuts. This is probably the part the requires the most delicacy as the clips are connected by thin plastic links and so they have to be teased out. The best approach that I found is to get a fingernail in the gap between the metal outer and the plastic inner sections and to gently try and push the plastic part in. If there is no ‘give’ then rotate the locking nut a bit and try again. If you keep doing this, you eventually get to a section that gives a bit – see below:
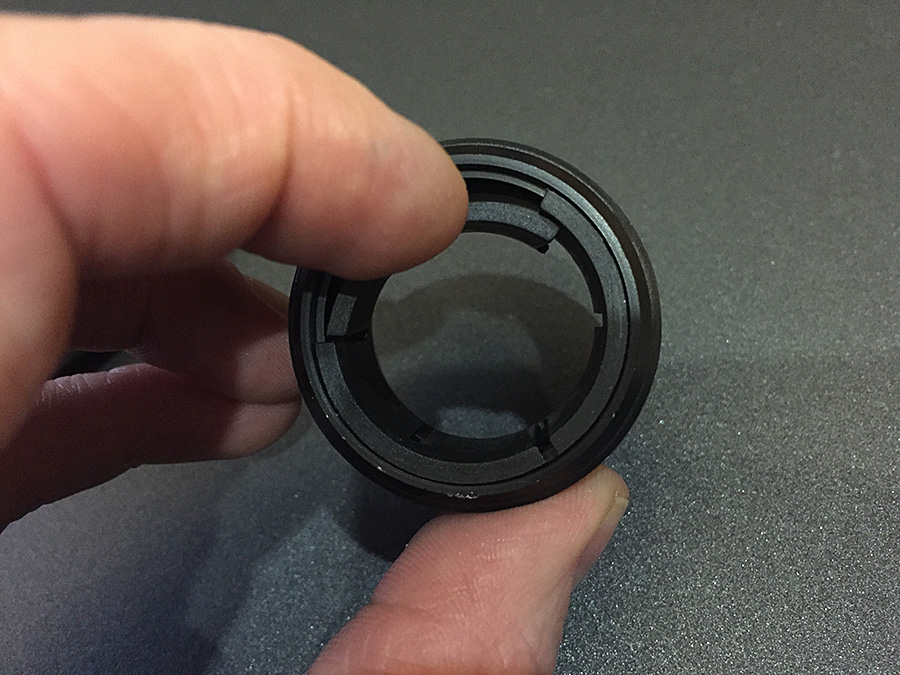
The idea is to gently pull this section away from the metal and ever so slightly down which will have the effect of taking the plastic (which has a groove) off the metal (which has a lip). Once the first section is off the lip, slowly work backwards along the plastic, easing it inwards and downwards. Eventually the plastic will drop off the metal nut completely and expose its threaded section.
You’ll eventually end up with the tripod disassembled and ready for the cleaning. You may want to take the top leg sections off the spider (i.e., the top plate) but unless you’ve seriously abused the tripod it likely won’t be necessary.
Originally I followed the advice gleaned from a number of guides and ‘how-to’ documents on the Internet, where the general advice was to use isopropanol alcohol or WD-40. Neither worked really well and a ‘test twisting’ of a locking nut on a leg section still made horrid crunching noises. So now I use citrus degreaser which has several domestic applications including cleaning bike chains and gear systems and cleaning thermally conductive paste off computer CPUs. Citrus degreaser is awesome stuff, and makes cleaning the old grease and gunk off the legs very easy.
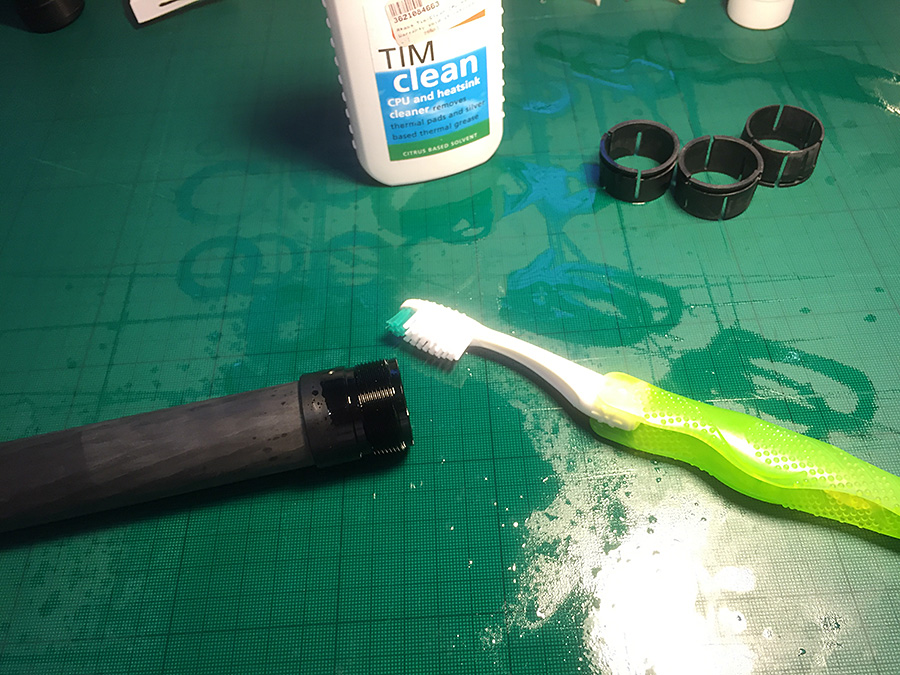
All you need is a few drops on the thread, gently spread it around (don’t scrub) with the toothbrush so that it gets in the nooks and crannies and leave for a couple of minutes. Repeat the process with the locking nuts.
After a couple of minutes – it doesn’t need more than that – remove the degreaser and gunk with warm water mixed with some household dishwashing detergent. Again I use the toothbrush – this time gently scrubbing – to get right into the grooves on both the leg sections and locking nuts. Once thoroughly cleaned I give it a thorough wash under a shower head although a kitchen tap would be just as good. Then, with all nice and clean, it is time to leave in the air to dry.
Reassembly
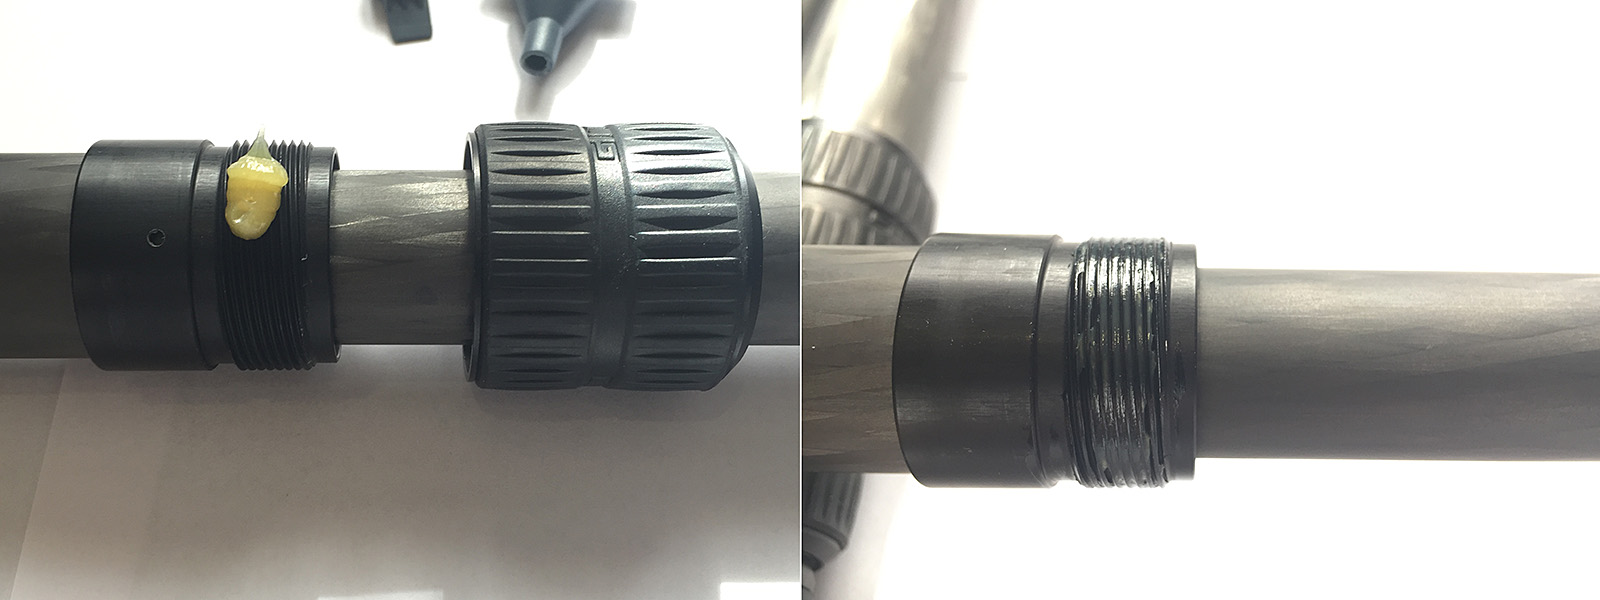
Reassembly is simply a case of reversing the disassembly process. I’m trying an experiment and using a different type of grease on one leg – Super Lube Synthetic Grease – and the normal Gitzo tripod grease on the others, simply as Super Lube is a lot cheaper. If you’re only cleaning your tripod once a year then it is probably not worth using anything other than the Gitzo grease, but if your tripod is likely to see repeated abuse in the field then a cheaper option is handy, as long as it works just as well. Only time will tell whether Super Lube is a viable option.
When reassembling the tripod it is important to get the gap between the shims lined up with the raised channel in the parent leg; if you meet a lot of resistance upon reassembly, double check the plastic shims are correctly seated on the leg section and that the gap lines up with the raised channel.
The other thing is to not overdo the amount of grease used. You only need to cover the threaded section – any more than that and you’ll risk having grease leaking out of the locking nut and acting as a magnet for any dust and grit in the air, and if you were heading back out in the desert with grease on leaking out that would be a quick way to cause problems. Also, I find it easier to put the locking nut on the leg, put the anti-rotation shims in place and slide it all into the parent leg section before applying the grease. Once you’ve evenly spread the grease over the thread you can screw the locking nut back on and then tighten and untighten it a dozen times to spread the grease around on the leg and the locking nut itself. Note, you don’t have to completely undo the locking nut, just a couple of turns back and forth.
If things are really bad, you may need to take the top leg sections off the spider, but usually this is not necessary – only if the tripod had fallen in the sea and become completely submerged for example. Even sand storms won’t penetrate into the upper mechanism. That said, sand, salt and grit do accumulate on the outside of the legs but brushing this off with a firm bristle paint brush should be sufficient.
Hopefully this article shows how easy it can be to strip down, clean and reassemble your tripod. Other tripods have different mechanisms – my Feisol for example doesn’t have an anti rotation mechanism and so no channel in the leg section to worry about and the shims are in three sections – but in essence a tripod is a blissfully simple part of the photographer’s arsenal. And whilst maintenance can be a pain it is even more painful when you’re trying to take a long exposure on a tripod with leg wobble due to a worn leg lock. It may be the difference between a usable and unusable shot.


9 Comments
Fantastic post Dave! There are so few decent ‘cleaning’ posts around. This one is superb. A decent cleaning regimen after gear grinding shoots should keep you kit survival rate reasonably high. Thanks for the detailed effort.
Hi Emil,
After I returned from Antarctica in 2012 I was shocked to see how many dust spots there were on the images – and at the amount of time spent in post trying to fix them. And from then until the trip with you in 2015 there has always been a small sense of worry that it would happen again and that it would happen in such a way it could not be fixed on that ‘key shot’. But, it was only after you showed us how to clean the camera sensor that I’ve been freed from that worry; sensor dust is now just an easily fixed annoyance, rather than a problem.
This post – and the tripod tear-down – was really born out of that experience, and from a conversation on Facebook. I think it is one of the things mark the difference between a seasoned professional and a less experienced person in any field of expertise: the seasoned professional can react to problems, resolve them quickly and carry on working; those with less experience cannot.
Of course, I haven’t had to strip down and clean a tripod in the desert yet – we’ll see how I feel after that!
I see your site needs some unique & fresh content. Writing manually is time consuming, but there is
solution for this. Just search for: Masquro’s strategies
I have noticed you don’t monetize your page, don’t waste your
traffic, you can earn extra bucks every month because you’ve got hi quality content.
If you want to know how to make extra $$$, search for:
Ercannou’s essential adsense alternative
Good info. Lucky me I discovered your blog by accident (stumbleupon).
I have book marked it for later!
I TRIED TO TAKE A TOP LEG OFF. NOW I CAN’T GET IT TIGHT ENOUGH TO HOLD THE LEG IN PLACE. ANY SUGGESTIONS?
Dave, a post on one of the photo forums suggests that the Gitzo grease is molybdenum disulfide. Amazon has a variety of inexpensive moly lubricants available; you might want to try one of them.
Hi May I know where I can buy GT 1540 F accessories?
Hello, Great article and photos. This is probably 6 years late, but I have an SDS of the exact product you mention (the Gitzo grease) which lists the chemicals/components etc. in detail. If you would like a copy in English so you can compare it with ‘Super lube’ or any other lube/grease, I can send it to you. (I too have a Gitzo tripod also and try to maintain it with the best greases available – all much, much less expensive than Gitzo grease).
Some alternatives below, both are premium greases. They are not a hazardous substance or mixture & have better water resistance, offering excellent oxidation resistance and extreme range service:
(These greases are non-hazardous, food-grade approved, FDA appr. for incidental food contact)
1.) G-4500 FM. Molykote Syn. Multi-Purpose Grease. Temp. Range: – 60˚f to 325.4˚f
(General purpose light consistency w/PTFE).
2.) G-1502 FM. Molykote Syn. Bearing & Gear Grease. Temp. Range: -40˚f to 300˚f
(Tacky grease, won’t normally wash off, or sling off).